Account & Organisation Management
Account
Settings
To change the account name, contact details or password:
-
Click the Portal menu icon in the top right corner of the main menu bar and select Account.
-
Using the menu to the left, select Settings.
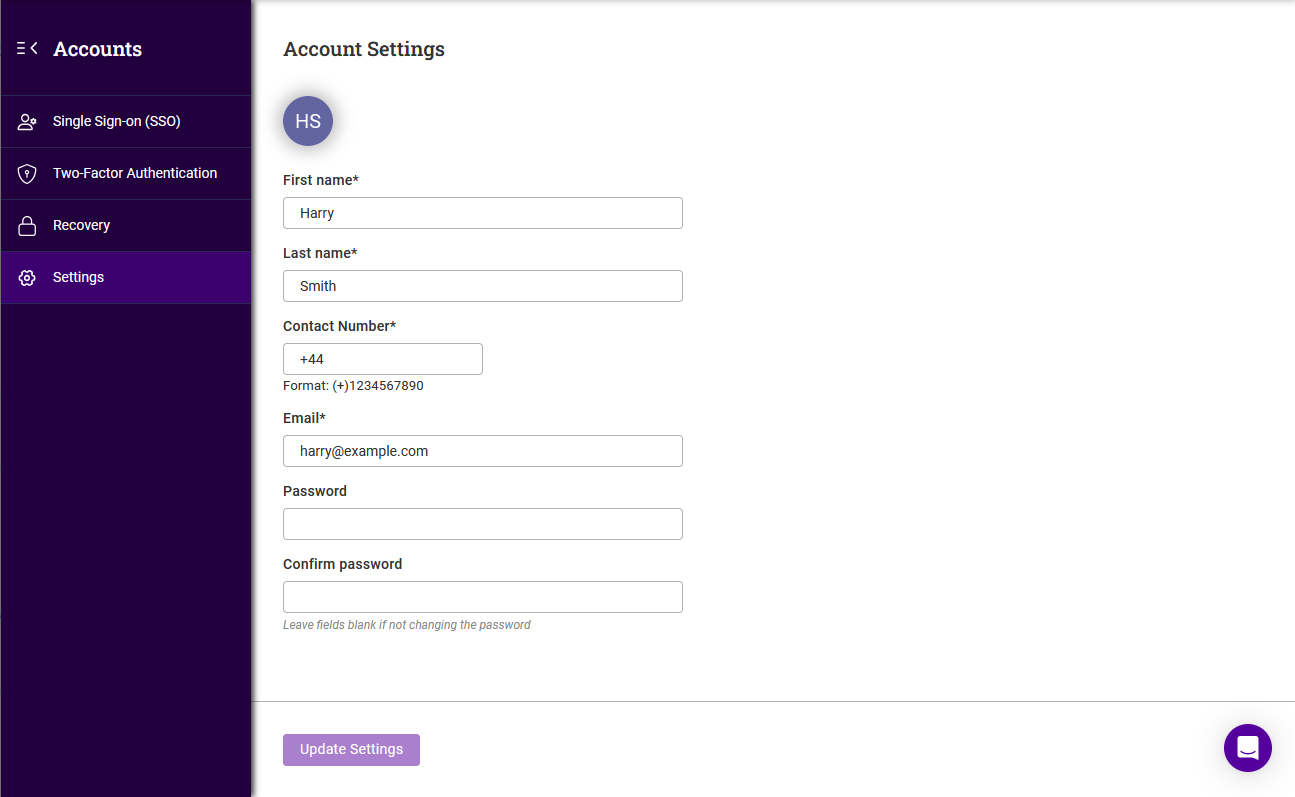
-
Update the required settings.
To change the password you’ll be prompted to enter your current password. -
Click Update Settings.
Recovery
If at any point you forget your password and need to reset it, you will need your user account and organisation private keys. Both keys must be download as part of the sign-up process but can also be downloaded from the ADC Portal at any time.
To download the private keys:
-
Click the Portal menu icon in the top right corner of the main menu bar and select Account.
-
Using the menu to the left, select Recovery.
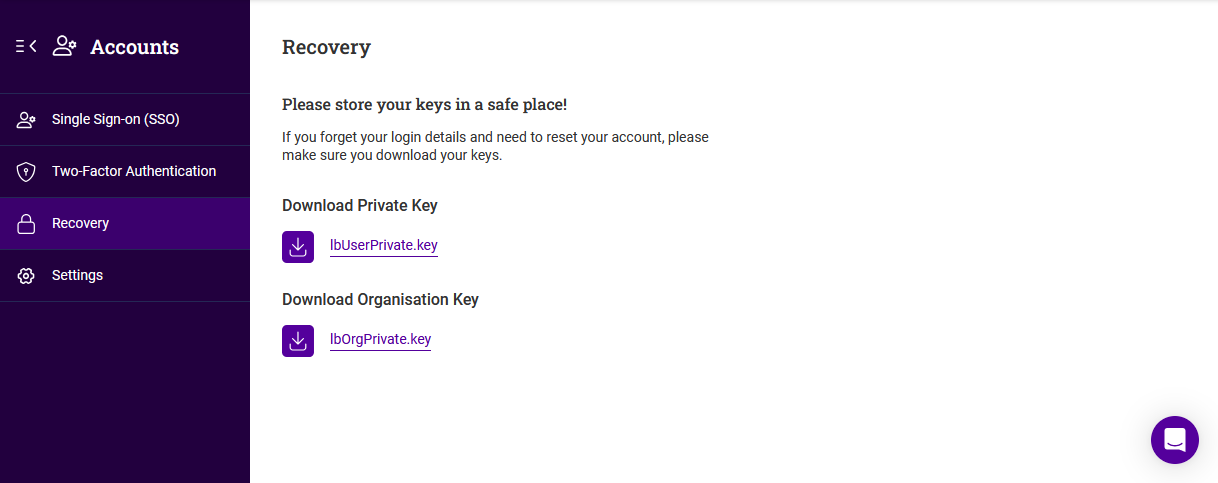
-
Click the lbUserPrivate.key link to download the user account private key.
-
Enter your password when prompted and click Submit.
-
Click the lbOrgPrivate.key link to download the organisation private key.
-
Enter your password when prompted and click Submit.
-
Save both private keys in a safe place.
Single Sign-On (SSO)
SSO can be enabled for each ADC Portal account. SSO simplifies Portal access by utilising login credentials from another system. SSO can be enabled using Google Workspace, Azure AD or SAML (depending on subscription level) protocols. NOTE: To configure SAML for the organisation, please refer to Security Assertion Markup Language (SAML).
To configure SSO:
-
Click the Portal menu icon in the top right corner of the main menu bar and select Account.
-
Using the menu to the left, select Single Sign-on (SSO).
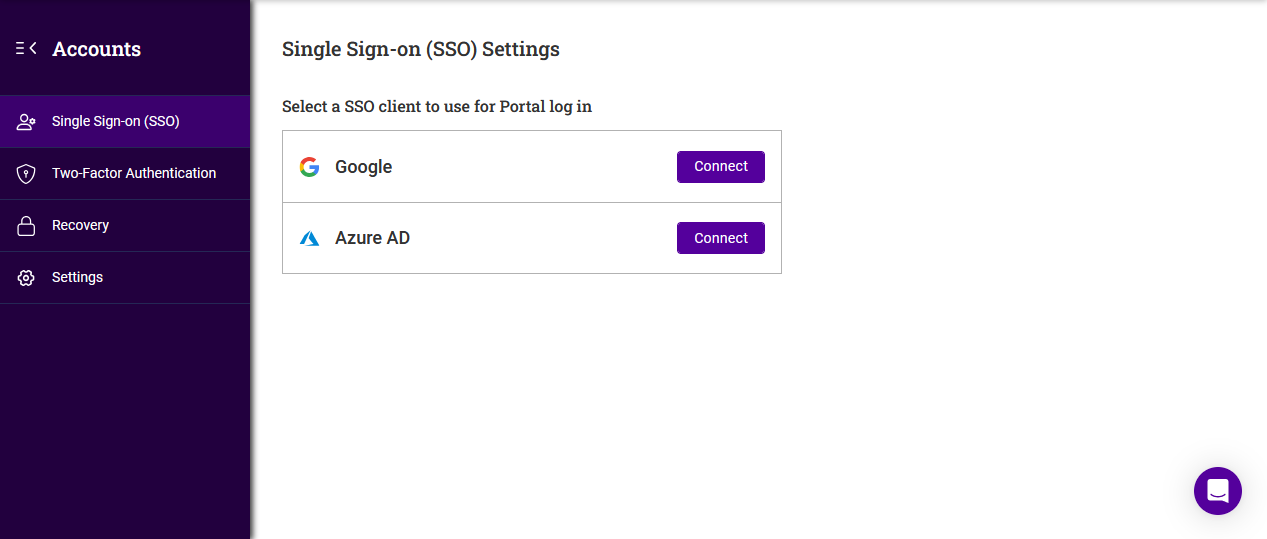
-
Select the relevant Connect button and enter the credentials for the account to be used.
-
Follow the steps to complete the process.
| To configure SAML for the organisation, please refer to Security Assertion Markup Language (SAML). |
Two Factor Authentication (2FA)
2FA can be enabled for each ADC Portal account. 2FA requires a unique code in addition to the user’s password. This code is supplied to the user via an SMS text message or via an authenticator app such as Google or MS Authenticator.
To configure 2FA:
-
Click the Portal menu icon in the top right corner of the main menu bar and select Account.
-
Using the menu to the left, select Two-Factor Authentication.
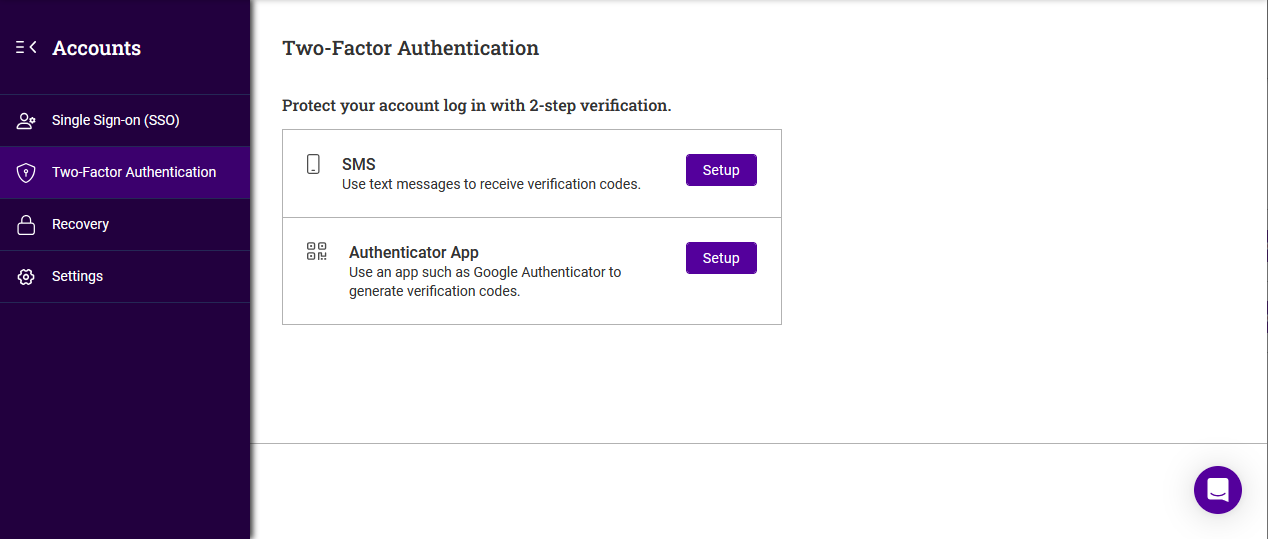
-
Select the relevant Setup button and follow the steps to configure 2FA.
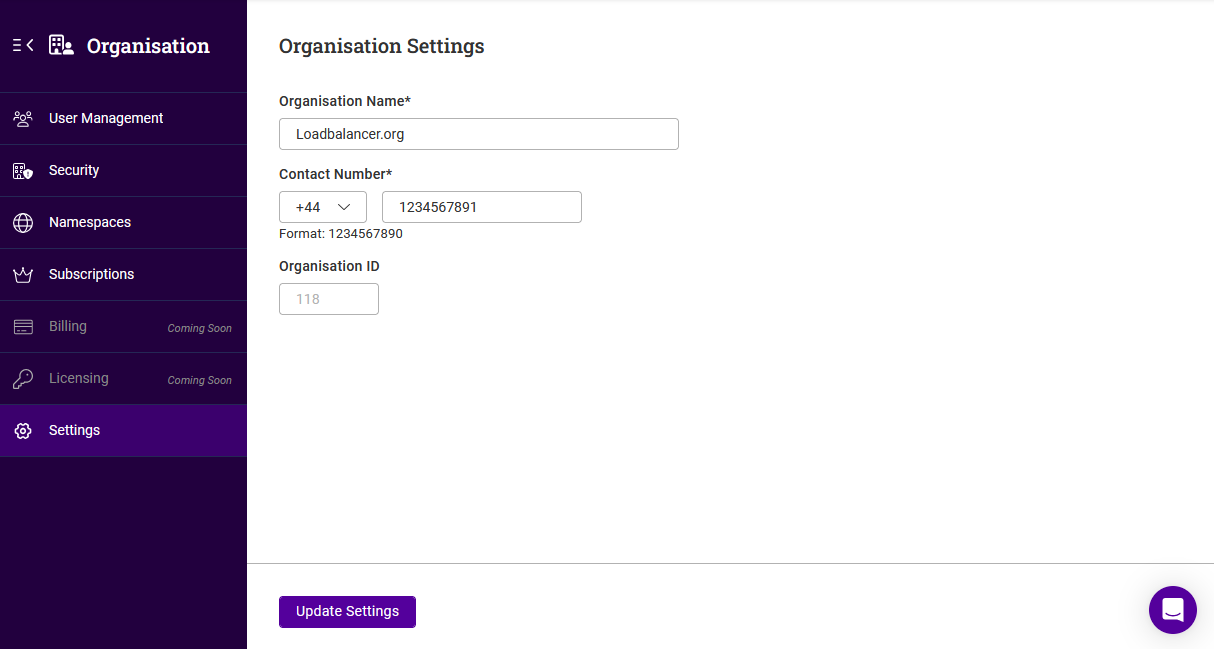
Organisation
When the first user account is created, the organisation is also created and configured.
User Management
Additional user accounts can be added to the organisation. Permissions granted to each user are based on the role(s) allocated either directly to the user or via group membership and the permissions configured for those role(s).
To add a new user:
-
Click LOADBALANCER | PORTAL in the main menu bar to view the Dashboard.
-
In the Users panel:
-
If this is the first user to be added, click Invite Users.
-
if users already exist, click Manage my users.
-
Click the Add user button.
-
-
-
The Add User form will be displayed:
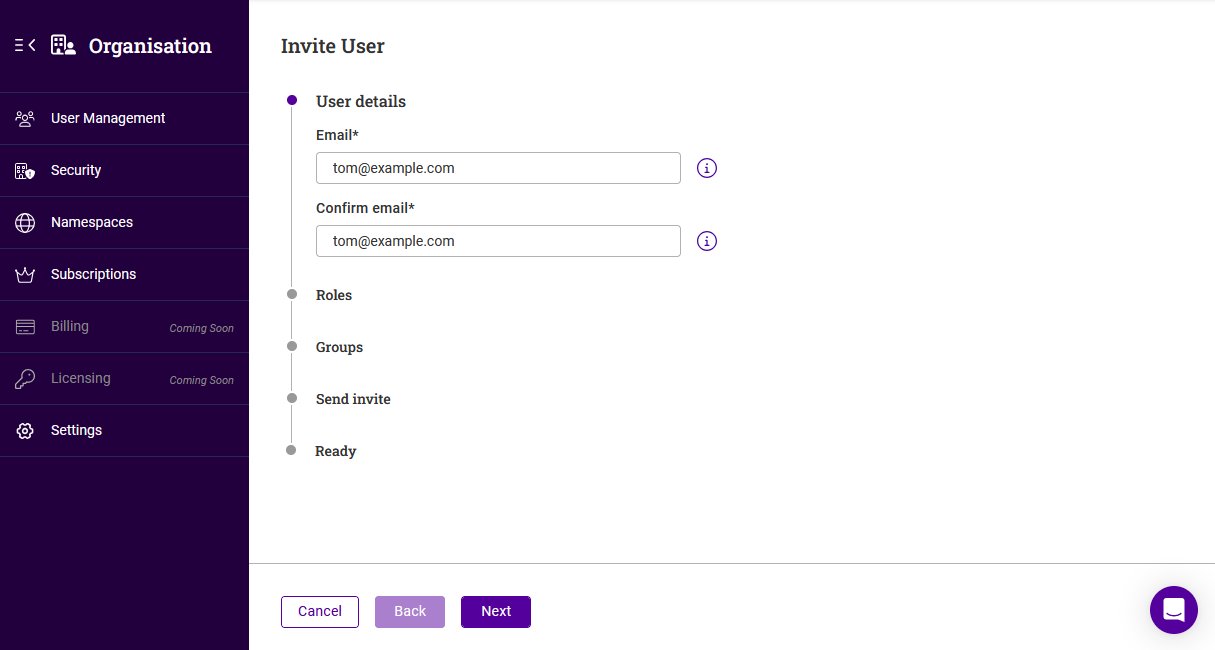
-
Specify and confirm the Email address of the new user, then click Next.
-
Select the required Role(s) and click Next.
-
If any groups have already been configured, select the required Group(s) and click Next.
At least one role or group must be selected. For more information on roles and groups, see Roles & Groups below. -
Copy the one-time passcode as instructed and enable (check) the checkbox to confirm this was done.
-
Click Next, then click Submit.
-
Enter your password and click Submit. An email with an invitation link will be sent to the email address specified.
-
Send the one-time passcode to the new user to enable them to complete the enrolment process.
To delete a user:
-
Click the three dots menu next to the user to be deleted.
-
Click Delete, then click Confirm to delete the user.
| It’s not possible to delete the user that created the first account and the organisation. |
Roles & Groups
Roles
Roles define a set of permissions that can be assigned to users. Three roles are included by default:
-
Owner - full access to all data and settings.
-
Maintainer - full access to all data and settings except for user, group, role and account settings where read only access is provided.
-
Viewer - read only access to all data and settings.
In addition, custom roles can be configured either from scratch or by duplicating one of the default roles and then customizing permissions to suit specific requirements.
To create a new role from scratch:
-
Click LOADBALANCER | PORTAL in the main menu bar to view the Dashboard.
-
In the Users panel:
-
If there are currently no users defined, click Invite Users.
-
if users already exist, click Manage my users.
-
-
Select the Roles tab.
-
Click the Add Role button.
-
The Add Role form will be displayed:
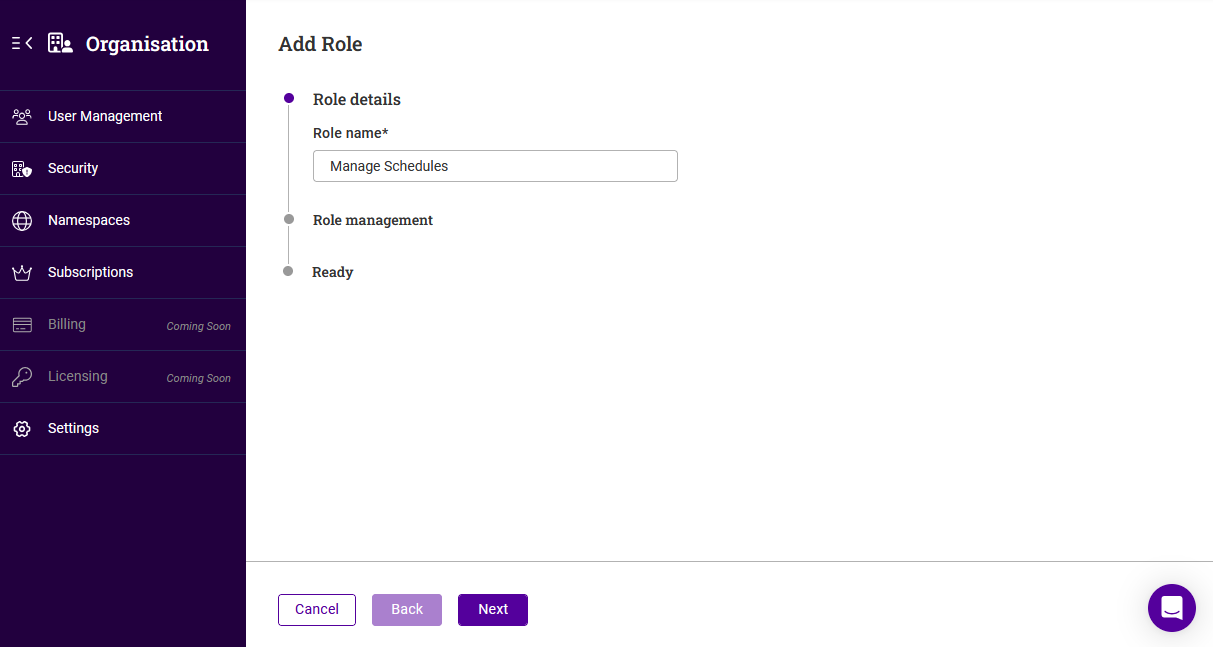
-
Specify an appropriate Role name, e.g. Manage Schedules and click Next.
-
Under the Role Management section either click Expand all or expand the relevant section(s) individually.
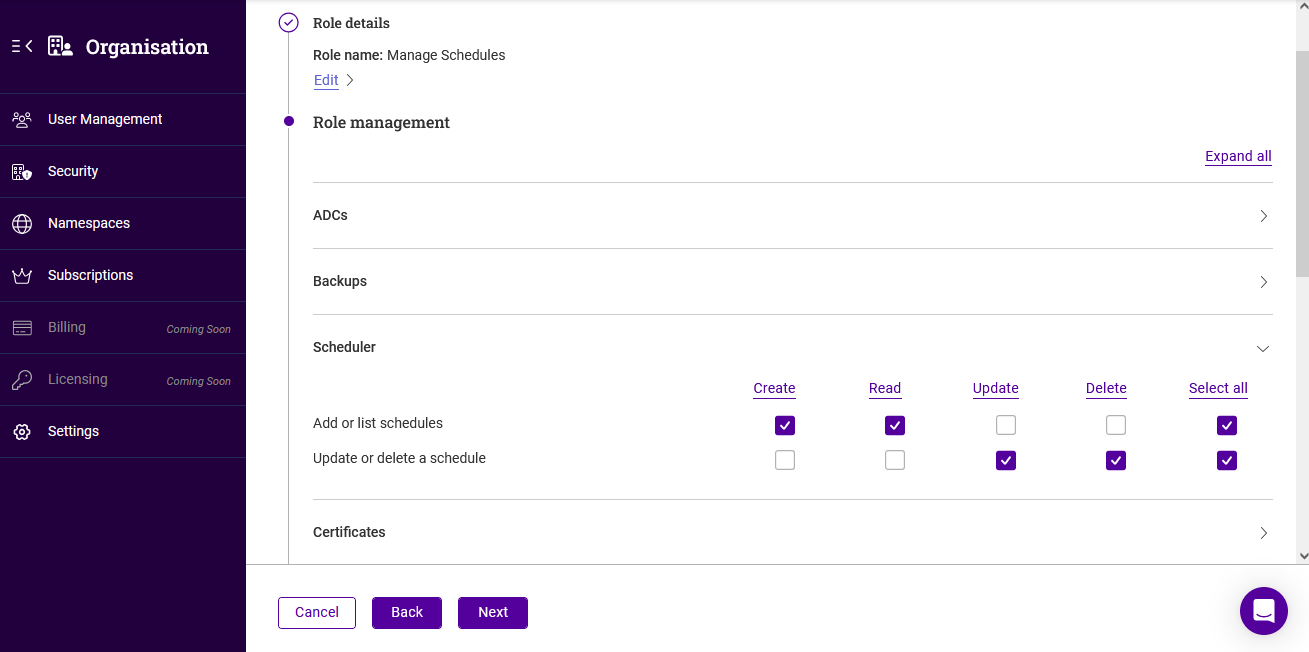
-
Select the required permissions. In the example above, all permissions related to schedules have been granted.
-
click Next, then click Submit.
To create a role by duplicating an existing role:
-
In the User Management form select the Roles tab.
-
Click the three dots menu next to the role to be duplicated.
-
Click Duplicate.
-
Specify a name for the new role and click Next.
-
Under the Role Management section either click Expand all or expand the relevant section(s) individually.
-
Customise the required permissions.
-
Click Next, then click submit.
To delete a role:
-
Click the three dots menu next to the role to be deleted.
-
Click Delete, then click Confirm to delete the role.
Groups
A group can have one or more associated roles and each group can contain multiple users. This enables user permissions to be assigned based on group membership.
To create a group:
-
Click LOADBALANCER | PORTAL in the main menu bar to view the Dashboard.
-
In the Users panel:
-
If there are currently no users defined, click Invite Users.
-
if users already exist, click Manage my users.
-
-
Select the Groups tab.
-
Click the Add Group button.
-
The Add Group form will be displayed:
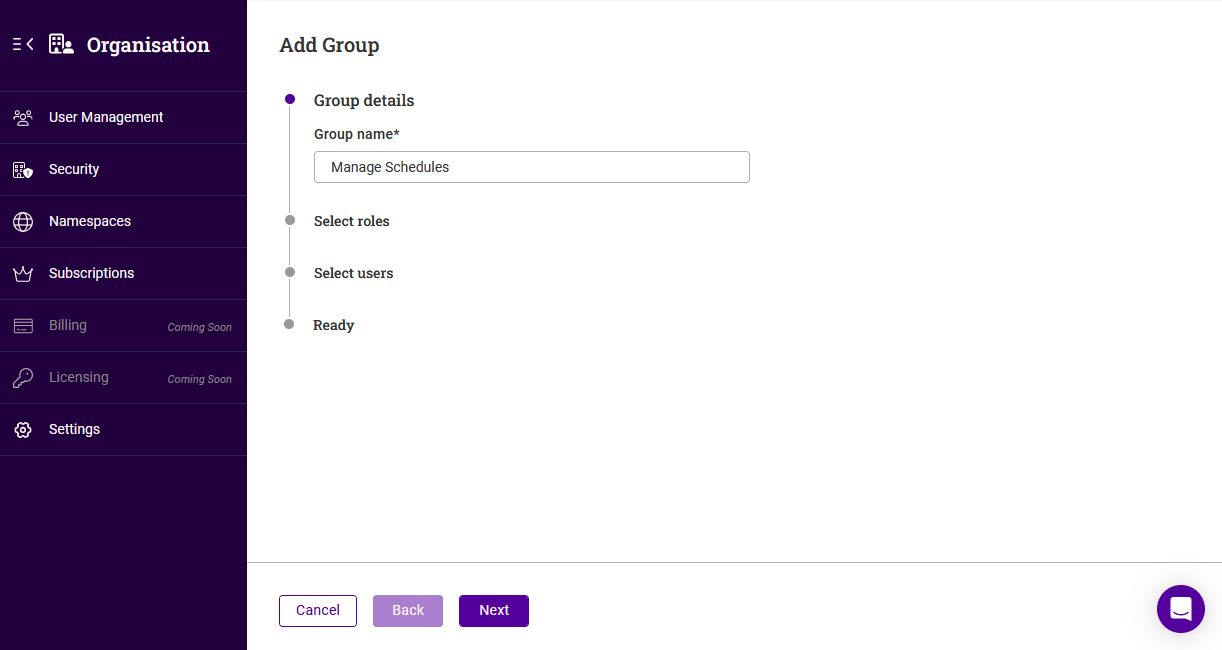
-
Specify an appropriate Group name, e.g. Manage Schedules and click Next.
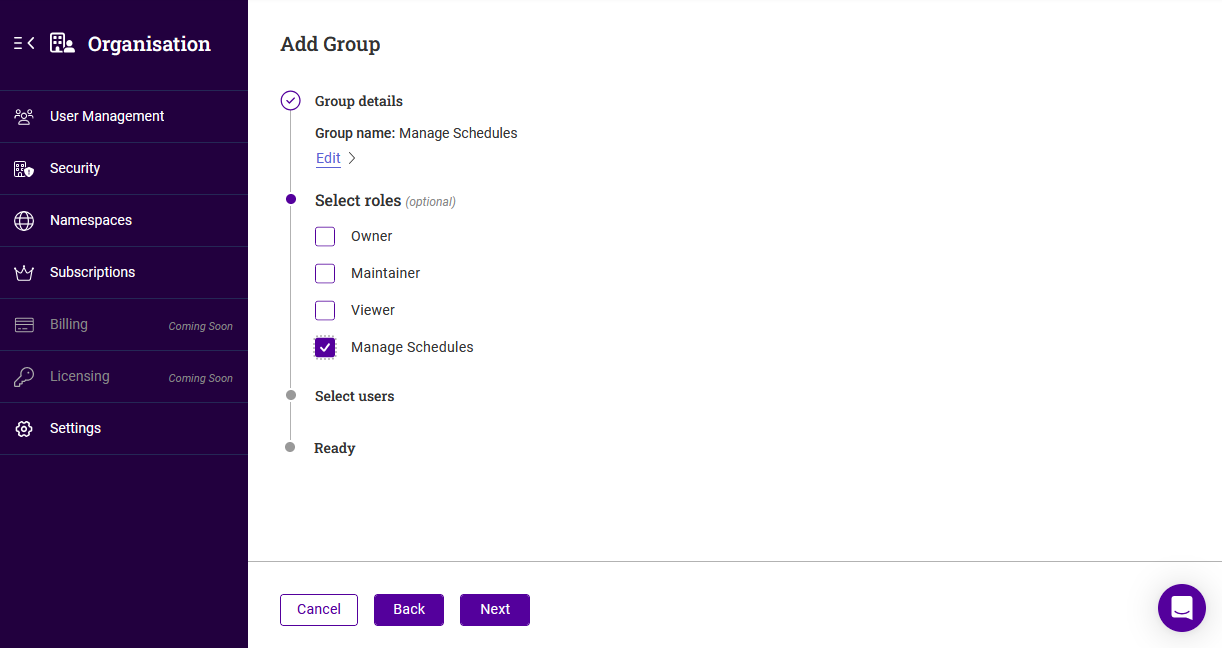
-
Select the role(s) to be associated with the group (this can be done later if preferred), then click Next.
-
Select the user(s) that will be members of the group (this can be done later if preferred), then click Next.
-
Click Submit.
As an example, if multiple users were associated with the default Viewer role when first created, they would have read only access to all data and settings. If you wanted to allow those users to configure and manage schedules, they could be made members of the Manage Schedules group created above. Since the Manage Schedules role created above is associated with this group and provides full permissions to all scheduler related functionality, this would grant the required permissions.
To delete a group:
-
Click the three dots menu next to the group to be deleted.
-
Click Delete, then click Confirm to delete the group.
Security
Portal Activity Audit Log
Auditing enables Portal admin users to track events occurring on the Portal. Tracked information includes date/time, user, activity type and activity description (session log).
To view the audit log:
-
Click the Portal menu icon in the top right corner of the main menu bar and select Organisation.
-
Using the menu to the left, select Security.
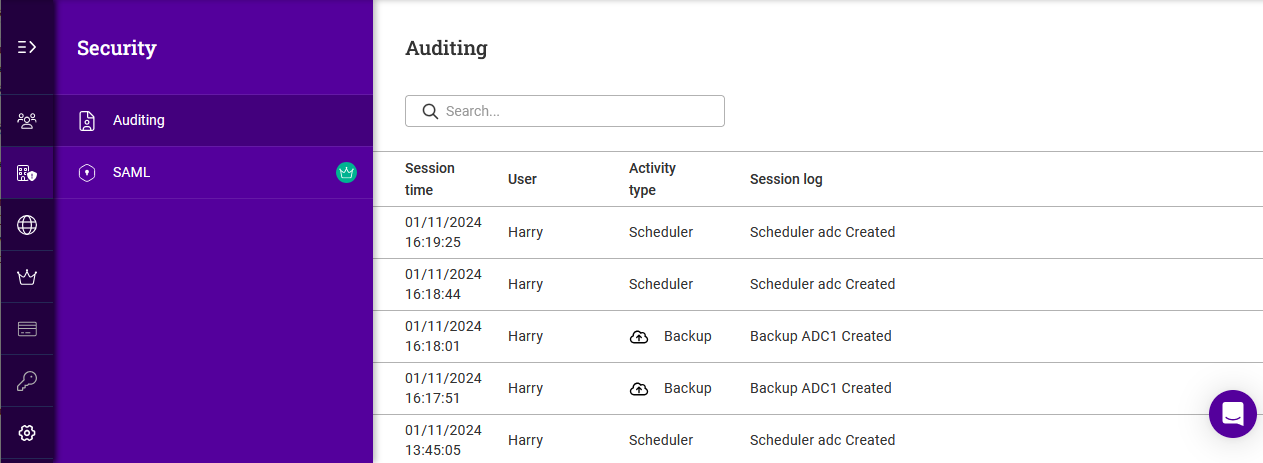
-
In the Security menu select Auditing to display the audit log.
-
To order by a particular column, click the column heading. The sort order (ascending or descending) is indicated by the arrow. Click the column heading again to change the sort order.
Security Assertion Markup Language (SAML)
SAML enables Portal login using a SAML identity provider’s single sign-on functionality.
To enable SAML login for the organisation:
-
Click the Portal menu icon in the top right corner of the main menu bar and select Organisation.
-
Using the menu to the left, select Security.
-
In the Security menu select SAML.
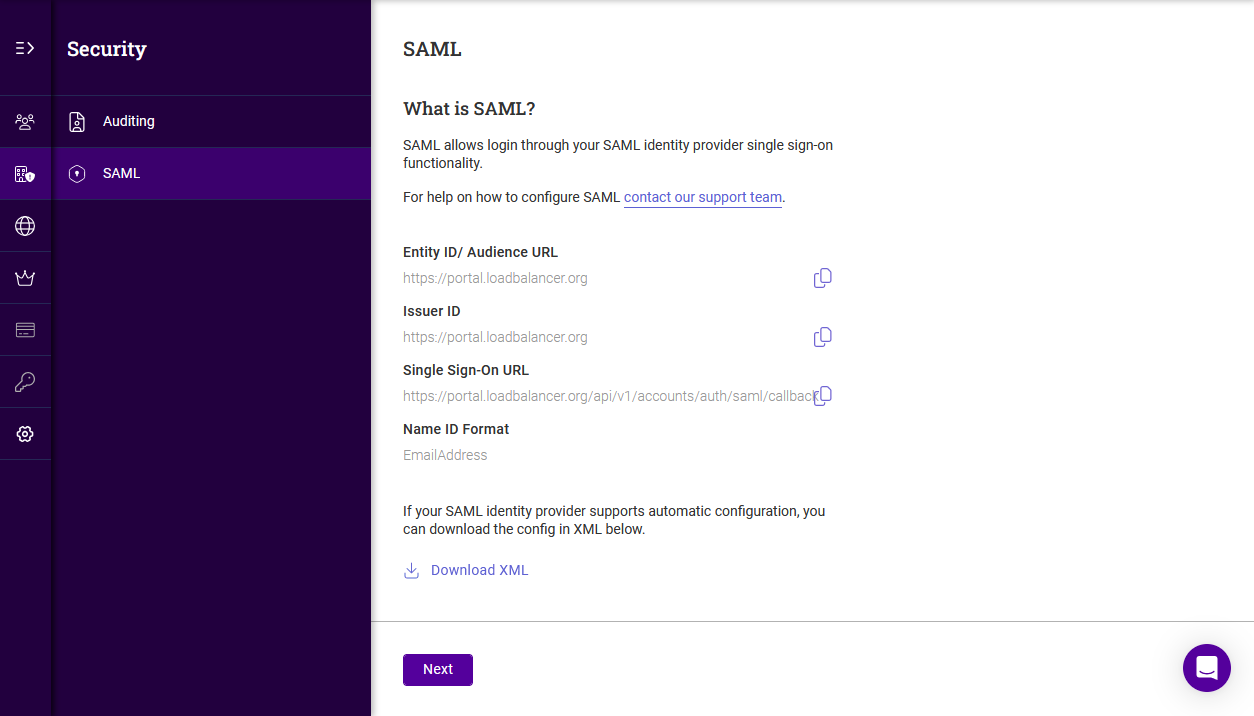 *
* -
Copy the data required using the links provided and paste this into the relevant fields in your chosen SAML provider’s configuration screen.
-
Click Next.
-
Copy the Metadata URL from your SAML provider and paste this into the field provided in the ADC Portal.
-
Click Submit.
| If you need any assistance configuring SAML, please contact our support team. |
Namespaces & Tags
Namespaces allow ADCs to be organised into user-defined groups to simplify management. Each ADC can reside in one Namespace at a time, ensuring a clean and efficient structure. In addition, up to 30 user-defined tags can be added to each ADC to help organize your infrastructure more effectively. Namespaces can be added as detailed below, Tags are specified and created when ADCs are added to the Portal.
For example, Namespaces could be used to indicate where ADCs are located and Tags could be used to indicate which support team is responsible for the ADC. All ADCs in a particular location could then be viewed by selecting the relevant Namespace using the Namespaces dropdown and all ADCs supported by a particular team could be found by specifying the relevant Tag in the ADC search box.
Namespaces and Tags are allocated when ADCs are added to the Portal. They can also be modifed later if required by editing the ADC - for more information, see ADC Actions Menu.
To add a new namespace:
-
Click LOADBALANCER | PORTAL in the main menu bar to view the Dashboard.
-
In the Namespaces panel, click View my Namespaces.
-
Click the Add namespace button.
-
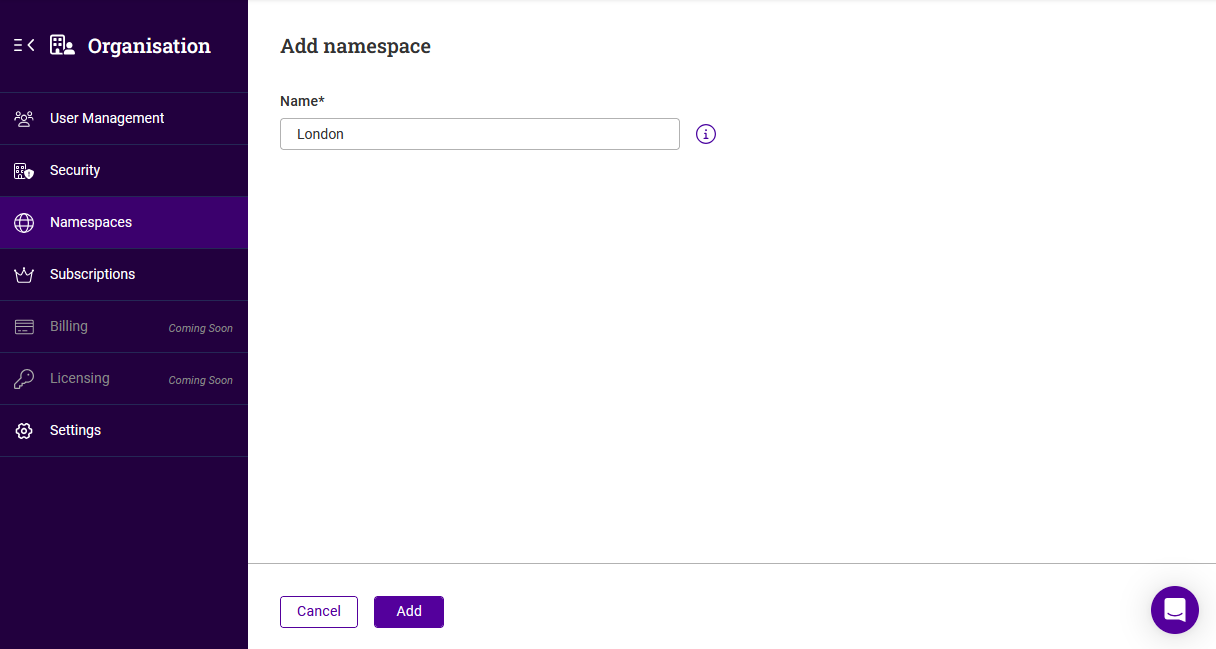
The Add Namespace form will be displayed:
-
Specify a Name for the new namespace and click Add.
To delete a namespace:
-
Click the three dots menu next to the namespace to be deleted.
-
Click Delete, then click Confirm to delete the namespace.
Subscriptions
To view the organisation’s current ADC Portal subscription:
-
Click the Subscriptions menu icon in the top right side of the main menu bar.
All features that are included are listed under each subscription level.
If you want to change your subscription, click the relevant Contact Sales button to open a chat window and discuss your requirements. Alternatively, email sales@loadbalancer.org.