ADC Management
Multi Vendor Support
ADCs from multiple vendors can be adopted (added to the ADC Portal). The table below lists which ADCs are currently supported.
| Vendor | Software Versions Supported | Notes |
|---|---|---|
Loadbalancer.org |
v8.11.4 & later |
|
F5 |
v17.0.0.1 & later |
Previous versions may be supported but have not been verified |
Kemp |
v7.2.55.0.21071 & later |
Previous versions may be supported but have not been verified |
Citrix |
v13.1-48.47 & later |
Previous versions may be supported but have not been verified |
Adding an ADC to the Portal
| There must already be an accessible Shuttle available before an ADC can be added. To add a Shuttle, please refer to Shuttle Management. |
Step 1 - Prepare the ADC for Adoption
Loadbalancer.org ADC Appliances:
-
Using the WebUI, navigate to Local Configuration > Portal Management.
-
Ensure that the Gateway Enabled checkbox is enabled (checked).
-
Click Update.
-
Restart the Gateway and Shuttle services using the restart buttons in the "Commit changes" box at the top of the screen.
All other ADC Appliances:
-
Follow the manufacturers instructions to add a user account that has permissions to make API calls.
-
Note the user credentials as these will be needed when adopting the appliance in the ADC Portal.
Step 2 - Adopt the ADC
-
Click LOADBALANCER | PORTAL in the Portal’s main menu bar to view the Dashboard.
-
In the ADCs panel:
-
If there are currently no ADCs, click Connect an ADC.
-
In the menu to the left, select List.
-
-
if ADCs have already been added, click View my ADCs.
-
-
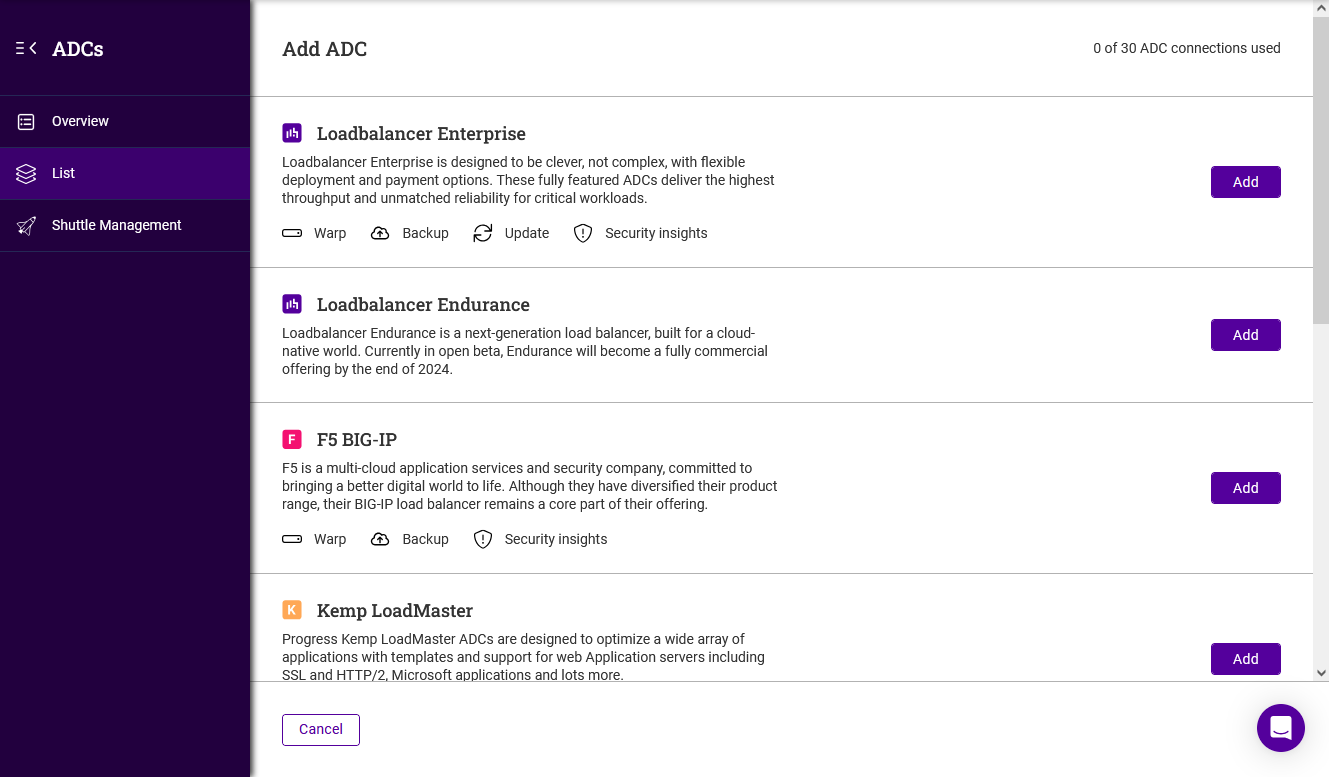
Click the Add ADC button.
-
Click the Add button for the type of ADC to be added, for example Loadbalancer Enterprise.
-
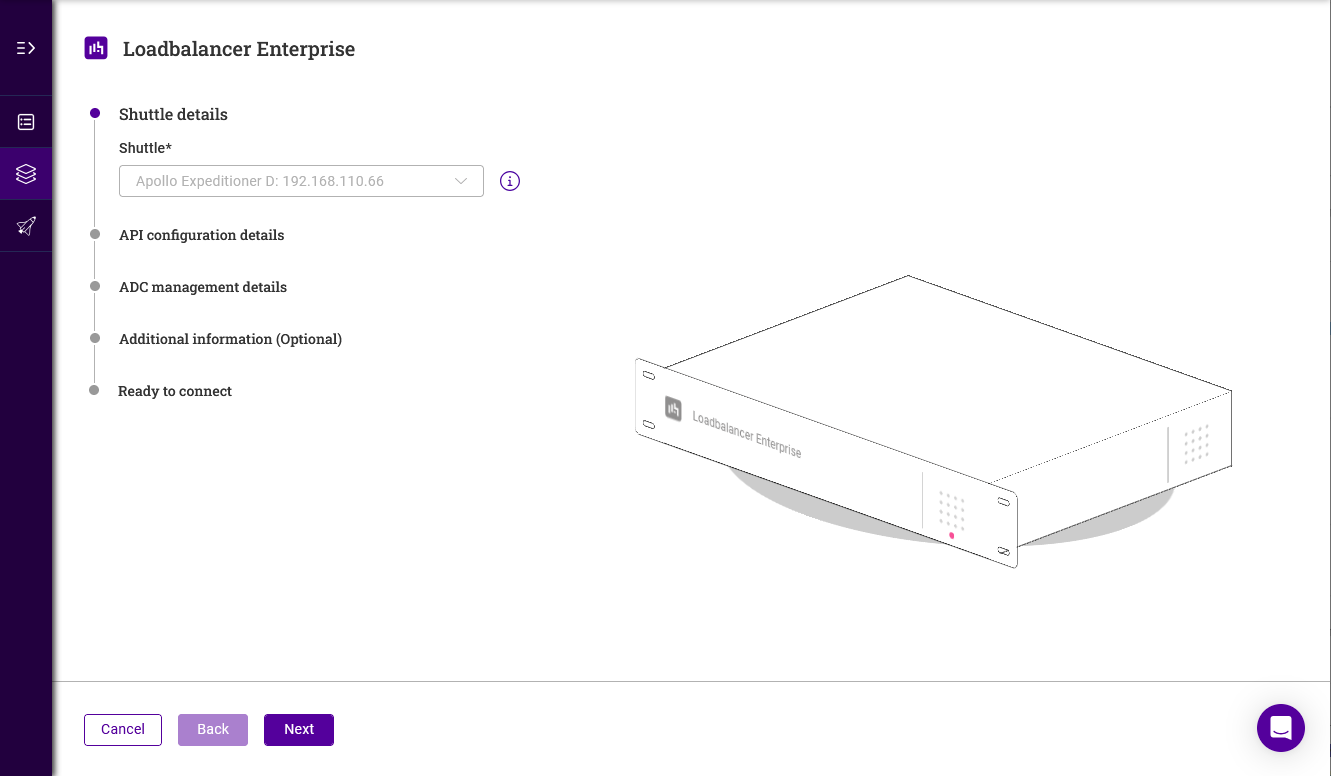
Using the Shuttle dropdown, select the required shuttle. If there is only one shuttle available, it will be greyed out and selected automatically as shown above.
-
Click Next.
-
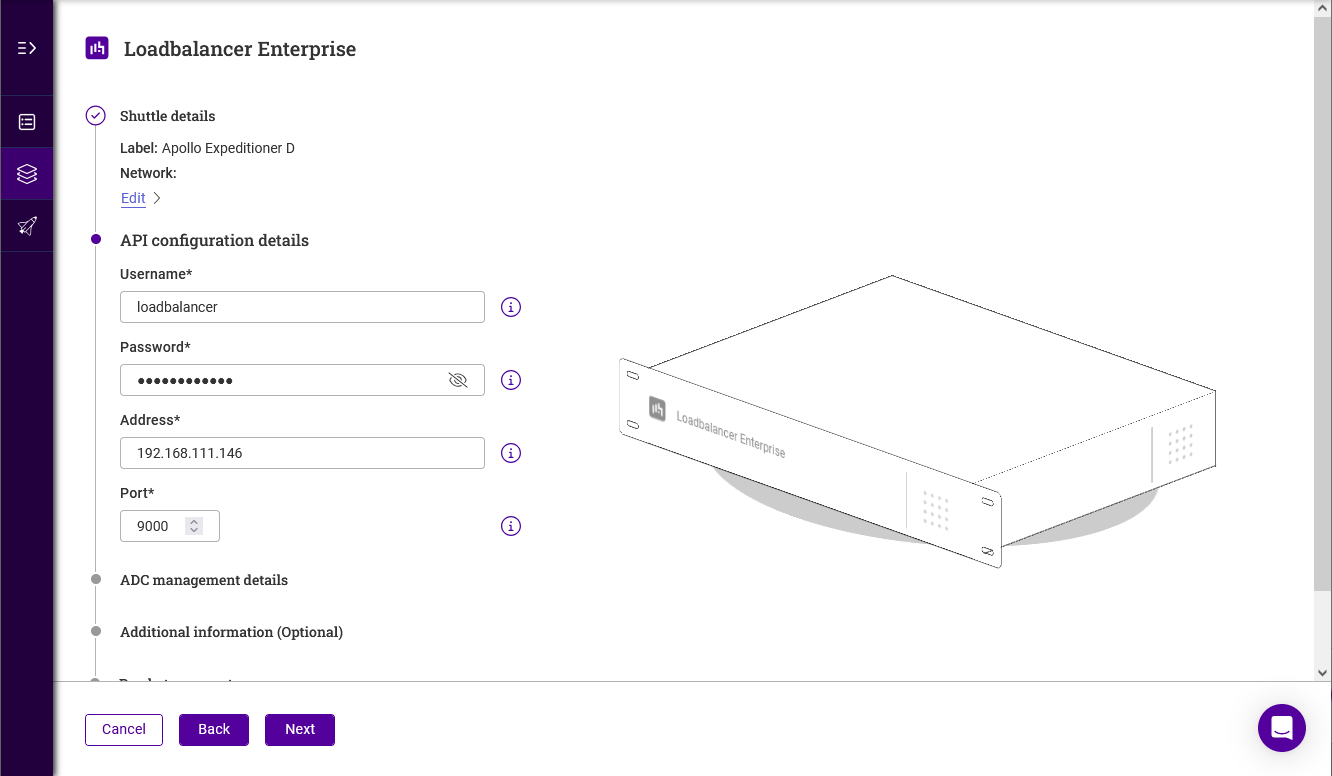
Enter the Username and Password for a user account that has permissions to make API calls. For an Enterprise appliance, the "loadbalancer" account can be specified.
-
Enter the IP address of the appliance being added.
-
Leave the Port set to the default value (9000).
-
Click Next.
-
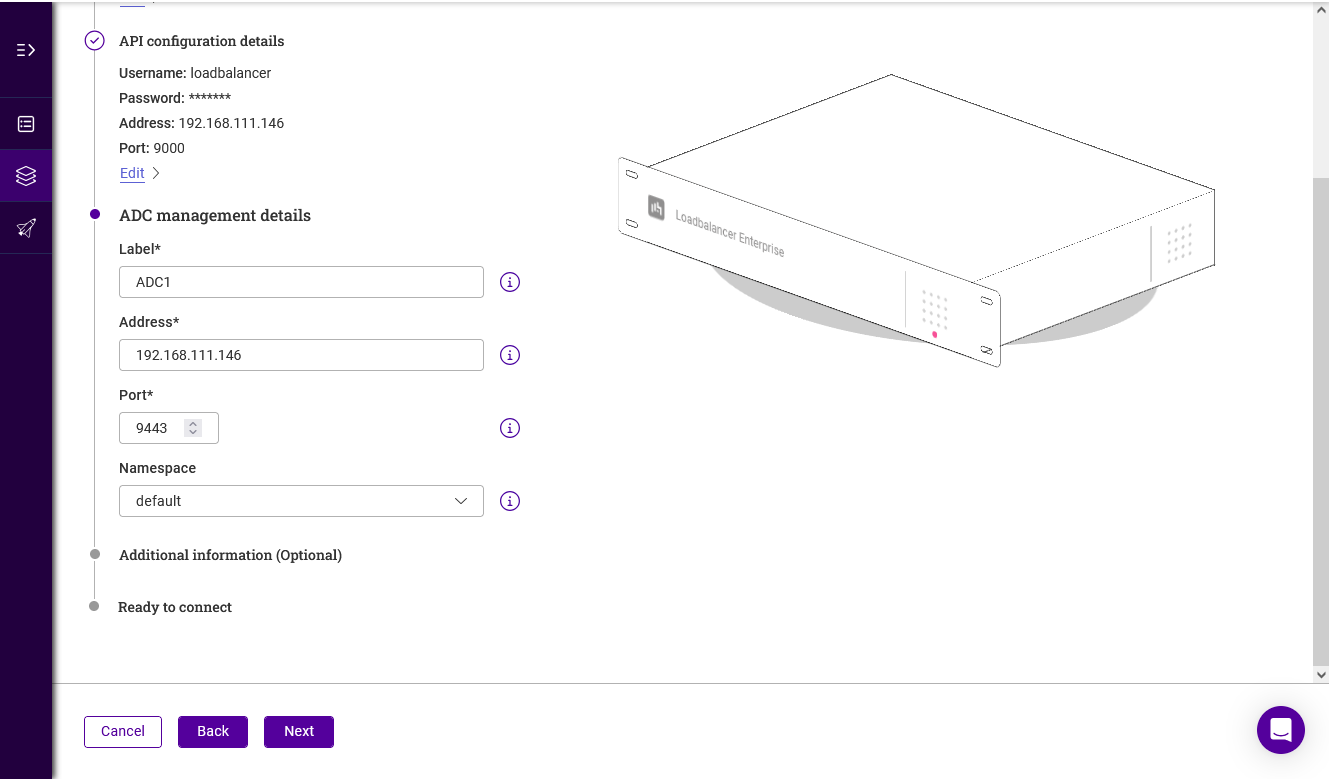
Enter an appropriate Label (name) for the appliance.
-
Ensure that the IP Address is correct.
-
Leave the port set to the default value (9443).
-
Select the required Namespace.
-
Ensure that the IP Address is correct.
-
Leave the Port set to the default value (9443).
-
Select the required Namespace.
-
Click Next.
-
Enter any required Notes and Tags to describe the appliance and click Next.
To create a tag, enter the required name and hit <ENTER>. The tag will appear colored blue under the Tags field. Repeat to specify multiple tags (up to 30). -
Verify all settings, these can be changed if needed using the relevant Edit option.
-
Click Submit - if the details have been specified correctly, the adopted appliance will appear in the list.
Viewing & Managing ADCs
To view all ADCs:
-
Click LOADBALANCER | PORTAL in the main menu bar to view the Dashboard.
-
A summary of the ADCs already added to the Portal will be displayed in the ADCs panel.
-
Click View my ADCs to see details of all ADCs.
-
All existing ADCs will be listed.
To view/manage a particular ADC:
-
Click LOADBALANCER | PORTAL in the main menu bar to view the Dashboard.
-
In the ADCs panel, click View my ADCs.
-
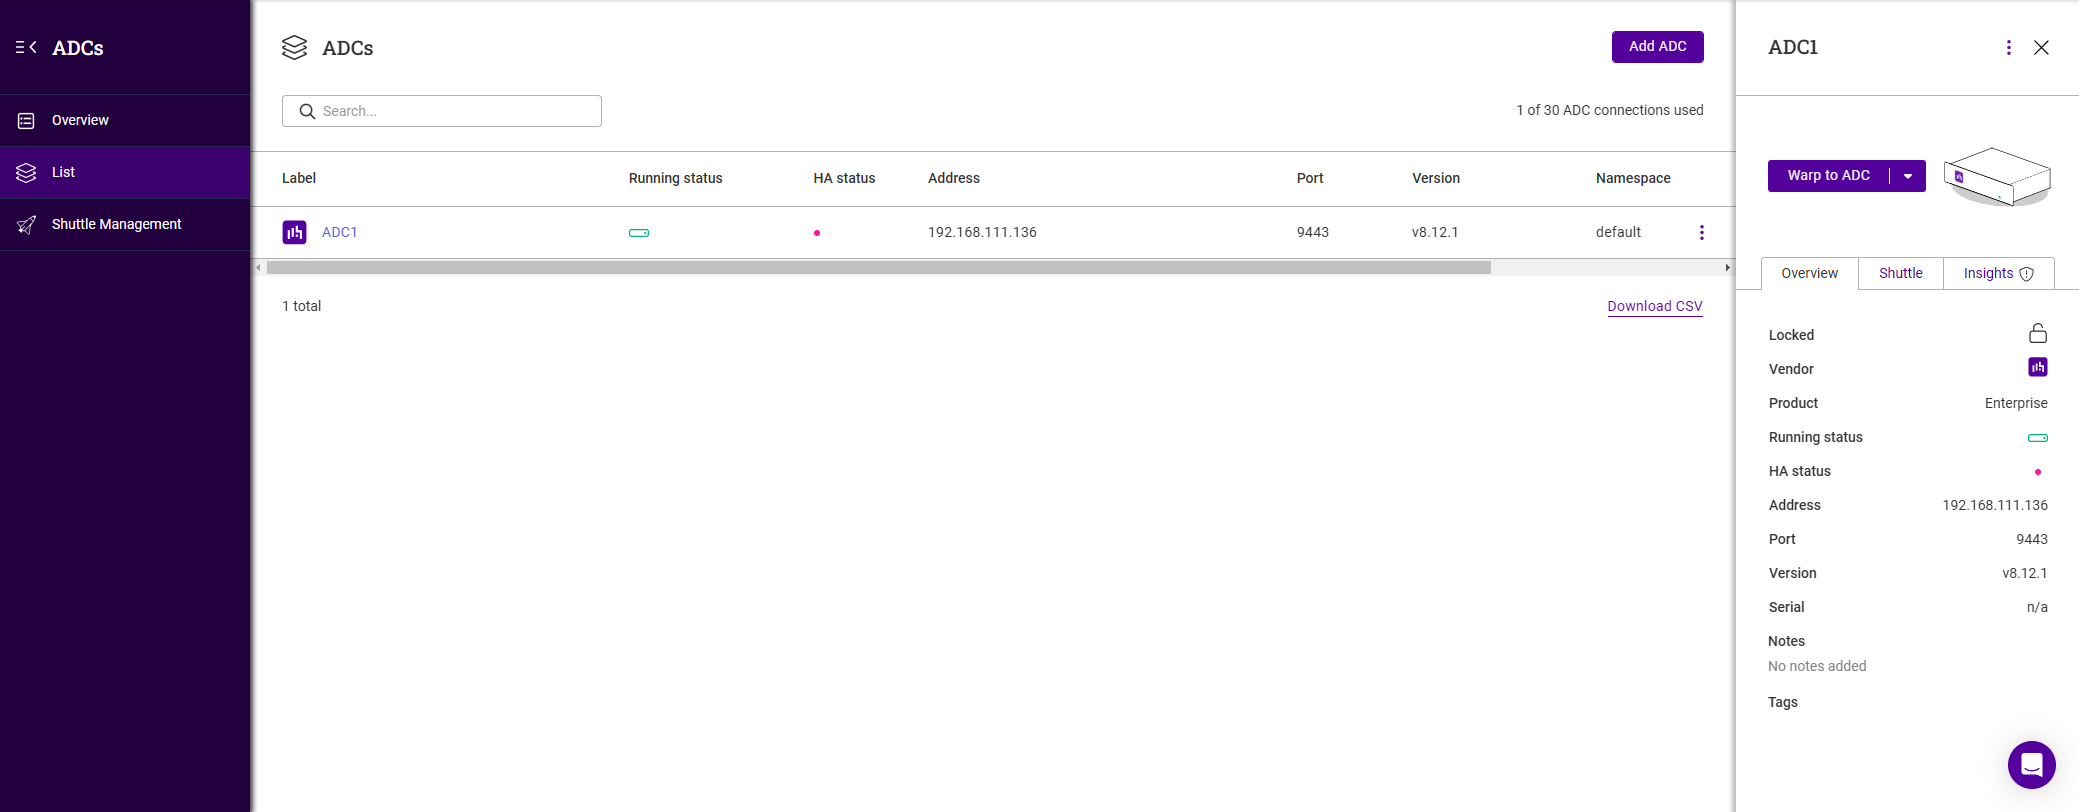
Click the Label (name) of the ADC to be managed, a new information panel will be displayed to the right.
-
The Overview tab provides a summary of the ADC.
-
The Shuttle tab details which Shuttle is being used to connect to the Portal.
-
The Insights tab details any security issues (CVEs) found.
-
Connect to an ADC’s WebUI
The Portal enables instant, one-click access to any ADC’s WebUI - for ADCs located in connected networks direct access can be used, for ADCs located in other networks [WARP] (not available with the Free Portal subscription level) can be used.
Using WARP
-
Click the Label (name) of the ADC to be viewed, a new panel will be displayed to the right.
-
Click Warp to ADC to securely connect to the ADC.
-
A new browser tab will open and display the WebUI.
Using Direct Access
-
Click the Label (name) of the ADC to be viewed, a new panel will be displayed to the right.
-
Click the down arrow on the Warp to ADC button and select Direct access.
-
A new browser tab will open and display the WebUI.
ADC Actions Menu
-
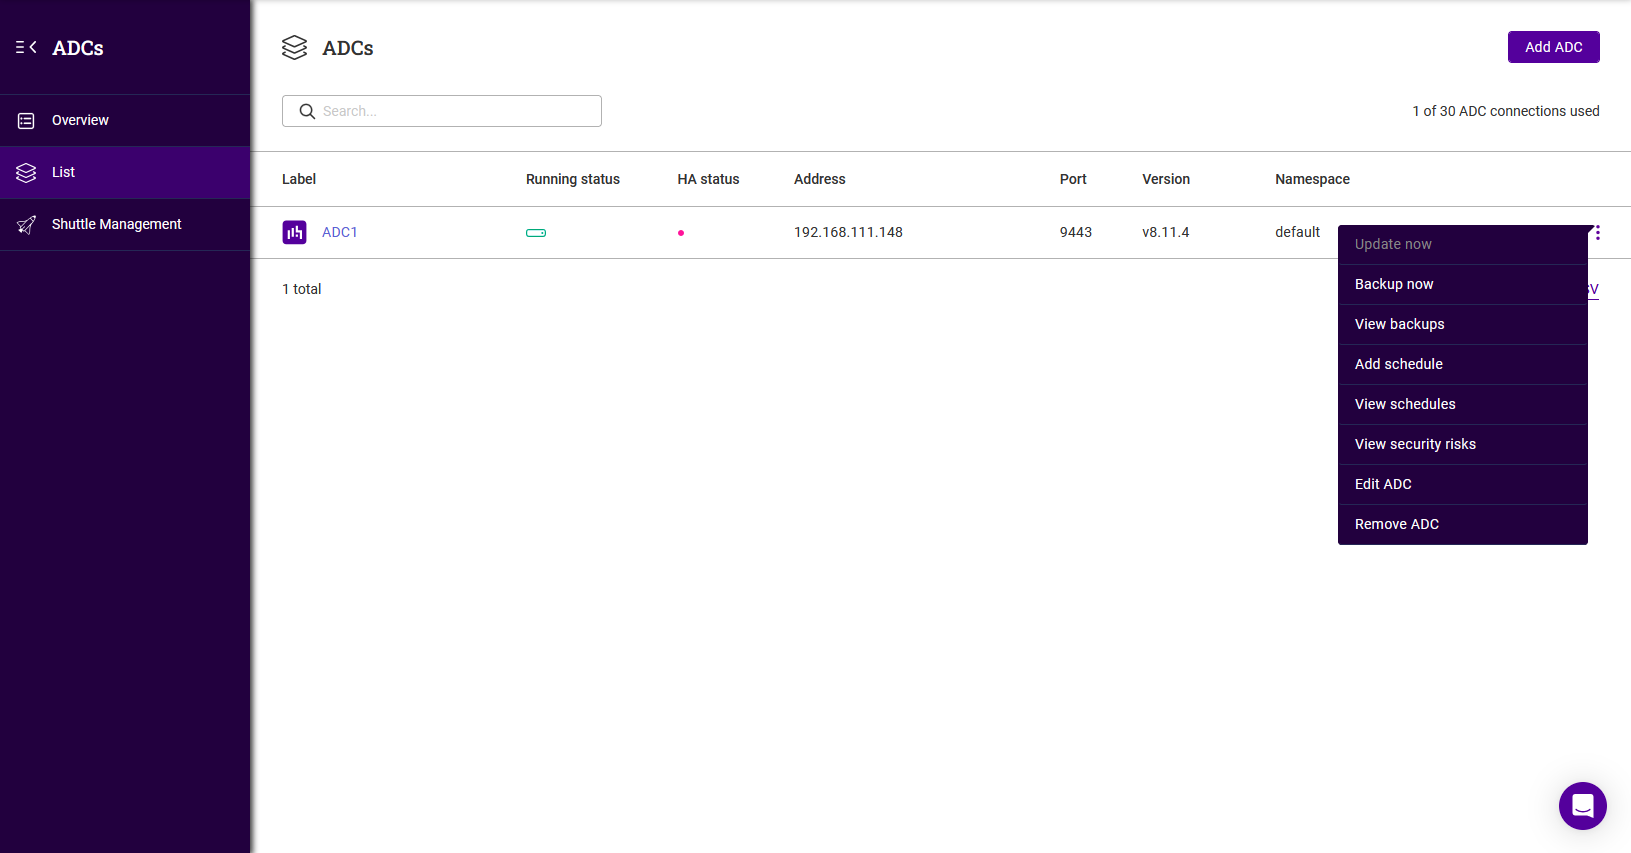
Click the three dots menu for the ADC, the actions menu will be displayed.
-
Select the required action:
-
Backup now
-
A backup of the ADC will be created.
-
-
View backups
-
All backups for this ADC will be listed.
-
To order by a particular column, click the column heading. The sort order (ascending or descending) is indicated by the arrow. Click the column heading again to change the sort order.
-
To download a backup:
-
Click the three dots menu to the right and click Download.
-
Enter your password and click Submit.
-
-
To delete a backup:
-
Click the three dots menu to the right and click Delete, then click Confirm to proceed.
-
-
-
Add schedule
-
The Create Schedule screen will be displayed.
-
The Product Name is set to the name of the ADC and Schedule Type is set to Backup.
-
Specify the required Date, Time and Occurrence and click Save Schedule.
-
-
View schedules
-
The Schedules screen will be displayed. Any schedules created for the ADC will be listed.
-
-
View security risks
-
The Security Insights screen will be displayed. Any CVEs for the ADC will be listed.
-
-
Edit ADC
-
The Edit ADC Details screen will be displayed. Update the settings as required and click Submit to save.
-
-
Remove ADC
-
Remove the ADC from the Portal. You’ll be prompted to confirm that you want to proceed, click Confirm to remove the ADC.
-
-