Organisation & account management
This section covers the settings that apply to the organisation as a whole and to your own user account. For the organisation it covers adding and managing users, roles and groups, the audit log, SAML login and the session timeout, Namespaces and Tags, Billing and the organisation’s own settings.
For your user account it covers single sign-on, two-factor authentication, the encryption keys used to protect your data and the account settings. It also covers the Resources area, which provides software downloads and a link to this documentation.
Organisation
When the first user account is created, the organisation is also created and configured.
User Management
| When multiple users are logged into the ADC Portal, you can see who else from your team is viewing the same Portal page. Coloured initials appear as avatars next to the page title so you always know when colleagues are working alongside you. |
Adding Users
Additional user accounts can be added to the organisation. Permissions granted to each user are based on the role(s) allocated either directly to the user or via group membership and the permissions configured for those role(s).
New users can be added individually or in bulk via a CSV file.
To add a new individual user:
-
Click LOADBALANCER | PORTAL in the main menu bar to view the Dashboard.
-
In the Users panel:
-
If this is the first user to be added, click Invite user.
-
if users already exist, click Manage my users.
-
Click the Add user button.
-
-
-
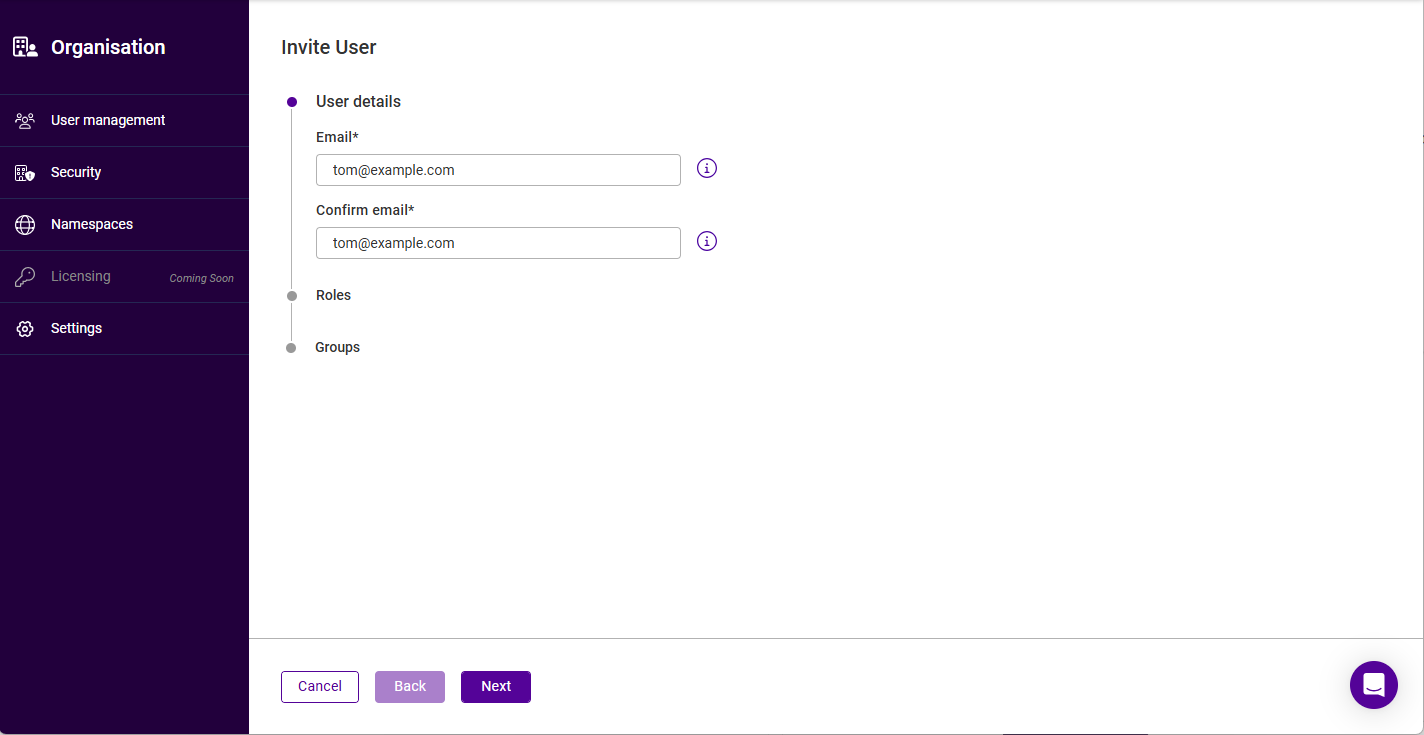
The Invite User form will be displayed:
-
Specify and confirm the Email address of the new user, then click Next.
-
Select the required Role(s) and click Next.
-
If any groups have already been configured, select the required Group(s) and click Next.
At least one role or group must be selected. For more information on roles and groups, see Roles & Groups below. -
Click Submit.
-
The account will be added in an "Invited" state and an activation email will be sent to the email address provided.
-
Ask the new user to open the email and click on the link to complete the activation process.
If the activation email doesn’t arrive, advise the user to check in any spam folders. The activation email will come from noreply-portal@loadbalancer.org. The new user will need to download their account private key during the activation process. This key is required if the user forgets their password and wants to reset it. Advise the user to store it in a safe location.
To import multiple users:
-
Click the Portal menu icon in the top right corner of the main menu bar and select Organization.
-
Using the menu to the left, select User management, then select the Users tab.
-
Click the Import users button.
-
Select the CSV file containing the users.
-
Click Open.
-
The field mapper will be displayed.
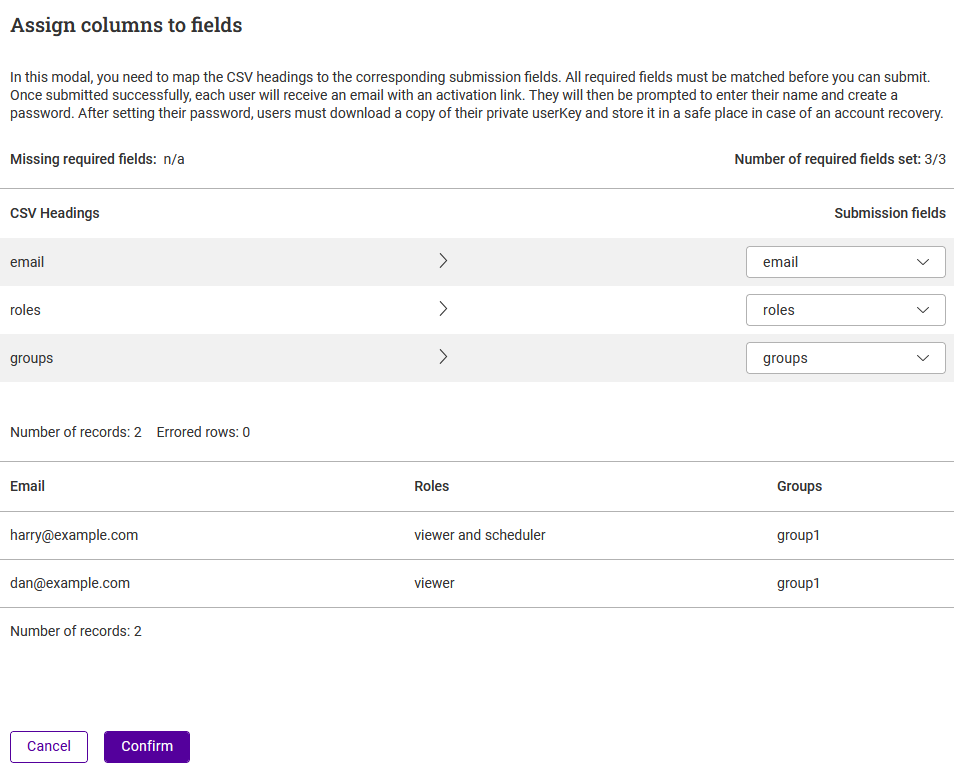
If the CSV file format described below is used, all CSV headings and fields will be matched automatically. If a different field layout is used, these can be mapped as required using the field dropdowns. Any errors found in the CSV file will be displayed. -
Once the mappings are correct, click Confirm to import the users.
CSV File Format
| Field Position | Field Name | Purpose | Required Field? | Notes |
|---|---|---|---|---|
1 |
email address of the user |
Yes |
valid email address, 3 chars min, 254 chars max. |
|
2 |
roles |
which roles to assign to the user |
Yes |
can be specified as the role name or ID. If multiple roles, specify in quotes and separate with commas, e.g "viewer,scheduler" or "01,02". 3 chars min, 254 chars max. |
3 |
groups |
groups the user should belong to |
Yes |
can be specified as the group name or ID. If multiple groups, specify in quotes and separate with commas, e.g "viewer,scheduler" or "01,02". 3 chars min, 254 chars max. |
4 |
disabled |
whether the user account should be disabled on creation |
No |
either "Yes" or "No". If this field is used, a value must be specified for all users in the file. |
Viewing Users
To view all users in the organisation:
-
Click the Portal menu icon in the top right corner of the main menu bar and select Organization.
-
Using the menu to the left, select User management, then select the Users tab.
The following details are listed for each user: Name, Email, Status, Roles, Groups, Last logged in, OTP enabled (whether two-factor authentication is configured) and Has org key (whether the user holds a copy of the organisation private key).
Each row also has a selection checkbox to its left - the number selected is shown below the list as Selected: n / n total - and a three dots menu to its right which provides the actions available for that user.
Modifying User Permissions
To change the role(s) and group(s) allocated to a user:
-
Click the three dots menu next to the user to be modified.
-
Click Update permissions.
-
Update the required Role(s) and Group(s), then click Submit.
| Update permissions is greyed out for the user that created the first account and the organisation - that user’s roles cannot be changed. |
Deleting Users
To delete a user:
-
Click the three dots menu next to the user to be deleted.
-
Click Delete, then click Confirm to delete the user.
| The user that created the first account and the organisation cannot be modified or removed - both Update permissions and Delete are greyed out on that user’s three dots menu. |
Password Reset
| Passwords can also be reset whilst logged in to the ADC Portal. For details, see Account Settings. |
If a user has forgotten their password and is unable to login, it can be reset using the Forgot password? link on the ADC Portal login page.
To reset your password:
-
On the Portal login page, enter your email address and click Continue.
-
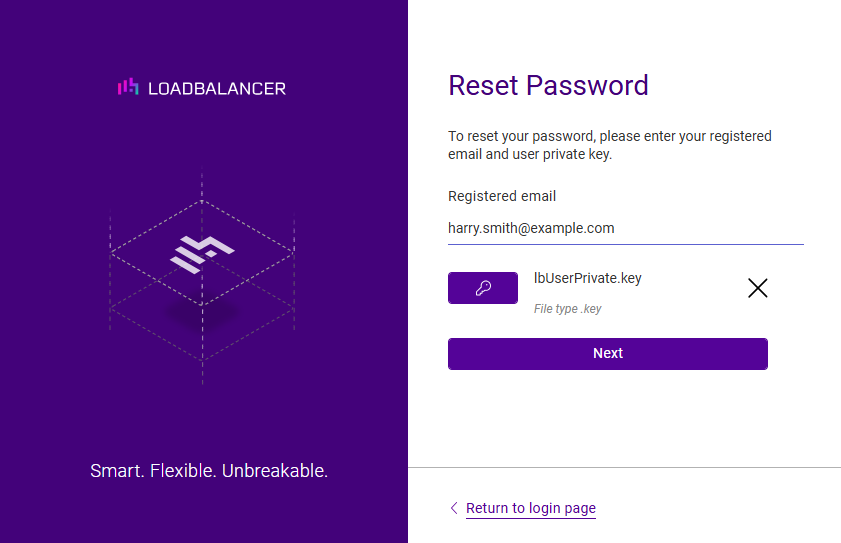
Click the Forgot password? link.
-
Enter your email address and select your user private key, then click Next.
-
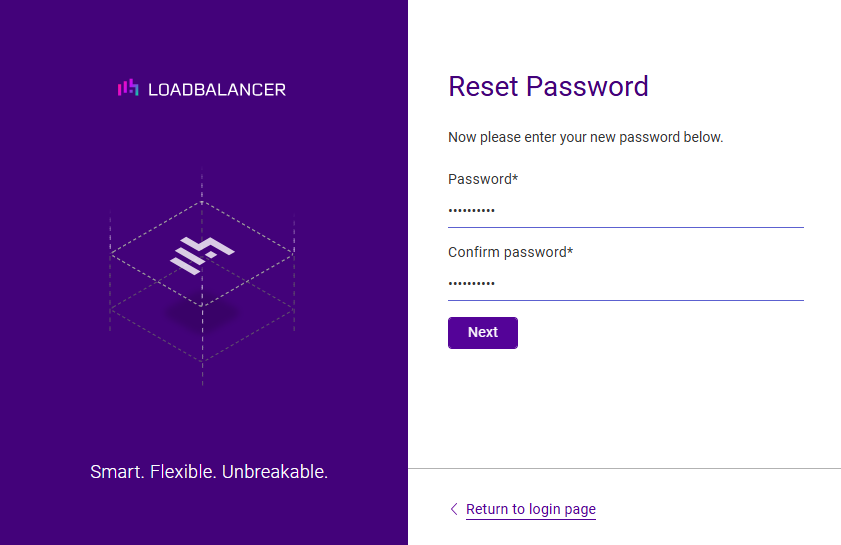
You’ll be prompted to enter a new password.
-
Enter and confirm your new password, then click Next.
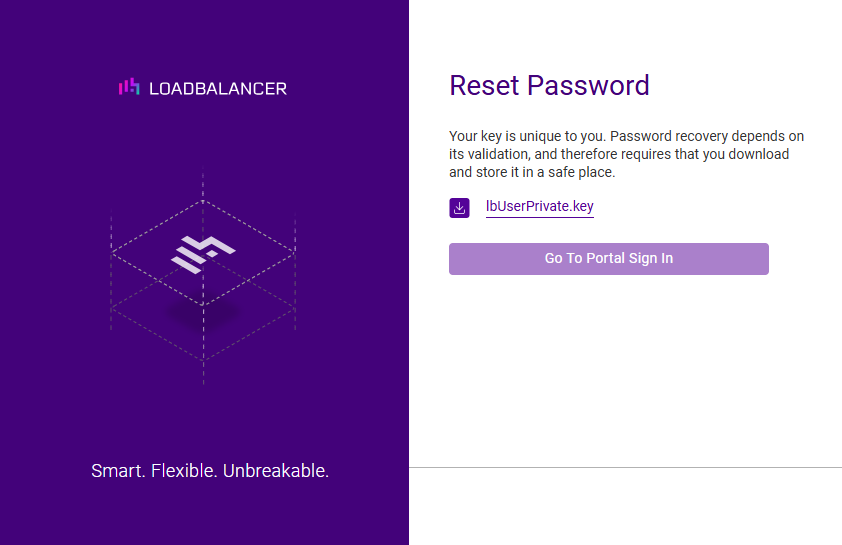
-
Download your new private key file and store it in a safe location. The previous user key can be discarded as it’s been superseded by the new key.
-
Once your private key has been downloaded, the Go to Portal sign-in button can be clicked.
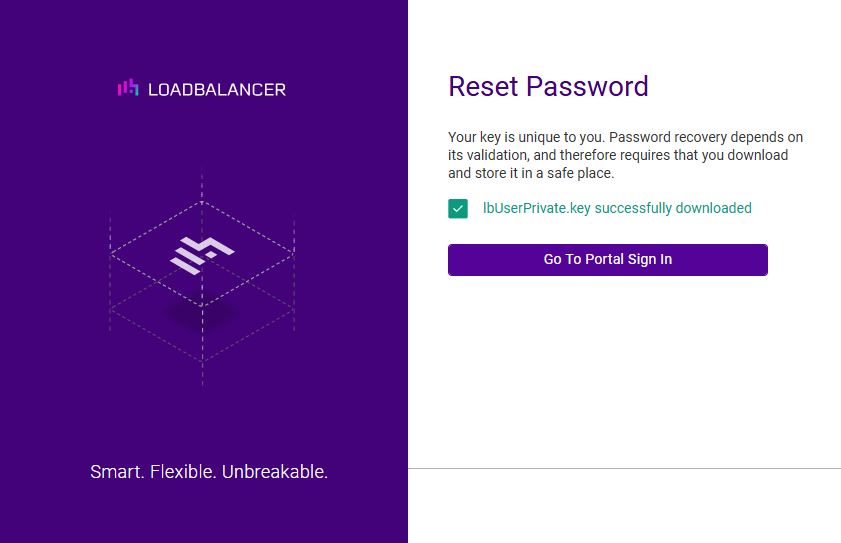
-
Once clicked, you’ll be taken to the ADC Portal login page.
-
Enter your email address and new password to access the ADC Portal.
Roles & Groups
Roles
Roles define a set of permissions that can be assigned to users. Three roles are included by default:
-
Owner - full access to all data and settings.
-
Maintainer - full access to all data and settings except for user, group, role and account settings where read-only access is provided.
-
Viewer - read-only access to all data and settings.
In addition, custom roles can be configured either from scratch or by duplicating one of the default roles and then customizing permissions to suit specific requirements.
To create a new role from scratch:
-
Click the Portal menu icon in the top right corner of the main menu bar and select Organization.
-
Using the menu to the left, select User management, then select the Roles tab.
-
Click the Add role button.
-
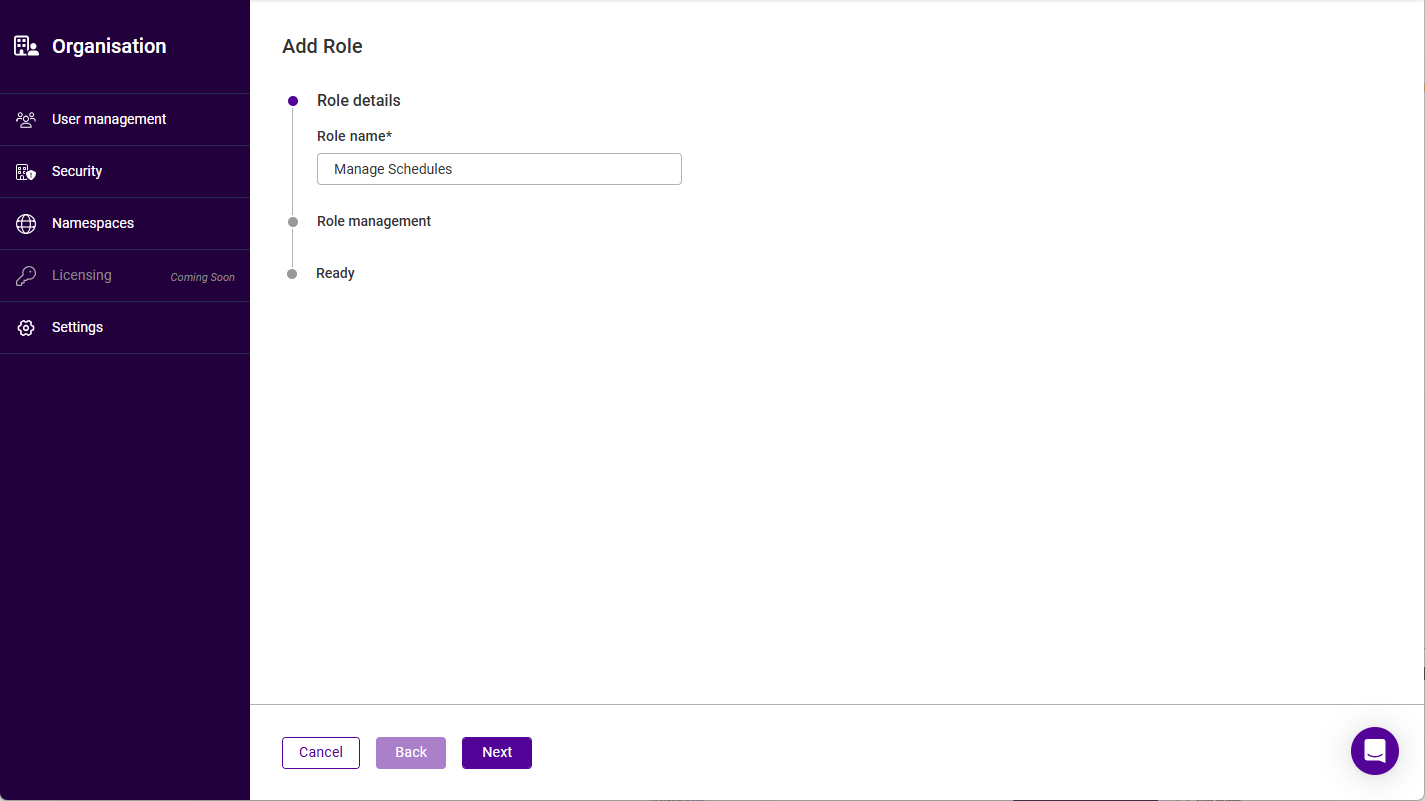
The Add Role form will be displayed:
-
Specify an appropriate Role name, e.g. Manage Schedules and click Next.
-
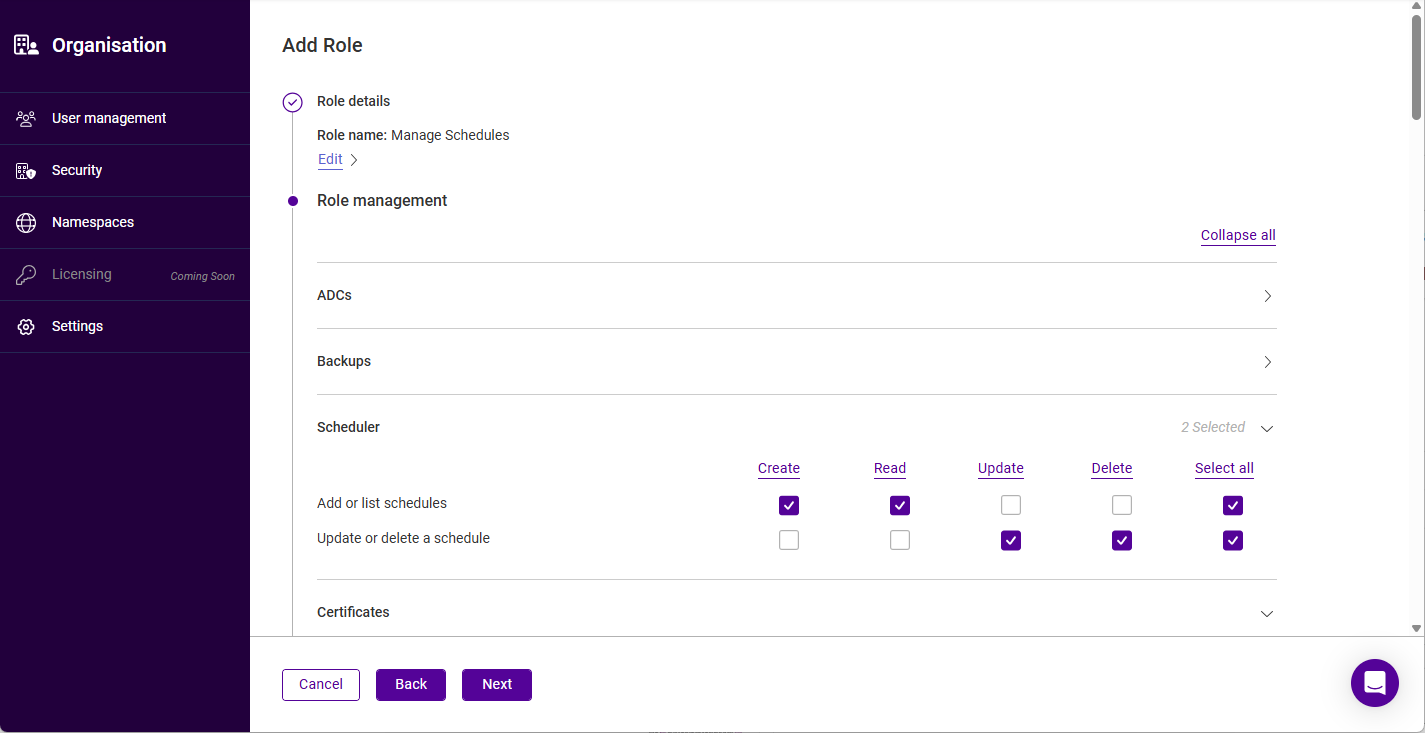
Under the Role management section either click Expand all or expand the relevant section(s) individually.
-
Select the required permissions. In the example above, all permissions related to schedules have been granted.
-
Click Next, then click Submit.
Permissions are grouped into the following sections, each of which offers Create, Read, Update and Delete permissions for the individual functions it contains, plus a Select all option:
| Section | Controls access to |
|---|---|
ADCs |
Adding, listing, editing and deleting ADCs, retrieving an ADC’s credentials, backing up an ADC and running a software update |
Backups |
Listing, downloading and deleting backups |
Scheduler |
Adding, listing, updating and deleting schedules |
Certificates |
Listing all certificates and listing the certificates for a specific ADC |
Insights |
Listing security insights and end-of-life insights, for all ADCs or for a specific ADC |
Shuttles |
Listing, adopting, editing and deleting Shuttles, and adding or deleting a Shuttle’s subnets |
Namespaces |
Creating, listing, editing and deleting namespaces |
Accounts |
Setting up or disabling two-factor authentication and disabling SSO |
Organisations |
Listing and updating an account, listing and deleting organisation members, accepting or rejecting key requests and listing audit logs |
Support |
Creating, listing, editing and closing support tickets and adding comments |
RBAC |
Managing roles, groups and their membership, and listing resources |
To create a role by duplicating an existing role:
-
Using the menu to the left, select User management, then select the Roles tab.
-
Click the three dots menu next to the role to be duplicated.
-
Click Duplicate.
-
Specify a name for the new role and click Next.
-
Under the Role management section either click Expand all or expand the relevant section(s) individually.
-
Configure the required permissions.
-
Click Next, then click Submit.
To delete a role:
-
Click the three dots menu next to the role to be deleted.
-
Click Delete, then click Confirm to delete the role.
| The three default roles (owner, maintainer and viewer) cannot be deleted or edited - the only option available on their three dots menu is Duplicate. Delete is only available for custom roles. |
Groups
A group can have one or more associated roles and each group can contain multiple users. This enables user permissions to be assigned based on group membership.
To create a group:
-
Click the Portal menu icon in the top right corner of the main menu bar and select Organization.
-
Using the menu to the left, select User management, then select the Groups tab.
-
Click the Add group button.
-
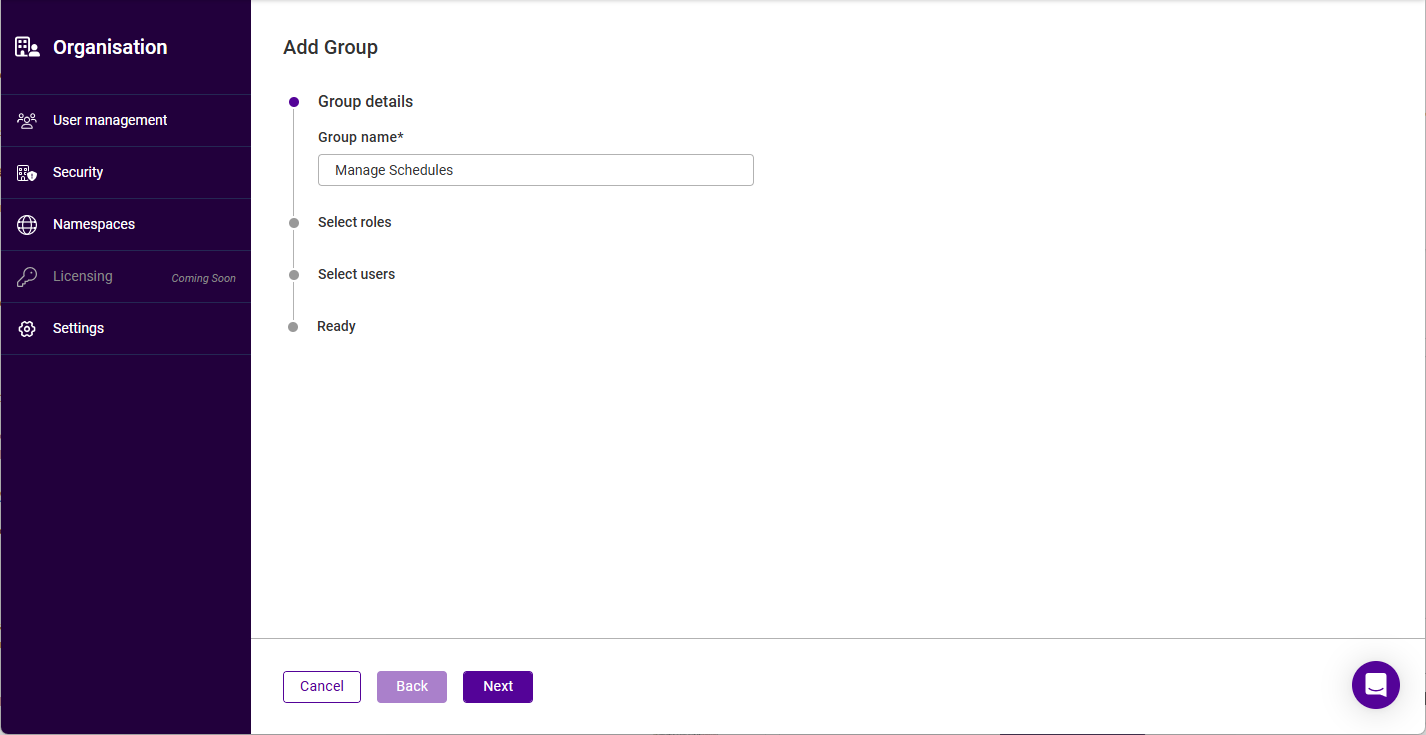
The Add Group form will be displayed:
-
Specify an appropriate Group name, e.g. Manage Schedules and click Next.
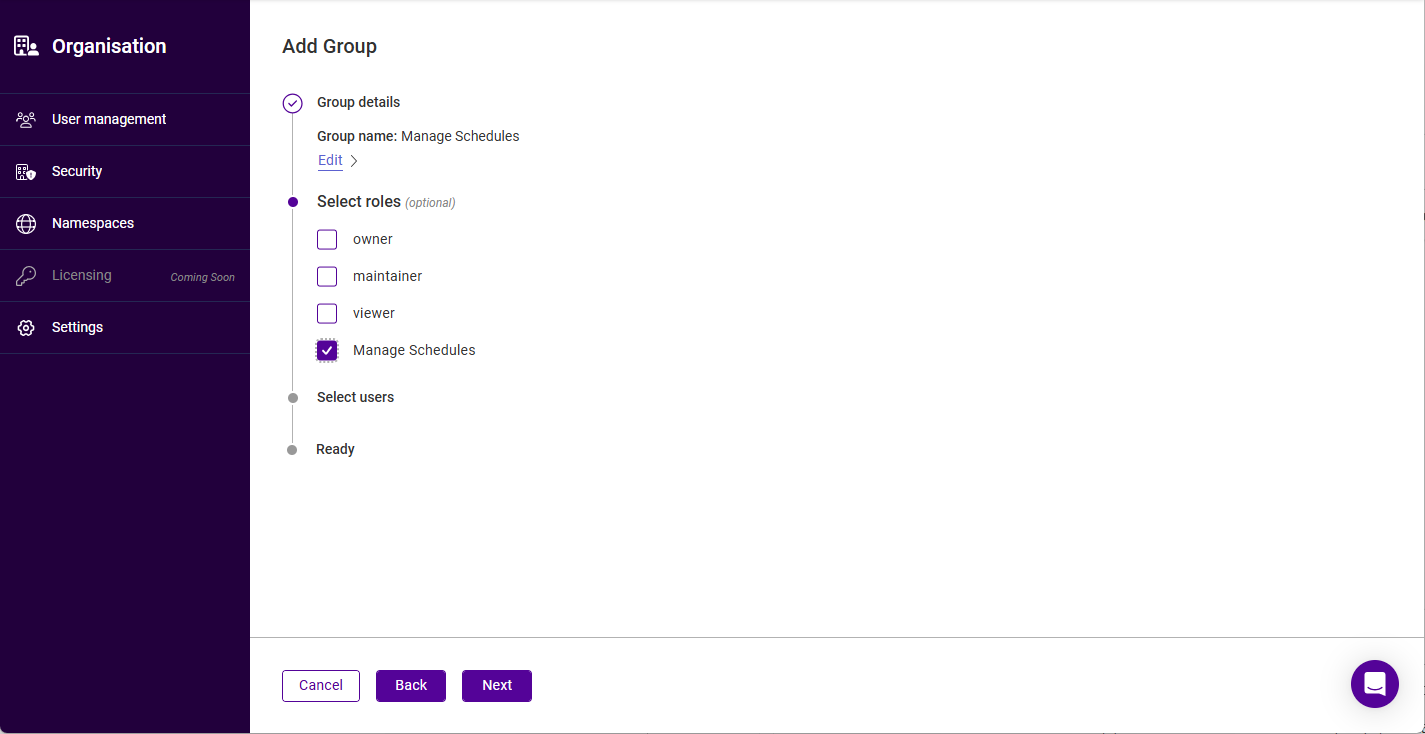
-
Select the role(s) to be allocated to the group (this can be done later if preferred), then click Next.
-
Select the user(s) that will be members of the group (this can be done later if preferred), then click Next.
-
Click Submit.
As an example, if multiple users were allocated the default Viewer role when first created, they would have read-only access to all data and settings. If you wanted to allow those users to configure and manage schedules, they could be made members of the Manage Schedules group created above. Since the Manage Schedules role created above is associated with this group and provides full permissions to all scheduler related functionality, this would grant the required permissions.
To delete a group:
-
Click the three dots menu next to the group to be deleted.
-
Click Delete, then click Confirm to delete the group.
Security
Portal Activity Audit Log
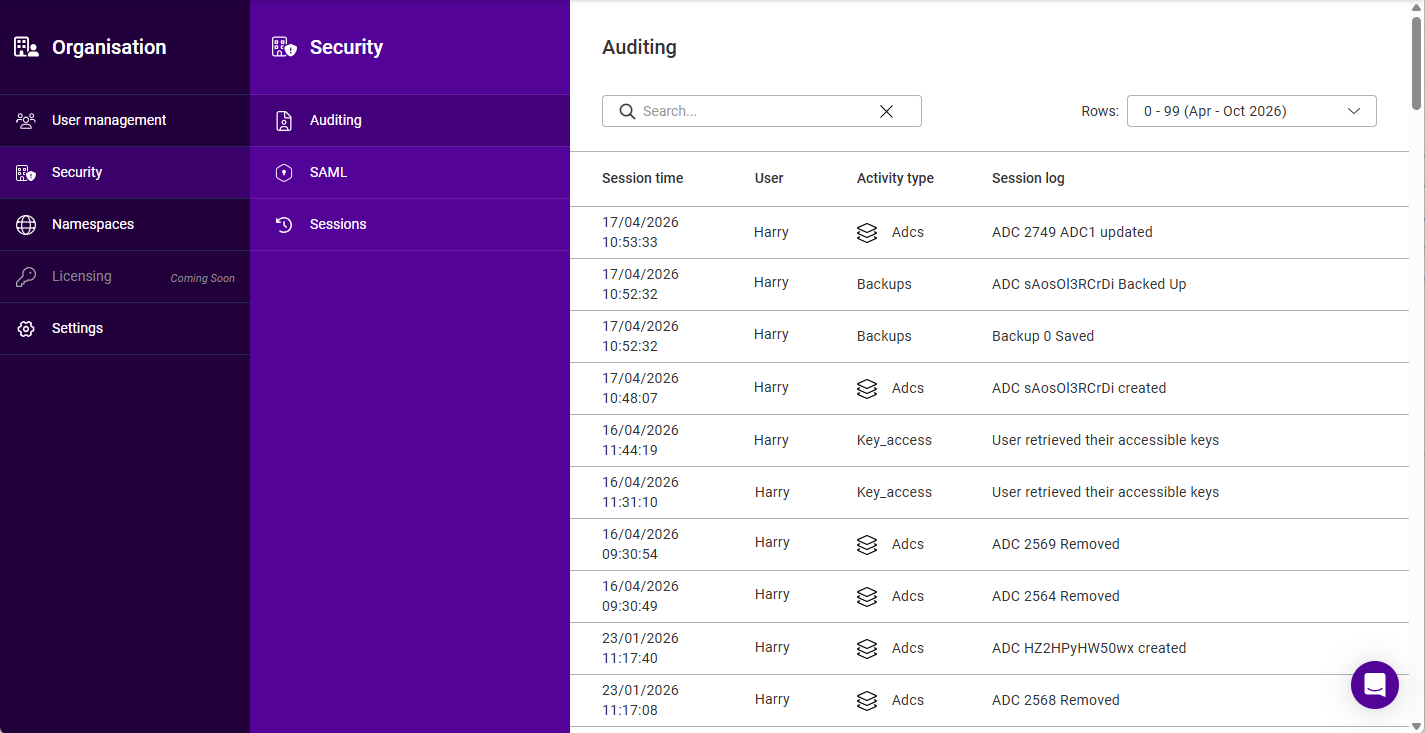
Auditing enables Portal admin users to track events occurring on the Portal. The following information is tracked: Session time, User, Activity type and Session log (a description of the activity).
To view the audit log:
-
Click the Portal menu icon in the top right corner of the main menu bar and select Organization.
-
Using the menu to the left, select Security > Auditing
-
Use the Rows dropdown to select the block of entries to display - entries are grouped in blocks of 100 and each block is labelled with the date range it covers.
-
To order by a particular column, click the column heading. The sort order (ascending or descending) is indicated by the arrow. Click the column heading again to change the sort order.
Security Assertion Markup Language (SAML)
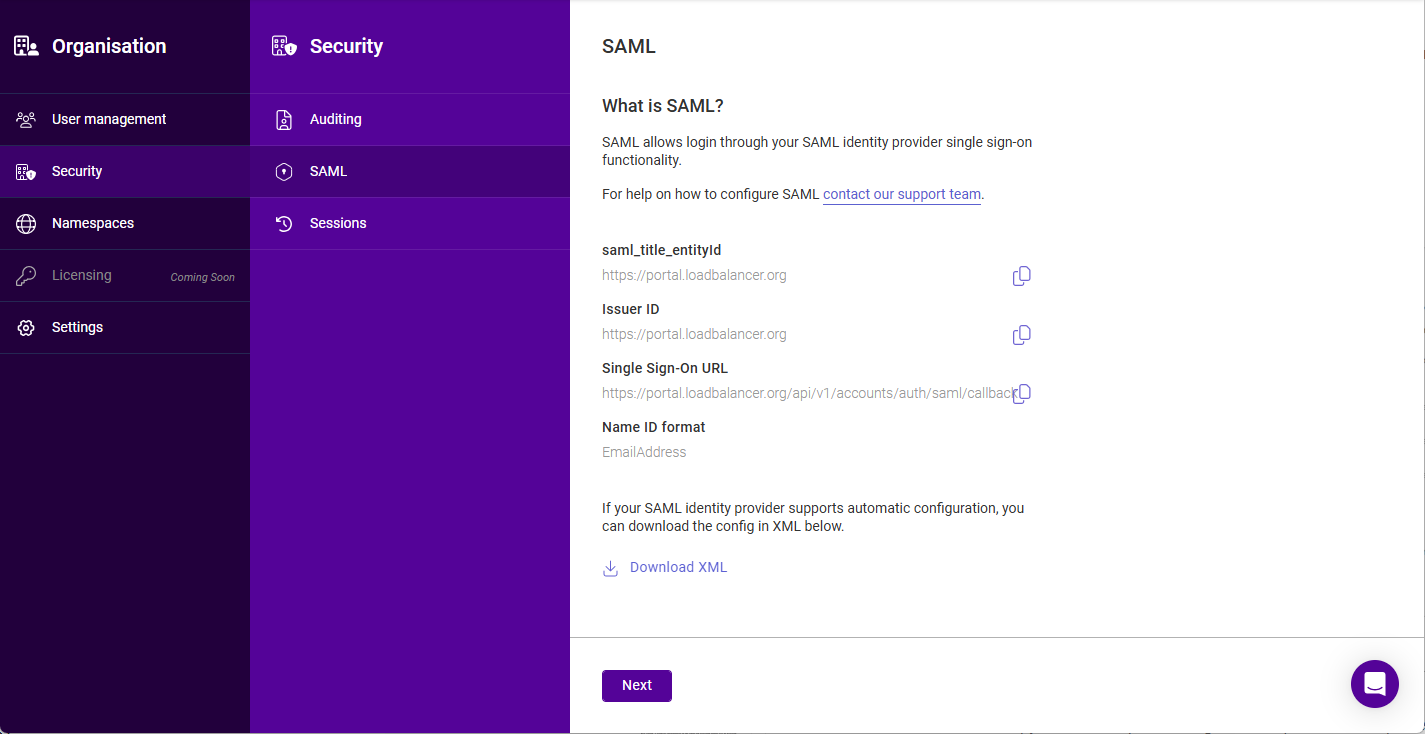
SAML enables Portal login using a SAML identity provider’s single sign-on functionality.
To enable SAML login for the organisation:
-
Click the Portal menu icon in the top right corner of the main menu bar and select Organization.
-
Using the menu to the left, select Security.
-
In the Security menu select SAML.
-
Copy the Entity ID, Issuer ID and Single Sign-On URL values using the copy links provided and paste these into the relevant fields in your chosen SAML provider’s configuration screen. The Name ID format that must be used is also shown (EmailAddress).
If your SAML identity provider supports automatic configuration, click Download XML to download the configuration instead. -
Click Next.
-
Copy the Metadata URL from your SAML provider and paste this into the field provided in the ADC Portal.
-
Click Submit.
| If you need any assistance configuring SAML, please contact our support team. |
Sessions
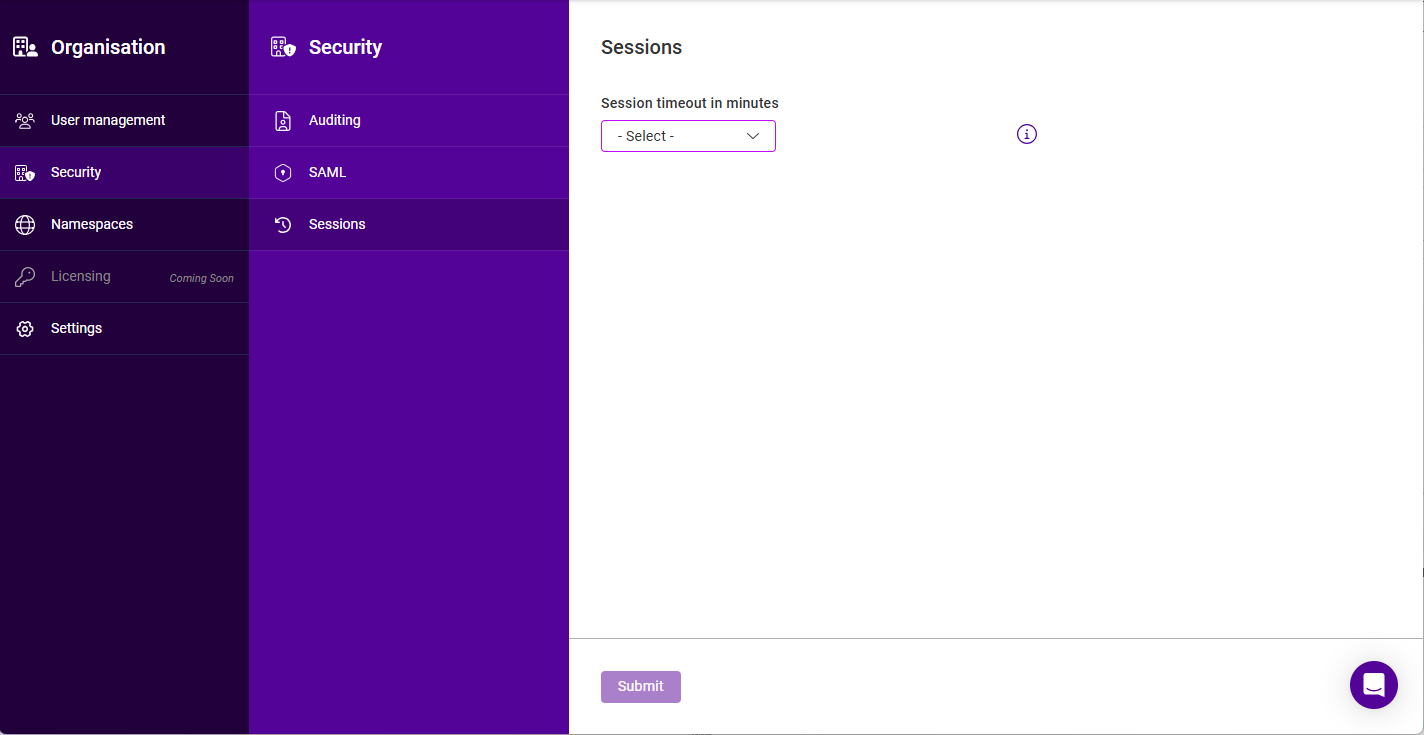
To modify the default session timeout:
-
Click the Portal menu icon in the top right corner of the main menu bar and select Organization.
-
Using the menu to the left, select Security.
-
In the Security menu select Sessions.
-
Select the required Session timeout in minutes. The following options are available:
-
15
-
30
-
60
-
120
-
1440 (1 Day)
-
10080 (7 Days)
-
20160 (14 Days)
-
43200 (30 Days)
-
-
Click Submit.
Namespaces & Tags
Namespaces allow ADCs to be organized into user-defined groups to simplify management. Each ADC can reside in one Namespace at a time, ensuring a clean and efficient structure. In addition, up to 30 user-defined tags can be added to each ADC to help organize your infrastructure more effectively. Namespaces can be added as detailed below, Tags are specified and created when ADCs are added to the Portal.
For example, Namespaces could be used to indicate where ADCs are located and Tags could be used to indicate which support team is responsible for the ADC. All ADCs in a particular location could then be viewed by selecting the relevant Namespace using the Namespaces dropdown and all ADCs supported by a particular team could be found by specifying the relevant Tag in the ADC search box.
Namespaces and Tags are allocated when ADCs are added to the Portal. They can also be modified later if required by editing the ADC - for more information, see ADC Actions Menu.
To add a new namespace:
-
Click LOADBALANCER | PORTAL in the main menu bar to view the Dashboard.
-
In the Namespaces panel, click View my Namespaces.
-
Click the Add namespace button.
-
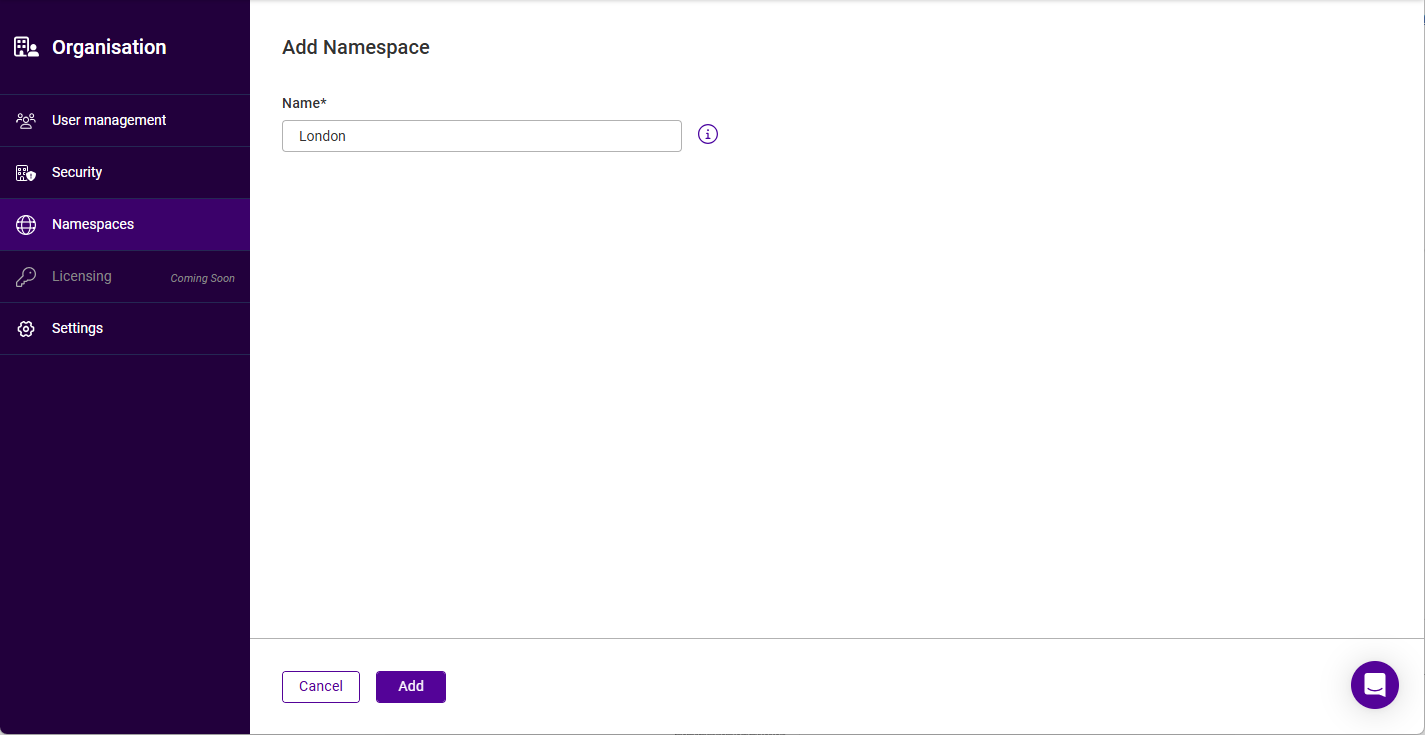
The Add namespace form will be displayed:
-
Specify a Name for the new namespace and click Add.
To delete a namespace:
-
Click the three dots menu next to the namespace to be deleted.
-
Click Delete, then click Confirm to delete the namespace.
Billing
To view the organisation’s current ADC Portal billing details:
-
Click the Portal menu icon in the top right corner of the main menu bar and select Organization.
-
Using the menu to the left, select Billing.
-
The following tabs are available:
-
Billing items - lists each chargeable Item along with its Description, Status and Monthly cost.
-
Payment methods - the payment methods configured for the organisation.
-
Invoice history - previously issued invoices.
-
| Payment methods and Invoice history are greyed out until the organisation has billing data - on a trial account only Billing items can be selected. |
If you want to change your subscription or have a billing query, click the Contact billing button to open a chat window and discuss your requirements. Alternatively, email sales@loadbalancer.org.
Settings
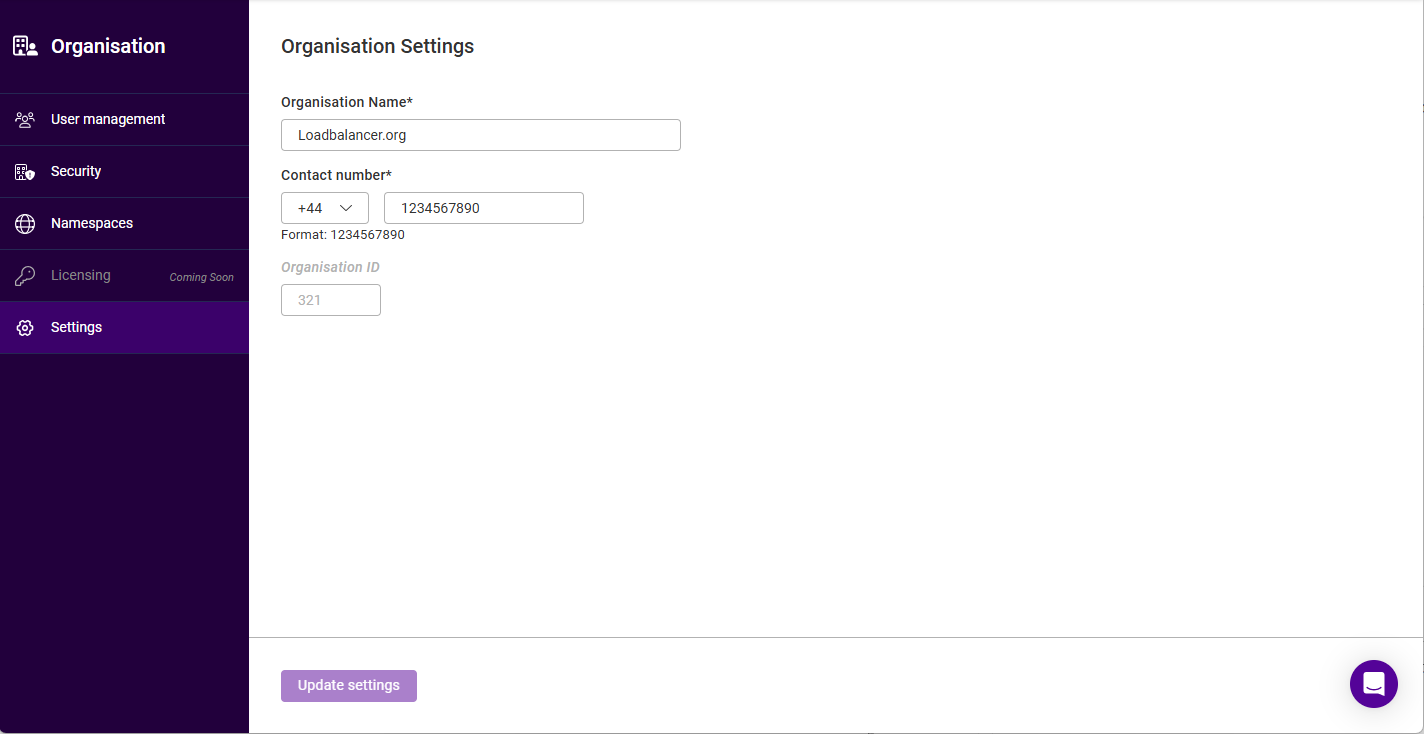
To update the Organisation’s name or telephone number:
-
Click the Portal menu icon in the top right corner of the main menu bar and select Organization.
-
Using the menu to the left, select Settings.
-
Update the Organization Name and Contact number as required.
The Organization ID is also displayed. This is allocated by the Portal and is read-only. -
Click Update settings.
Account
Single Sign-On (SSO)
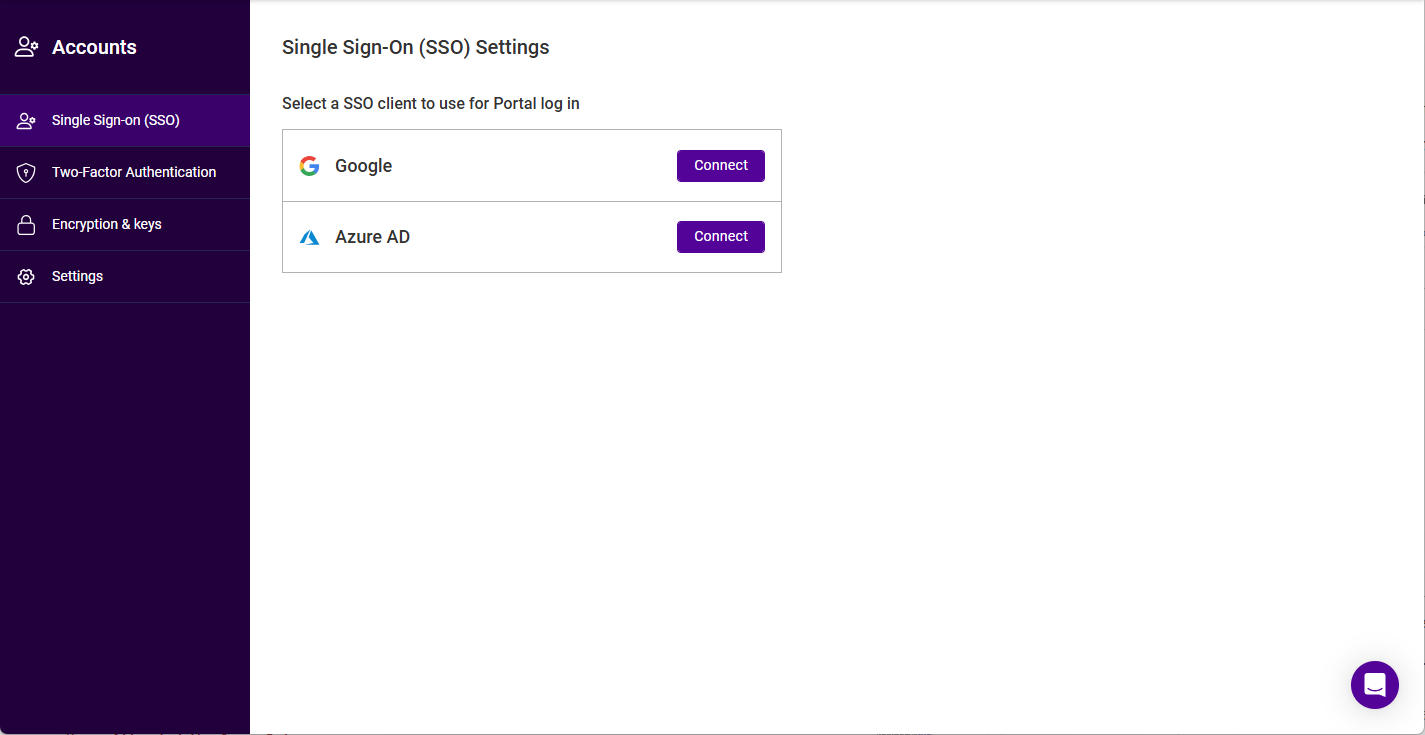
SSO can be enabled for each ADC Portal user account. SSO simplifies Portal access by utilizing login credentials from another system. Two SSO clients are offered - Google and Azure AD.
| SAML is not configured here - it’s enabled for the organisation as a whole, see Security Assertion Markup Language (SAML). |
To configure SSO:
-
Click the Portal menu icon in the top right corner of the main menu bar and select Account.
-
Using the menu to the left, select Single Sign-on (SSO).
-
Select the relevant Connect button and enter the credentials for the account to be used.
-
Follow the steps to complete the process.
| To configure SAML for the organisation, see Security Assertion Markup Language (SAML). |
Two Factor Authentication (2FA)
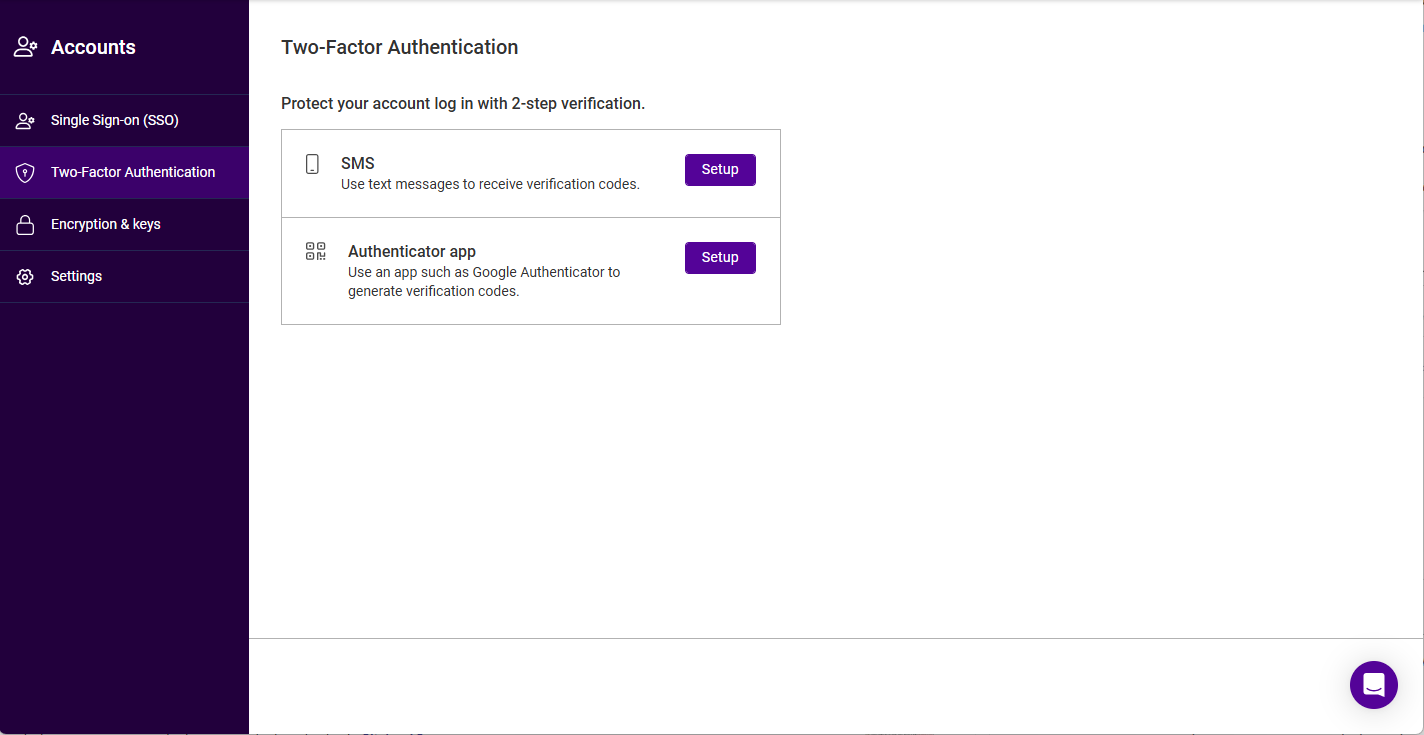
2FA can be enabled for each ADC Portal user account. 2FA requires a unique code in addition to the user’s password. This code is supplied to the user via an SMS text message or via an authenticator app such as Google or MS Authenticator.
To configure 2FA:
-
Click the Portal menu icon in the top right corner of the main menu bar and select Account.
-
Using the menu to the left, select Two-Factor Authentication.
-
Select the relevant Setup button and follow the steps to configure 2FA.
Encryption & Keys
Key access and management permissions depend on the role(s) allocated either directly or through group membership.
Users Allocated the Owner Role
Users allocated the Owner role are able to download both their user private key and the organisation private key.
Users not Allocated the Owner Role
Users who are not allocated the Owner role can download their user private key, but cannot download the organisation private key. Instead, they must request permission to access it. Access to the organisation private key is required for various tasks such as downloading backups.
Accessing & Downloading Keys
-
Click the Portal menu icon in the top right corner of the main menu bar and select Account.
-
Using the menu to the left, select Encryption & keys.
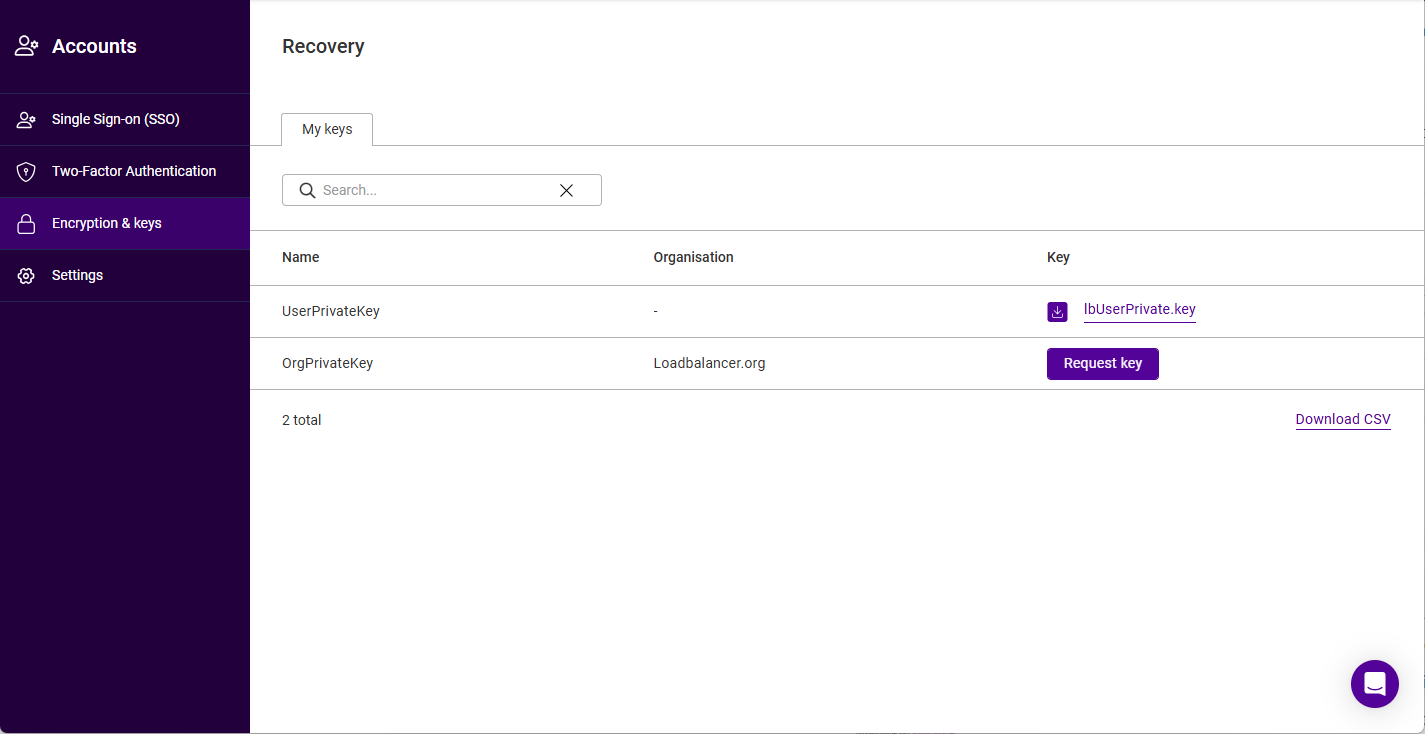
The Recovery screen will be displayed:
-
Two rows are listed, User private key and Org private key. For each, the Organization the key belongs to and its current State (e.g. Approved) are shown.
-
To download your user private key, click the three dots menu on the User private key row and select Download user private key.
-
Enter your password when prompted and click Submit.
-
To download the organisation private key, click the three dots menu on the Org private key row and select Download org private key.
Only users allocated the Owner role can download the organisation private key. A user who is not allocated the Owner role must request access to it instead, and a user allocated the Owner role must then approve the request. Once approved, the key is accessed via the Portal when needed - the actual key cannot be downloaded. -
Enter your password when prompted and click Submit.
-
Save the keys in a safe place.
| The Org private key row also offers a Recover org private key option. This is used to restore access to the organisation private key when the copy held by the Portal for your account is no longer usable. |
Viewing Key Access Requests
-
Login as a user who is allocated the Owner role.
-
Click LOADBALANCER | PORTAL in the main menu bar to view the Dashboard.
-
In the Users panel, click Manage my users.
-
If there are pending requests they will be listed in the Requested keys tab as shown below.
The Requested keys tab lists each request with its Name, Email, Request date and Status. When there are no outstanding requests the tab is still shown, but reports No data to display. 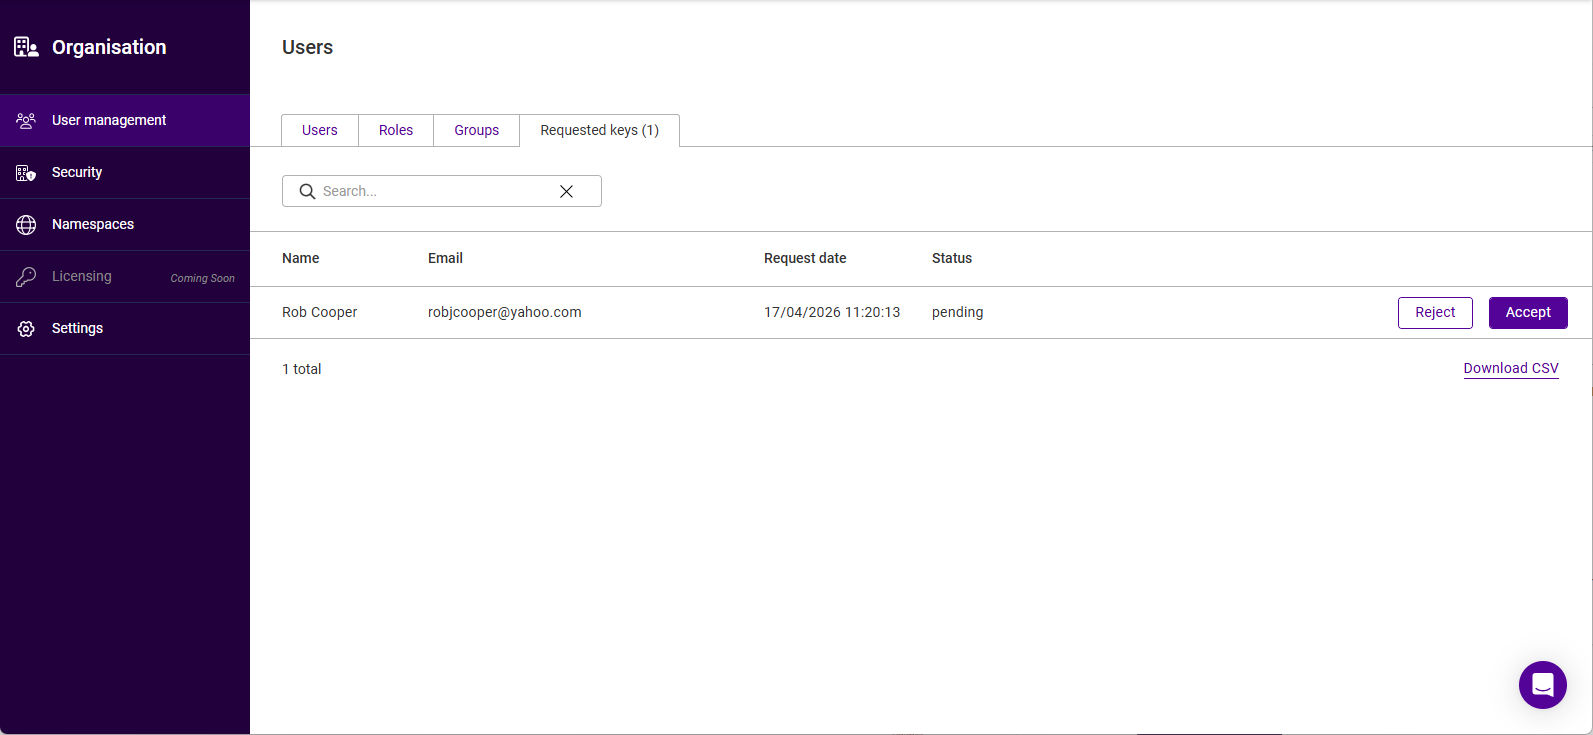
-
Requests can be accepted or rejected using the relevant button.
Settings
To change the account name, contact details or password:
| If a user has forgotten their password and is unable to login, see Password Reset. |
-
Click the Portal menu icon in the top right corner of the main menu bar and select Account.
-
Using the menu to the left, select Settings.
-
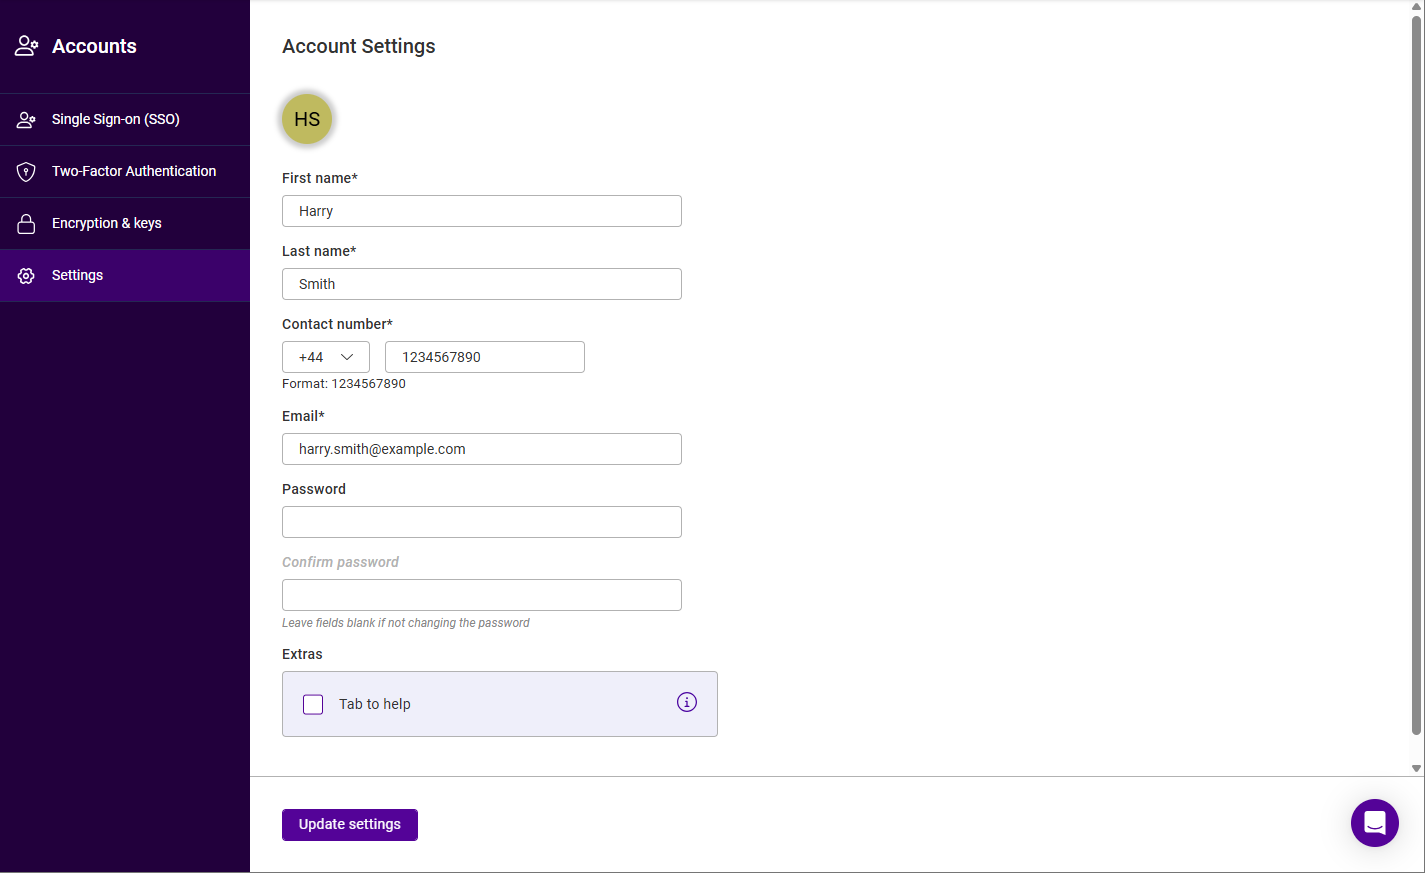
Update the required settings - First name, Last name, Contact number, Email, Password and Confirm password. Leave the two password fields blank if the password is not being changed.
An Extras section is also provided containing the Tab to help checkbox. To change the password you’ll be prompted to enter your current password. -
Click Update settings.
Resources
The Resources area provides access to Loadbalancer.org software downloads and documentation.
-
Click the Portal menu icon in the top right corner of the main menu bar and select Resources.
-
Using the menu to the left, select the required option:
-
Downloads - click the Select button for Loadbalancer Enterprise to download the software.
Downloads for Loadbalancer Endurance are coming soon. -
Documentation - opens the Loadbalancer.org documentation in a new browser tab.
-