System Maintenance
Backup & restore
Backups are created automatically and can also be created manuually as and when required.
Manual Backups
To create a backup:
-
Using the WebUI, navigate to Maintenance > Backup & restore.
-
Click Backup.
-
. The backup archive will be created and downloaded to your browser’s default location or you’ll be prompted to select a location depending on the settings configured.
Restore
-
Using the WebUI, navigate to Maintenance > Backup & restore.
-
Click Upload backup.
To restore an auto backup:
-
Using the WebUI, navigate to Maintenance > Backup & restore.
-
Click the three dots menu next to the auto backup you’d like to restore.
-
Click Restore.
-
Select the Restore Type.
-
If Part Restore is selected:
-
test
-
-
If <appliance-name> (i.e. a full restore) is selected:
-
test
-
-
To restore a manual backup:
-
Using the WebUI, navigate to Maintenance > Backup & restore.
-
Click Upload backup.
-
Click Choose file, then navigate to the location of the backup archive, select the file and click Open.
-
Click Upload to restore the backup.
System services
The various services running on the appliance can be manually reloaded or restarted if required. This is normally only required when a new configuration is added or an existing configuration is modified.
To restart or reload a service:
-
Using the WebUI, navigate to Maintenance > System services.
-
Click the three dots menu next to service you’d like to reload or restart.
-
Select either Reload or Retart.
Appliance Software Update
We recommend that the appliance is kept up to date to ensure that you benefit from the latest bug fixes, security updates and feature improvements. Both online and offline update are supported.
| Services may need to be restarted/reloaded after the update process completes or in some cases a full appliance restart may be required. |
Online Update
The appliance periodically contacts the Loadbalancer.org update server (update.loadbalancer.org) and checks for updates. If an update is found, a notification will be displayed on the main dashboard in the SYSTEM UPDATES widget as shown in the example below:
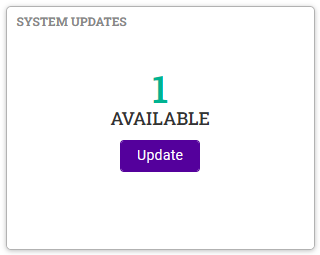
Click Update. Details of the update package(s) available will be displayed as shown in the example below:
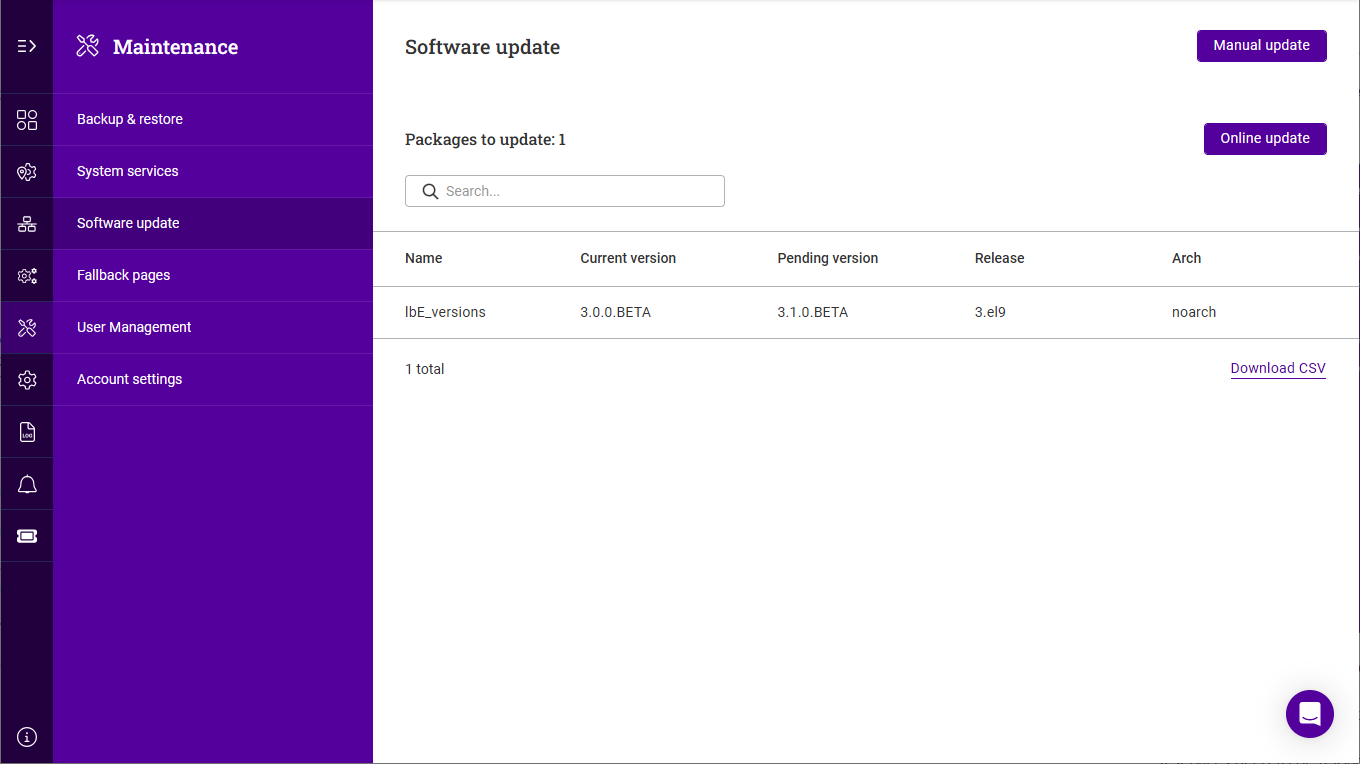
Click Online Update, then click Confirm in the popup to start the update process.
The update process can take several minutes depending on download speed and the number of updates.
If services need to be reloaded/restarted or the appliance needs a full restart, you’ll be prompted accordingly.
Offline Update
If the appliance does not have access to the Internet, offline update can be used. To check if updates are available, please contact our support team.
To perform an offline update:
-
Using the WebUI, navigate to: Maintenance > Software update.
-
Click Manual update.
-
Click Choose File, then browse to and select the update file.
-
If services need to be reloaded/restarted or the appliance needs a full restart, you’ll be prompted accordingly.
Fallback pages
Multiple fallback pages can be added to the appliance. Once added, a fallback page can be associated with one or more Virtual Services.
The fallback page is displayed when all Real Servers are down.
What about when taken offline???
To add a fallback page:
-
Using the WebUI, navigate to Maintenance > Fallback pages.
-
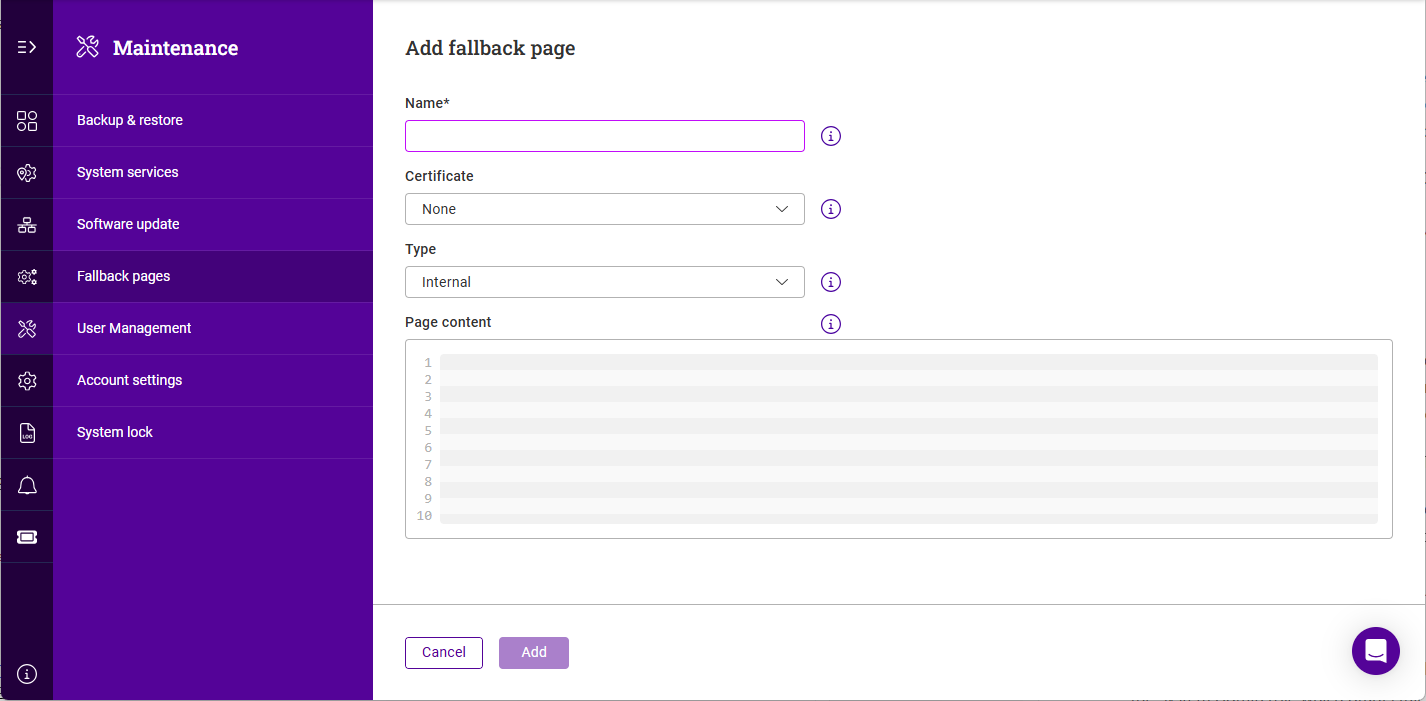
Click Add fallback page.
-
Enter an appropriate Name for the fallback page.
-
If the page should be available on HTTPS, select the relevant Certificate.
-
Select the Type.
-
If Internal is selected:
-
Specify the required page content.
-
-
If External is selected:
-
Specify the IP address and Port of the external fallback server.
-
-
-
Click Update
To add a fallback page:
-
Using the WebUI, navigate to Maintenance > Fallback pages.
-
Click the three dots menu next to the fallback page you’d like to edit.
-
Click Edit.
-
Update the relevant setting(s), then click Update.
User Management
When first deployed, the appliance includes one system administrator account. This account is created when the setup wizard is run.
Adding Users
Additional user accounts can be added if required. Permissions granted to each user are based on the role(s) allocated either directly to the user or via group membership and the permissions configured for those role(s).
To add a new user:
-
Using the WebUI, navigate to Maintenance > User management.
-
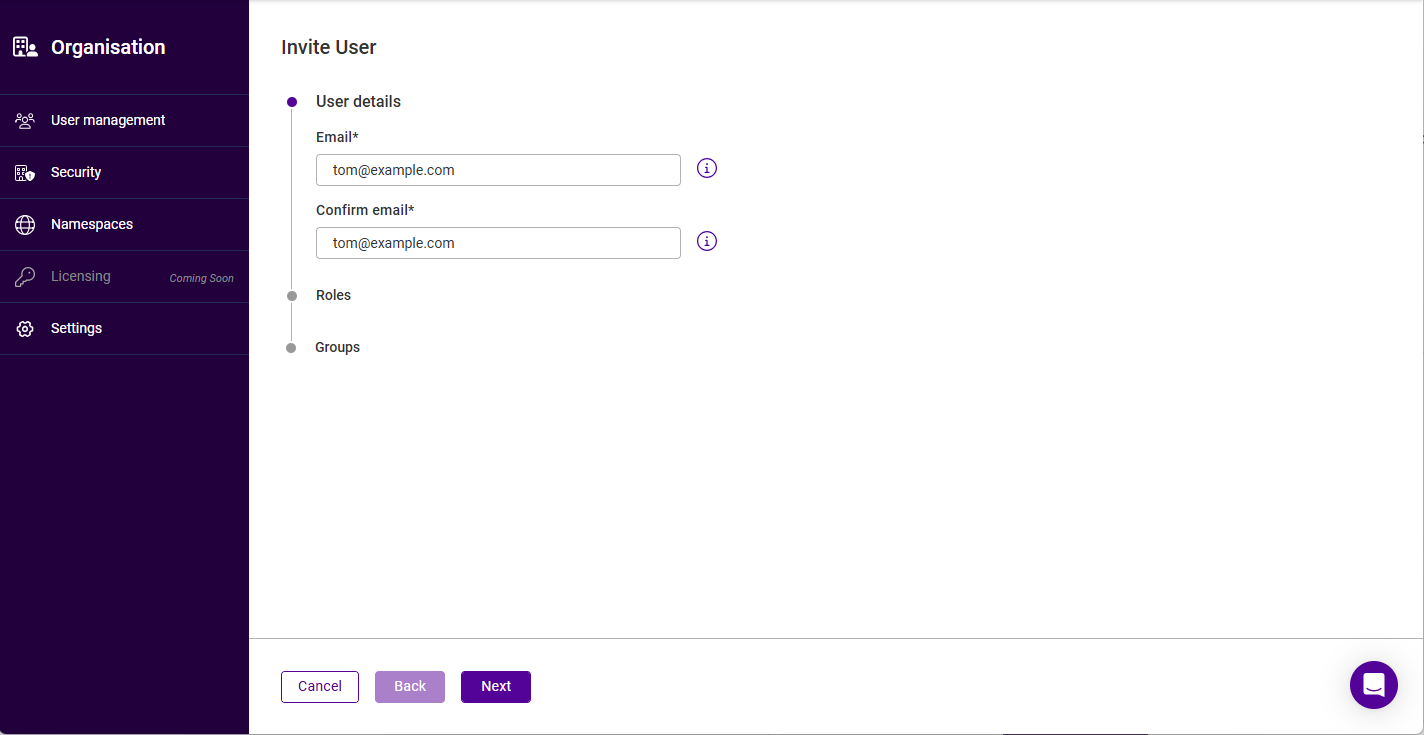
Click the Add user button.
-
Specify and confirm the Email address of the new user, then click Next.
-
Select the required Role(s) and click Next.
-
If any groups have already been configured, select the required Group(s) and click Next.
At least one role or group must be selected. For more information on roles and groups, see Roles & Groups below. -
Click Submit.
-
The account will be added in an "Invited" state and an activation email will be sent to the email address provided.
-
Ask the new user to open the email and click on the link to complete the activation process.
If the activation email doesn’t arrive, advise the user to check in any spam folders. The activation email will come from noreply-portal@loadbalancer.org. The new user will need to download their account private key during the activation process. This key is required if the user forgets their password and wants to reset it. Advise the user to store it in a safe location.
Roles & Groups
Roles
Roles define a set of permissions that can be assigned to users. Three roles are included by default:
-
Owner - full access to all data and settings.
-
Maintainer - full access to all data and settings except for user, group, role and account settings where read only access is provided.
-
Viewer - read only access to all data and settings.
In addition, custom roles can be configured either from scratch or by duplicating one of the default roles and then customizing permissions to suit specific requirements.
To create a new role from scratch:
-
Click the Portal menu icon in the top right corner of the main menu bar and select Organisation.
-
Select the Roles tab.
-
Click the Add role button.
-
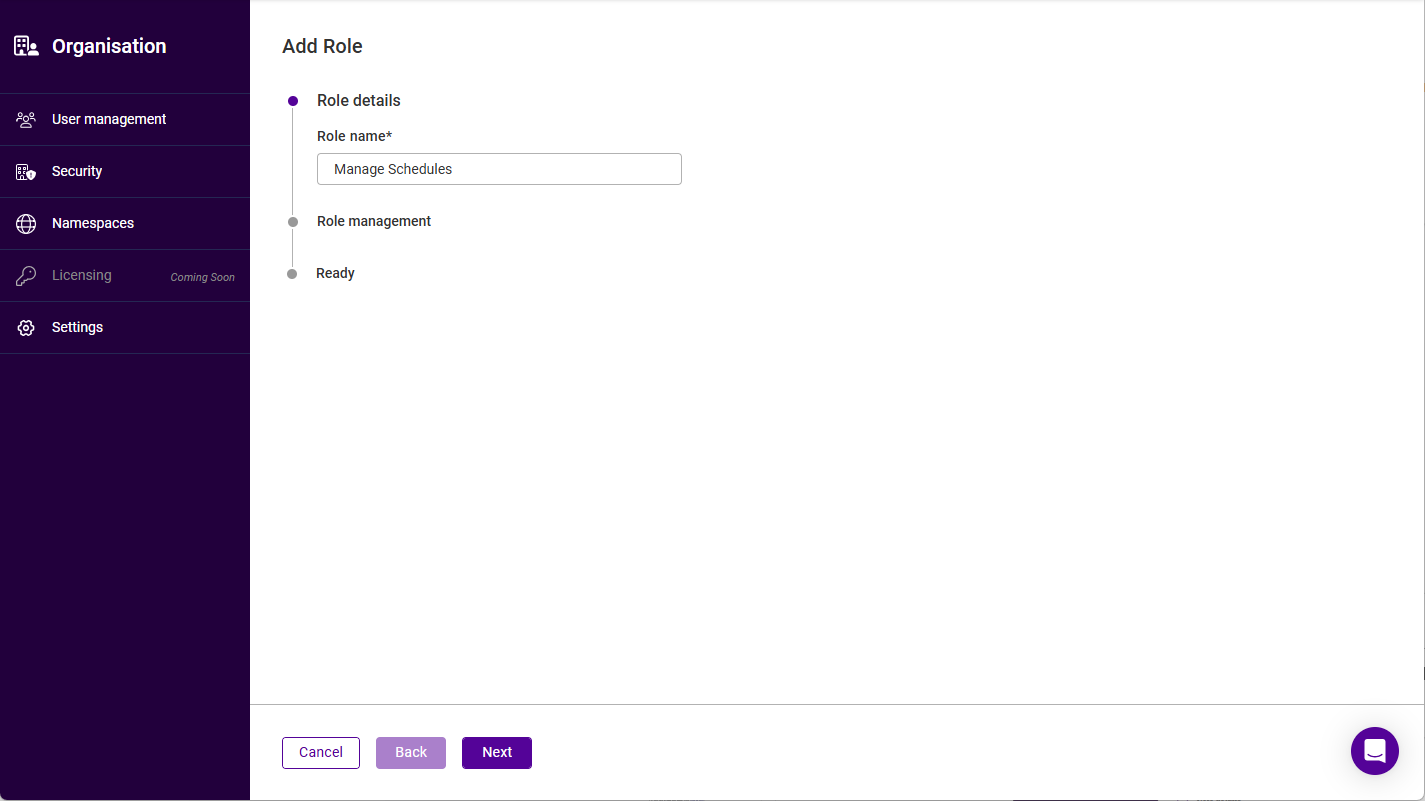
The Add Role form will be displayed:
-
Specify an appropriate Role name, e.g. Manage Schedules and click Next.
-
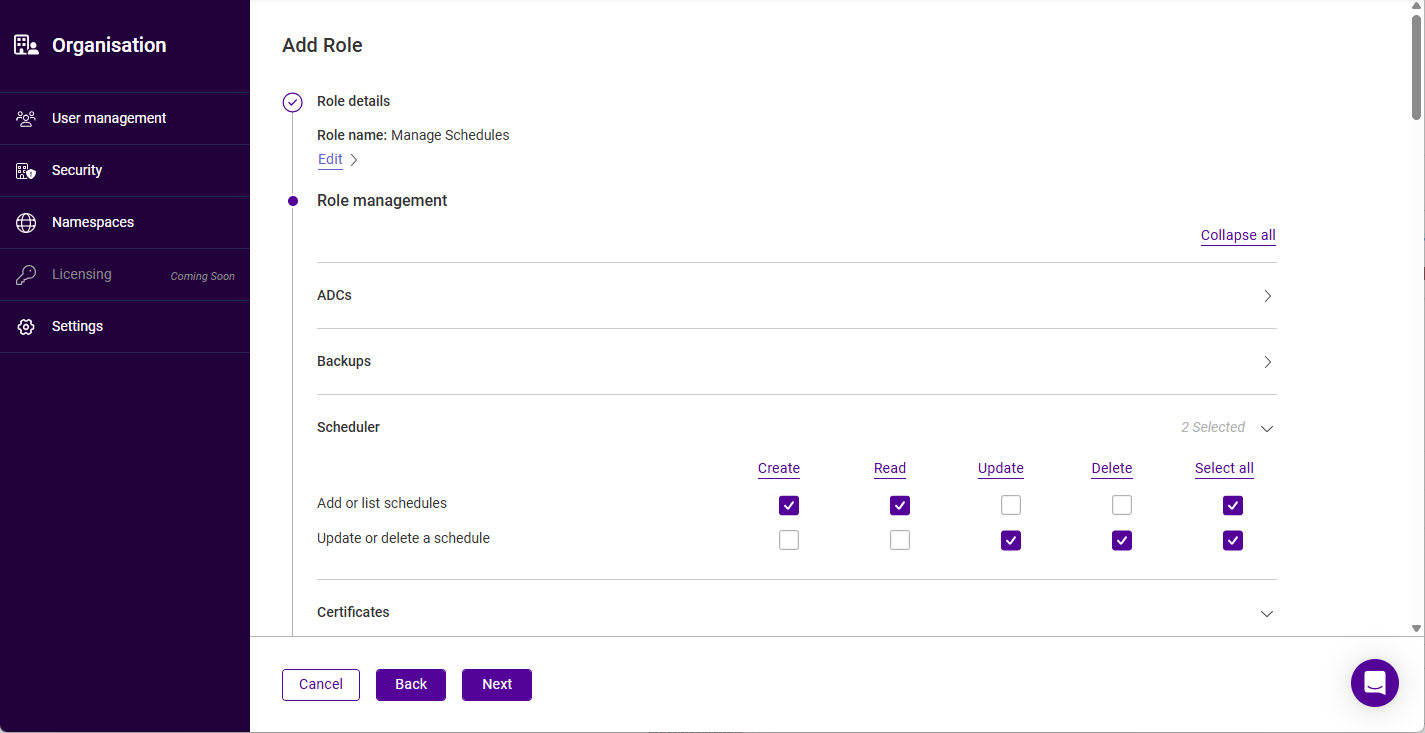
Under the Role Management section either click Expand all or expand the relevant section(s) individually.
-
Select the required permissions. In the example above, all permissions related to schedules have been granted.
-
click Next, then click Submit.
To create a role by duplicating an existing role:
-
In the User Management form select the Roles tab.
-
Click the three dots menu next to the role to be duplicated.
-
Click Duplicate.
-
Specify a name for the new role and click Next.
-
Under the Role Management section either click Expand all or expand the relevant section(s) individually.
-
Configure the required permissions.
-
Click Next, then click submit.
To delete a role:
-
Click the three dots menu next to the role to be deleted.
-
Click Delete, then click Confirm to delete the role.
Groups
A group can have one or more associated roles and each group can contain multiple users. This enables user permissions to be assigned based on group membership.
To create a group:
-
Click the Portal menu icon in the top right corner of the main menu bar and select Organisation.
-
Select the Groups tab.
-
Click the Add group button.
-
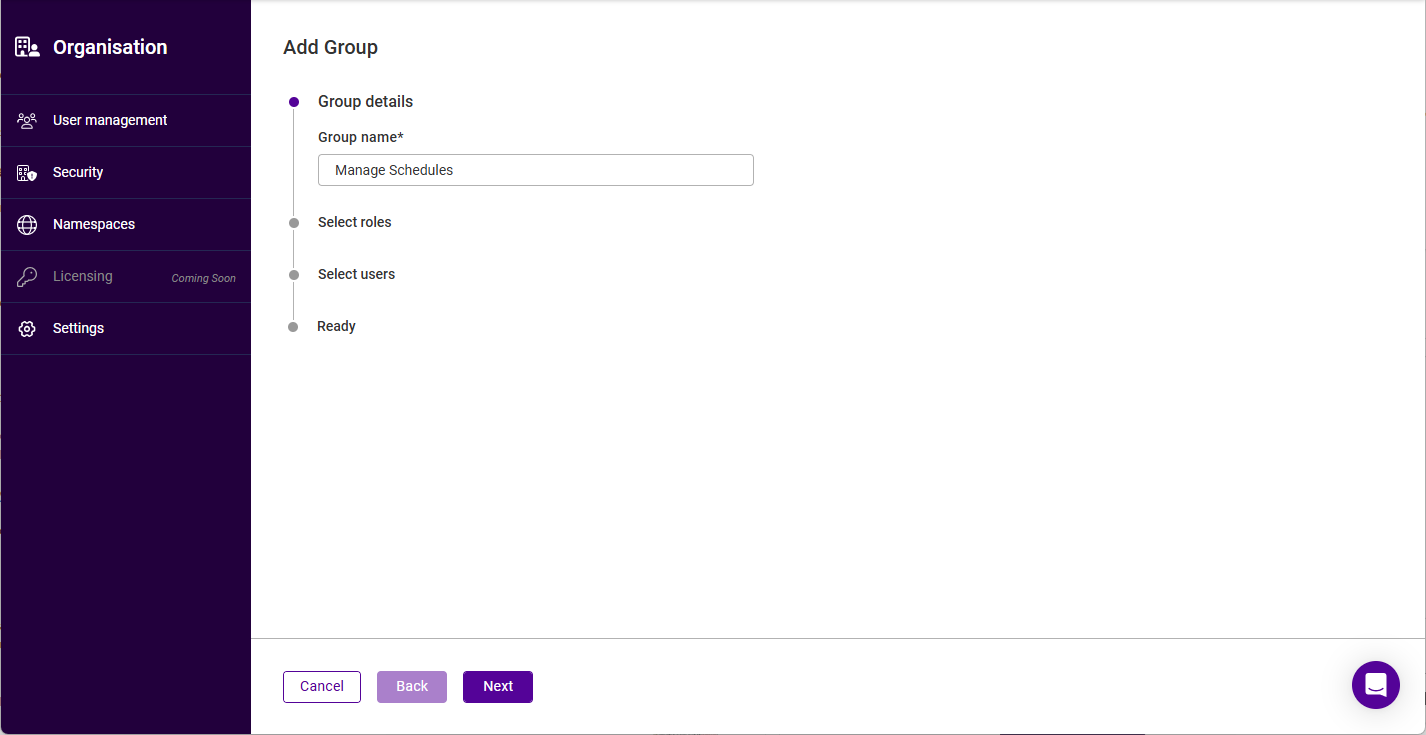
The Add Group form will be displayed:
-
Specify an appropriate Group name, e.g. Manage Schedules and click Next.
-
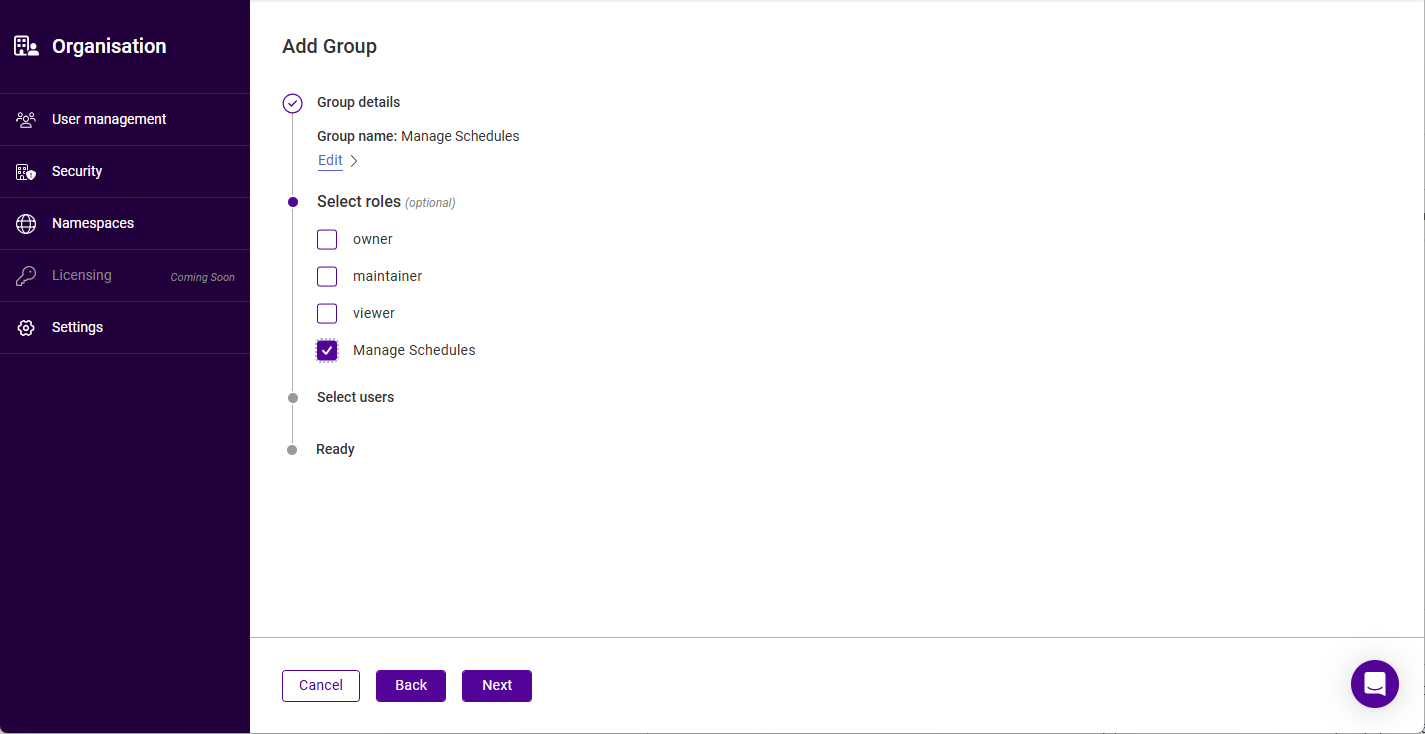
Select the role(s) to be allocated to the group (this can be done later if preferred), then click Next.
-
Select the user(s) that will be members of the group (this can be done later if preferred), then click Next.
-
Click Submit.
As an example, if multiple users were allocated the default Viewer role when first created, they would have read only access to all data and settings. If you wanted to allow those users to configure and manage schedules, they could be made members of the Manage Schedules group created above. Since the Manage Schedules role created above is associated with this group and provides full permissions to all scheduler related functionality, this would grant the required permissions.
To delete a group:
-
Click the three dots menu next to the group to be deleted.
-
Click Delete, then click Confirm to delete the group.