Configuring & Testing a Simple Load Balanced Test Environment
This configuration example illustrates how to configure a simple layer 7 load balanced test environment using the WebUI.
The following diagram and table describe the environment:
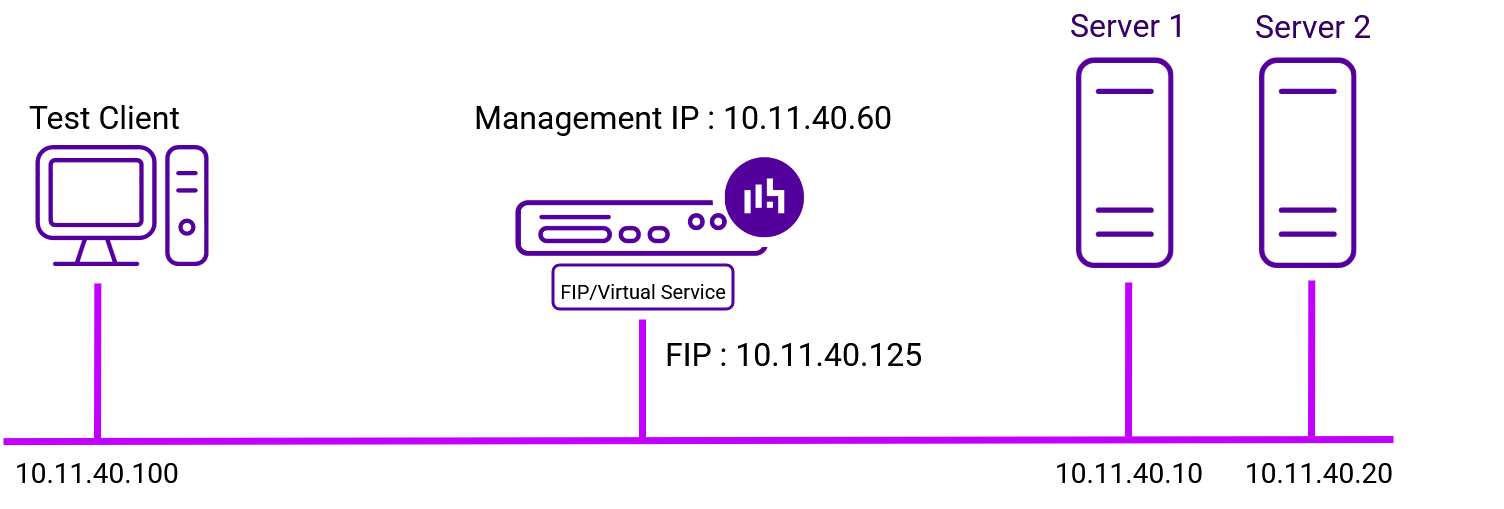
| IP Address | Device | Notes |
|---|---|---|
10.11.40.100 |
Test Client |
|
10.11.40.60 |
Load Balancer |
the load balancer’s management IP address |
10.11.40.125 |
Load Balancer |
the FIP/Service address (floating IP) - the address clients connect to |
10.11.40.10 |
Web Server 1 |
the first Real Server |
10.11.40.20 |
Web Server 2 |
the second Real Server |
Deploy the Appliance
For details on deploying the appliance, please refer to Virtual Appliance Deployment.
Run the Network Setup Wizard
For details on configuring network settings, please refer to Configure Initial Network Settings.
Configure Load Balanced Services
For details on accessing the WebUI, please refer to Accessing the Appliance WebUI.
When using the WebUI, a template based wizard system is used to configure the service.
To add a new service:
-
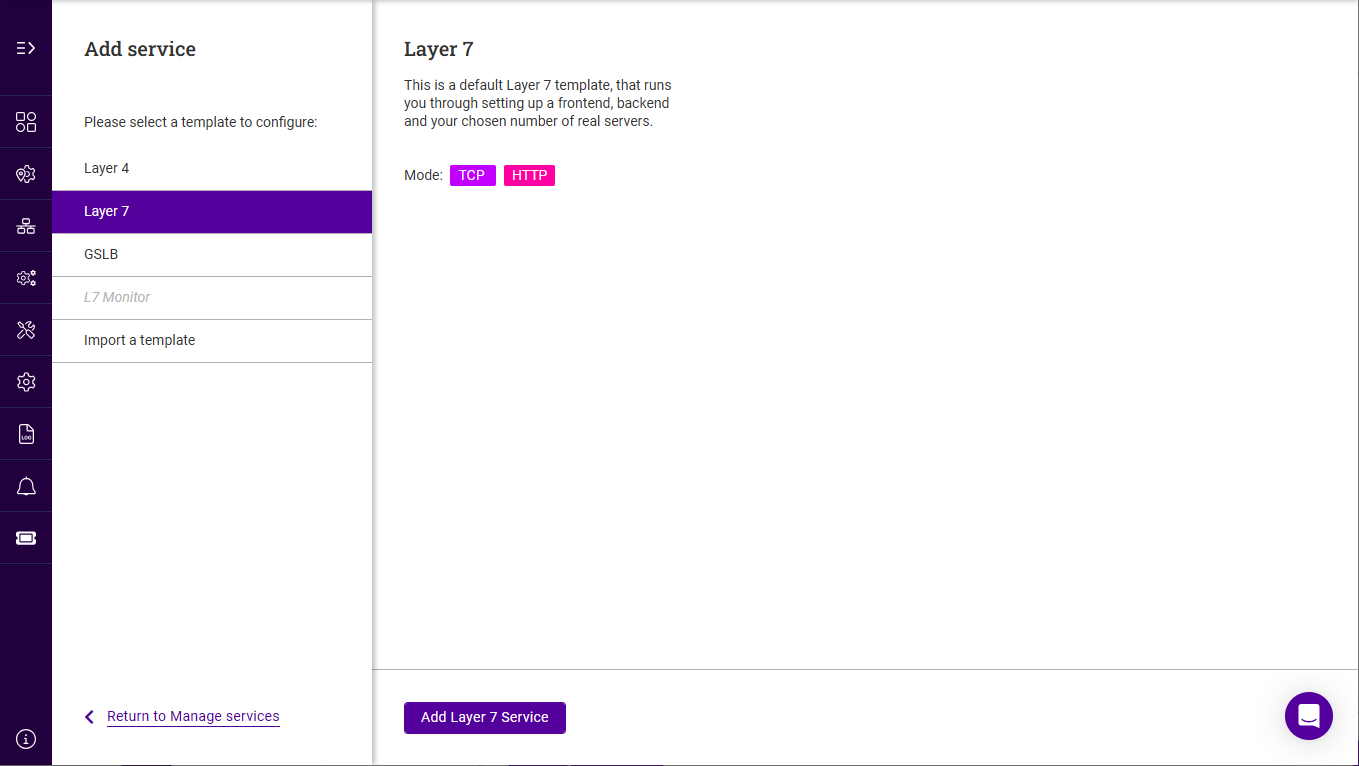
Using the WebUI, navigate to Cluster Configuration > Manage Services and click Add Service.
-
Click Add Layer 7 Service.
-
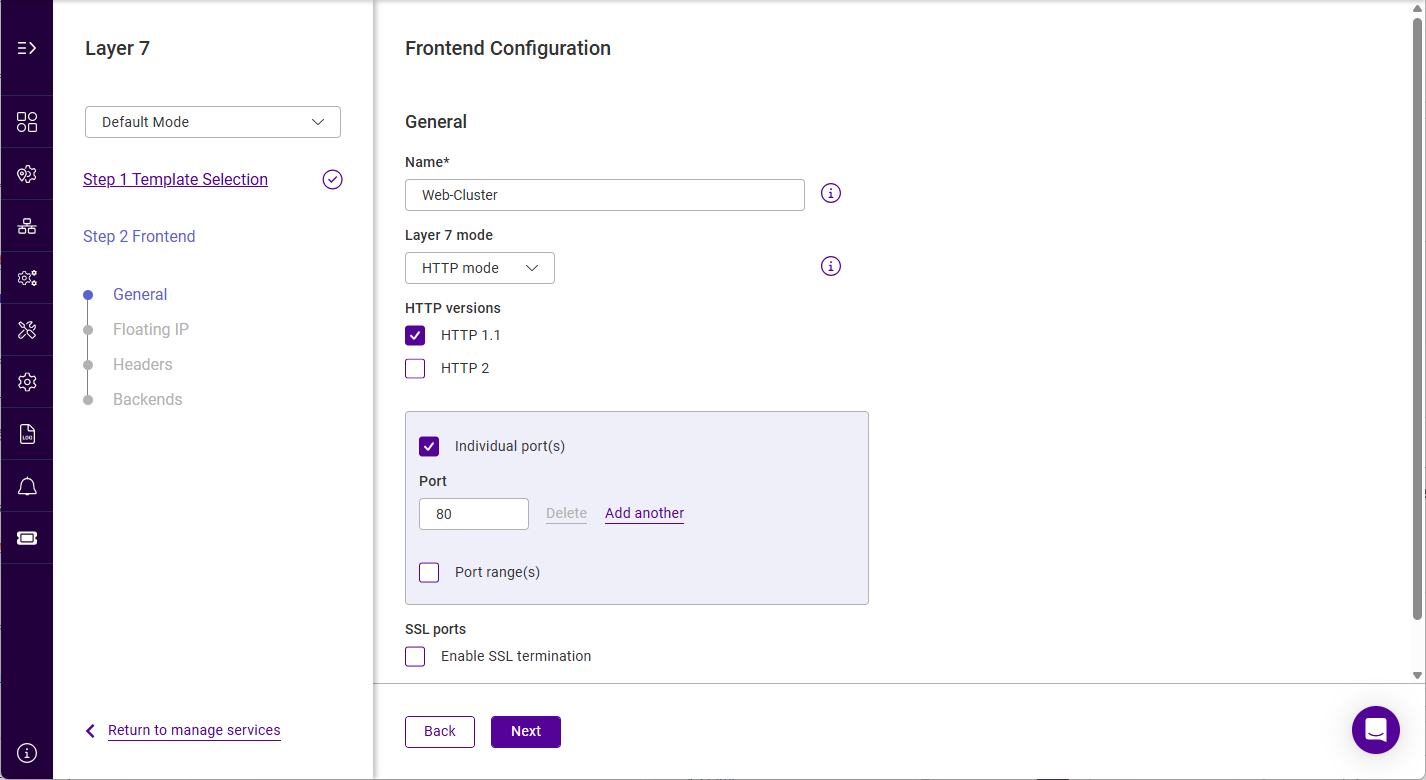
Specify a suitable name for the service, e.g. Web-Cluster.
-
Leave all other settings at their default value.
-
Click Next.
-
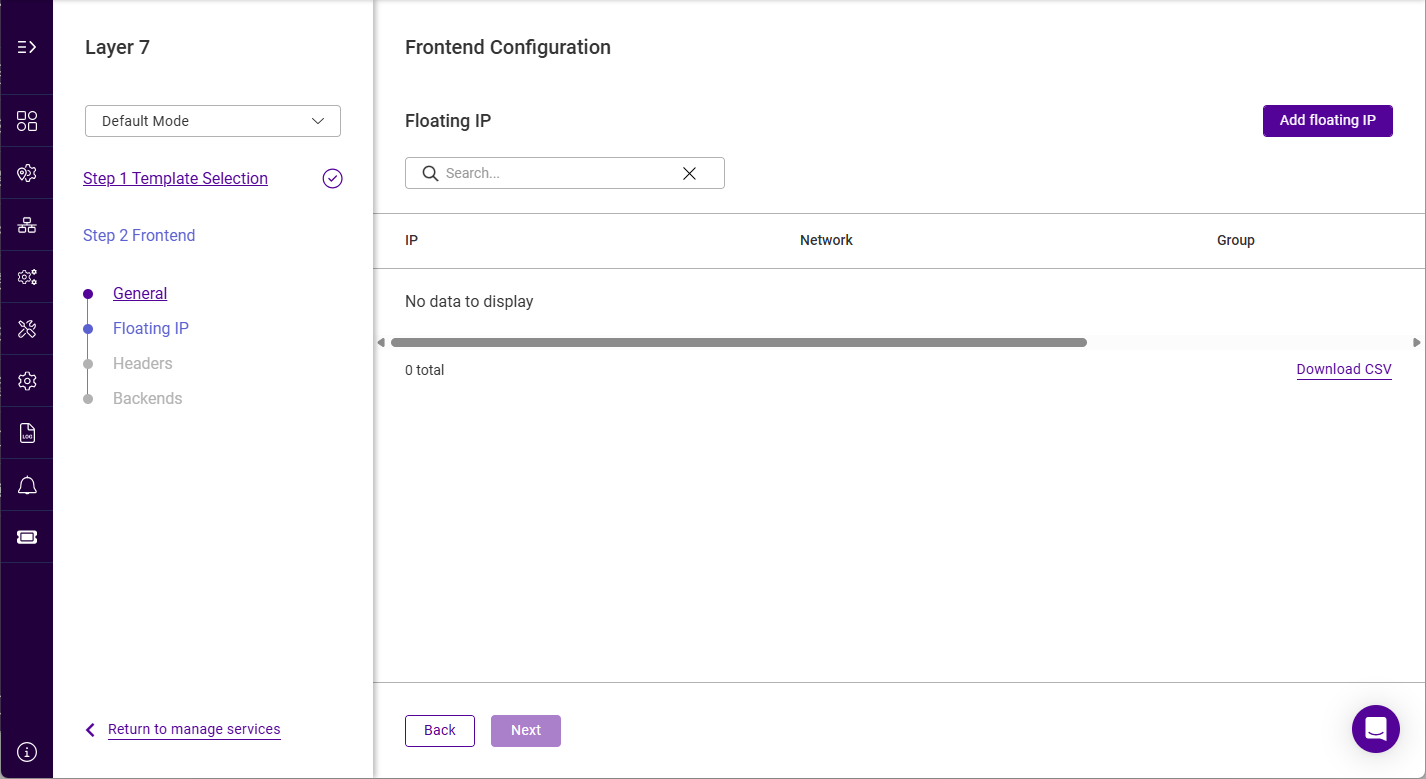
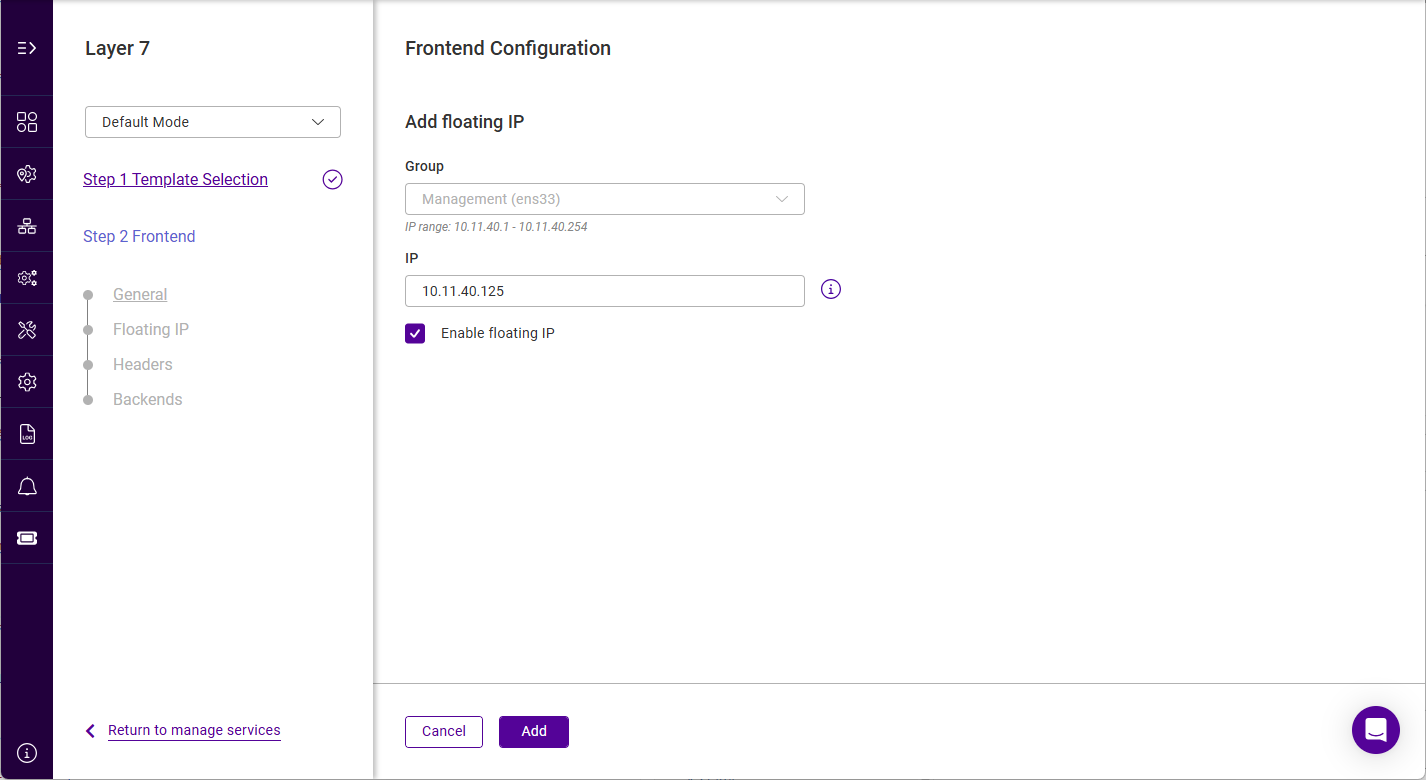
Click Add floating IP.
-
Specify a suitable IP address for the service, e.g. 10.11.40.125.
-
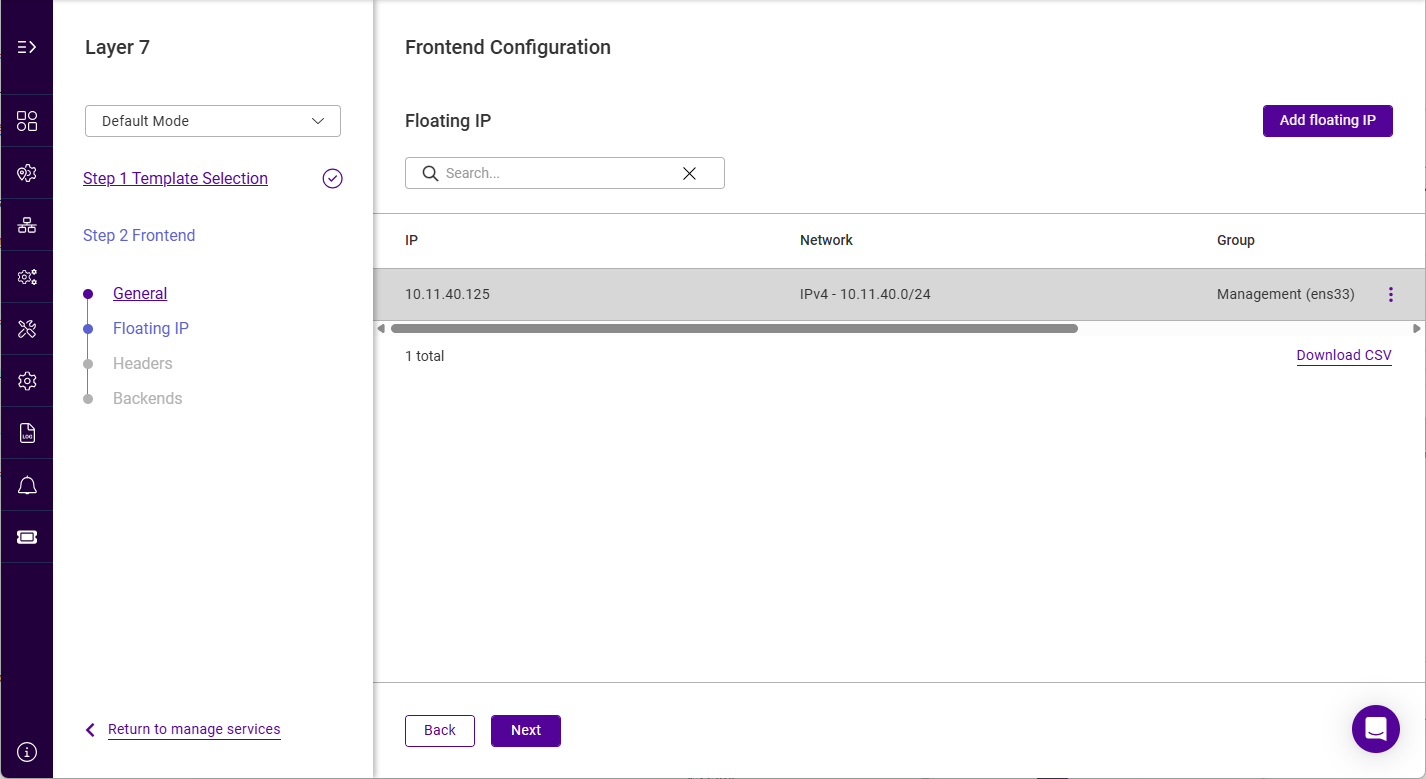
Click Add.
-
Ensure that the Floating IP is selected and click Next until the Backends screen is displayed.
-
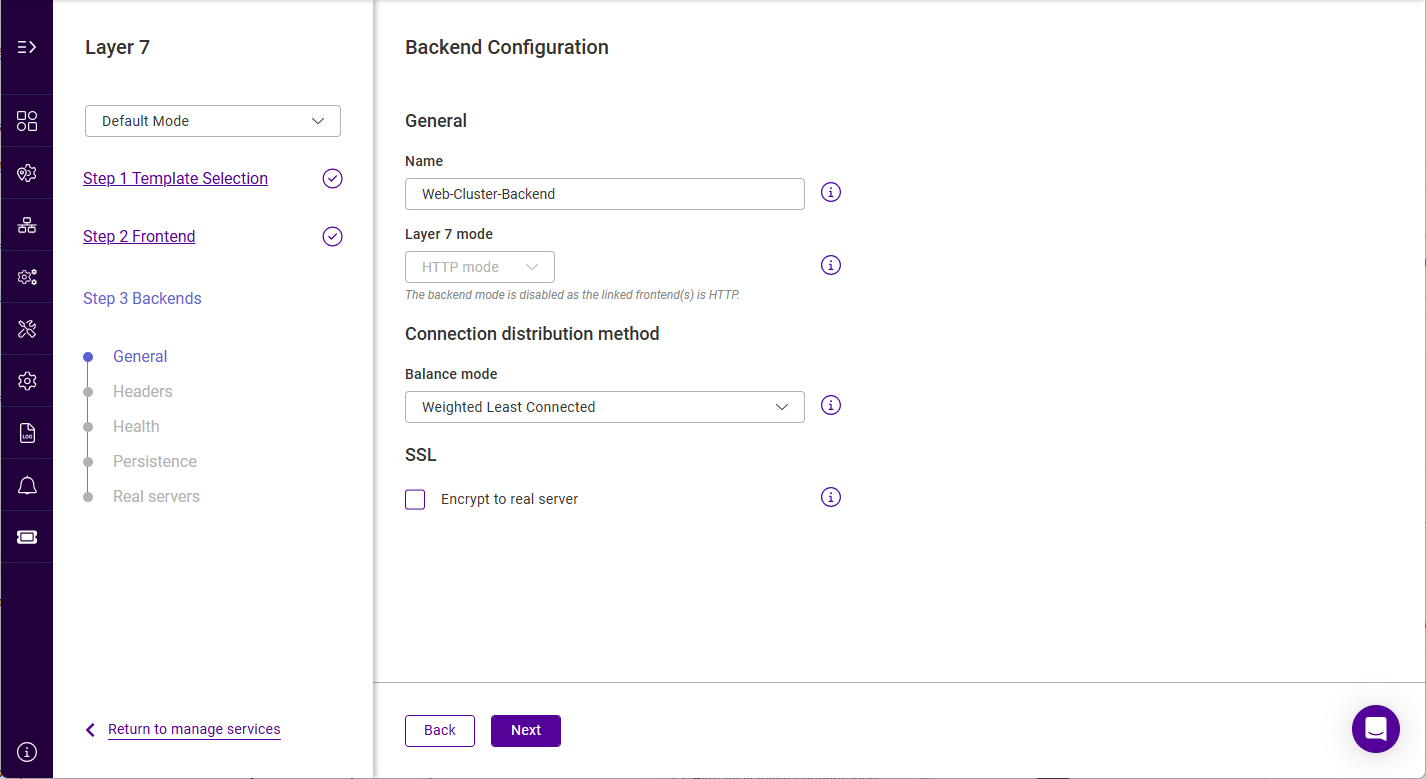
Click Add backend.
-
Specify a suitable Name, e.g. Web-Cluster-Backend.
-
Leave all other settings at their default value.
-
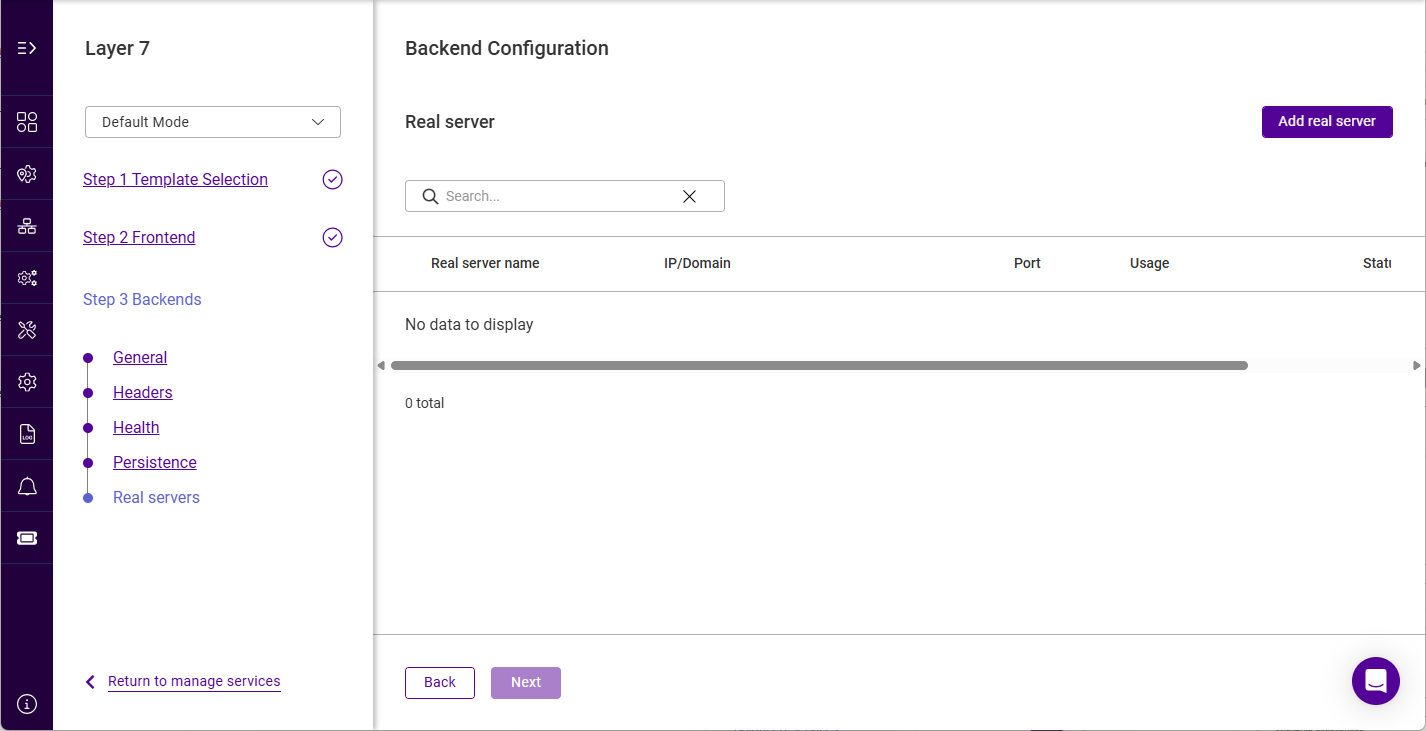
Click Next until the Backend Configuration / Real server screen is displayed.
-
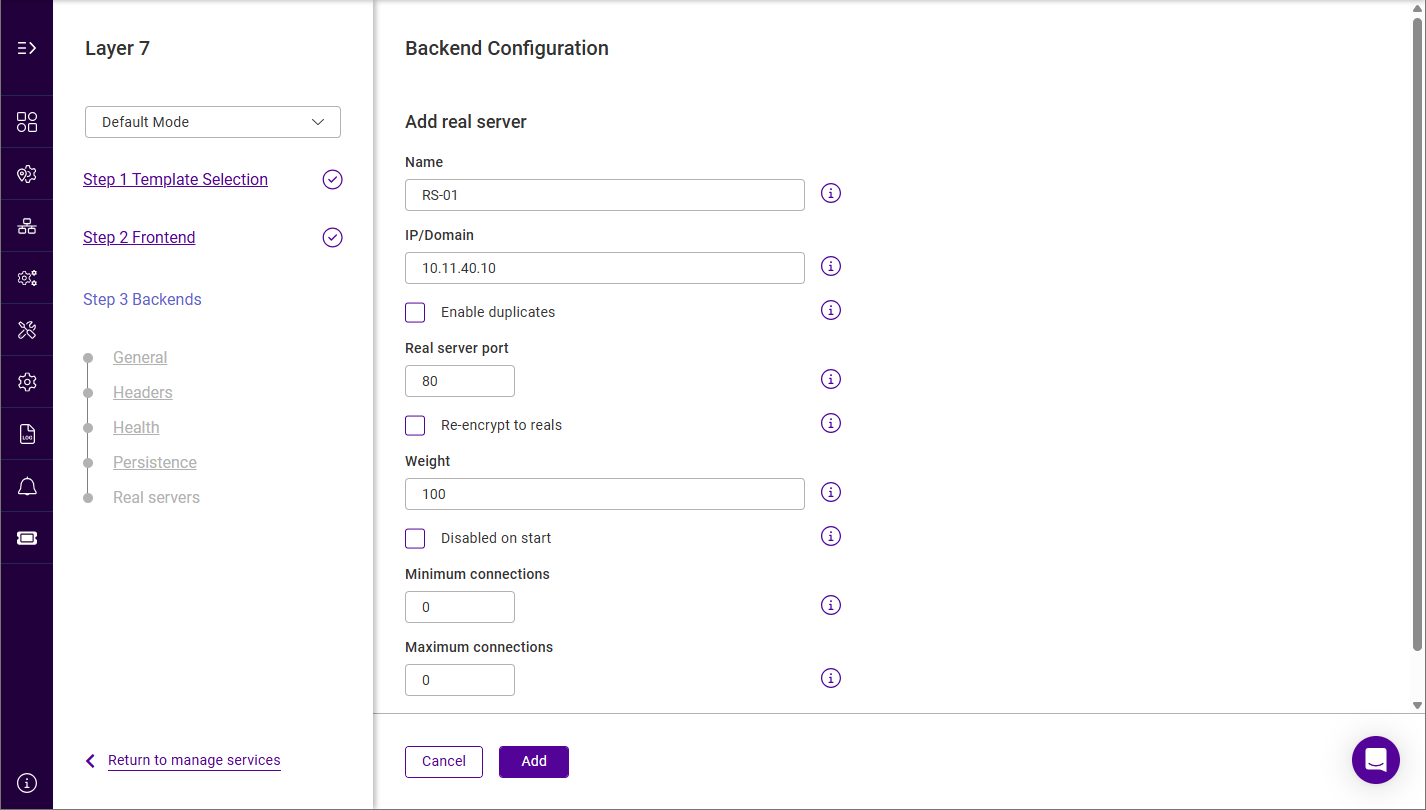
Click Add real server.
-
Specify a suitable Name, e.g. RS-01.
-
Specify the IP address of the first Real Server, e.g. 10.11.40.10.
-
Leave all other settings at their default value.
-
Click Add.
-
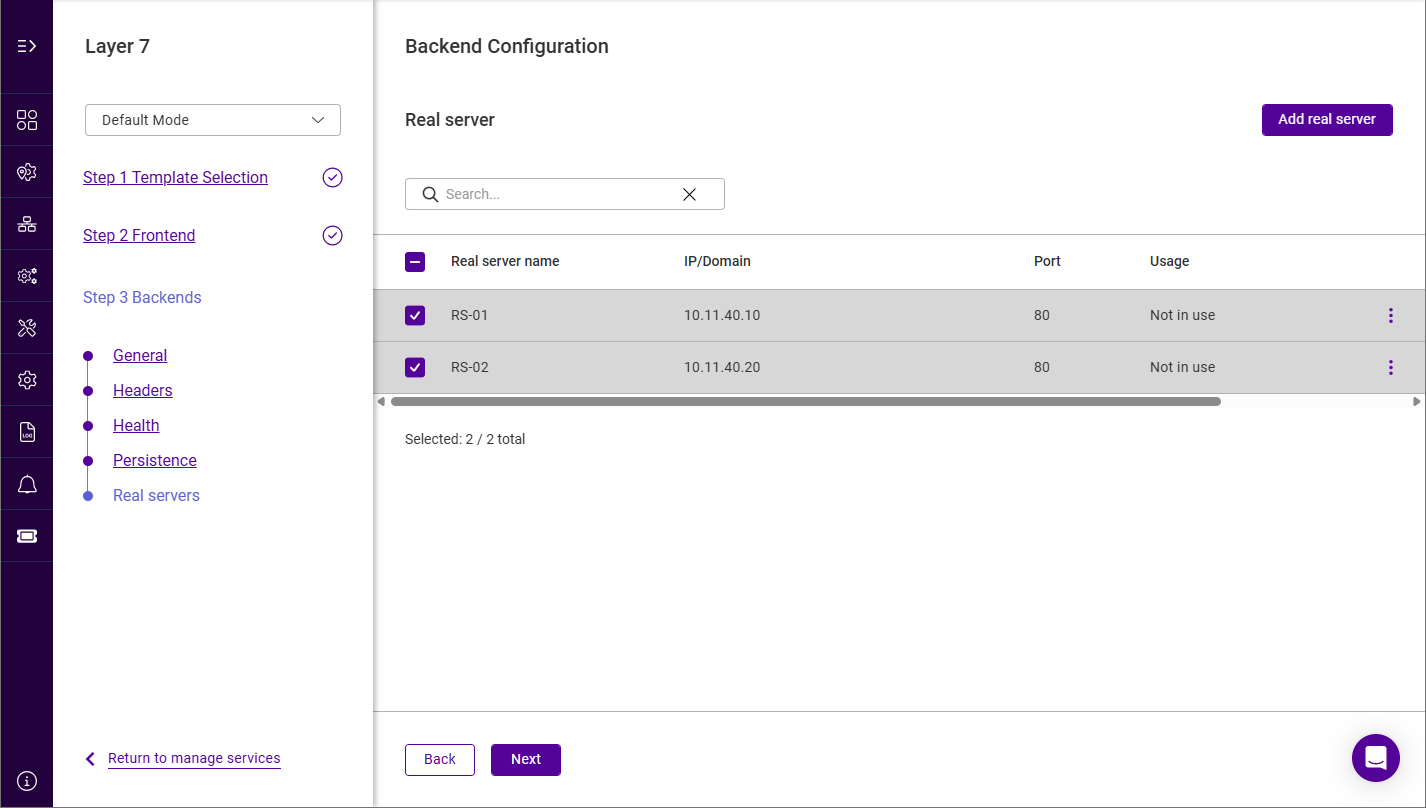
Repeat these steps to add the second Real Server, e.g. 10.11.40.20.
-
Click Next, then click Submit to create the service.
Apply New Settings
To finalize the new configuration, NF Tables must be updated.
To update NF Tables:
-
Using the WebUI, navigate to: Maintenance > System services.
-
Click Update for NF Tables.
| When additional services are added, NF Tables (the firewall service) will again require updating. In addition, HAProxy (the underlying service used for layer 7 Virtual Services) must also be reloaded. |