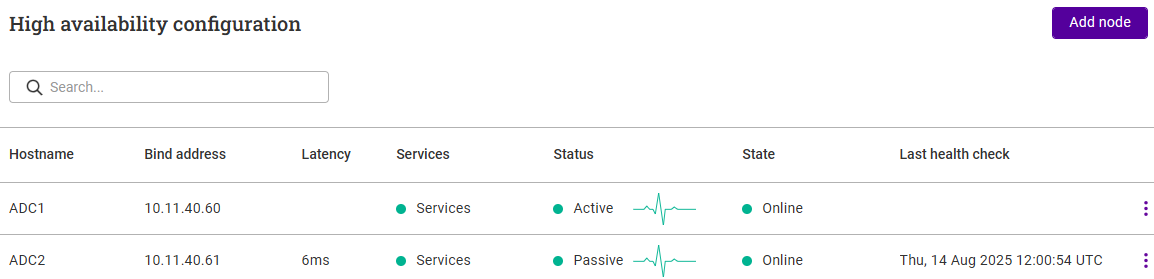
High Availability Configuration
We recommend that 2 appliances are deployed in an HA configuration to provide a highly available and resilient load balancing solution. Once configured, the nodes operate in an active / passive manner. Each node in the cluster uses Pulse to determine the state of the peer node. Should the active node suffer a failure, the passive device will take over.
Once a second node has been added, load balanced services and other settings can be configured and modified on either node, the peer node will automatically be kept in sync.
Non-Replicated Settings/Actions
Some settings/actions are not replicated to the peer, these are listed by WebUI menu option in the table below:
| WebUI Main Menu Option | Sub Menu Option | Description |
|---|---|---|
Local Configuration |
All sub menu options |
Date & time settings, WebUI settings, various physical advanced settings, SNMP, licensing, Prometheus collector setting and ADC Portal related settings |
Network |
Interfaces |
Network interface settings |
Network |
IP Groups (Subnets) |
Network subnet settings |
Network |
Static IP |
Static IPs |
Maintenance |
Backup & Restore |
Creation of backups |
Maintenance |
Software Update |
Appliance software updates |
| Make sure that the items listed above are configured/actioned on each node. |
Configuring HA
-
Deploy a second appliance and Configure Initial Network Settings.
-
Using the WebUI on the first appliance, navigate to: Cluster Configuration > High-availability configuration.
-
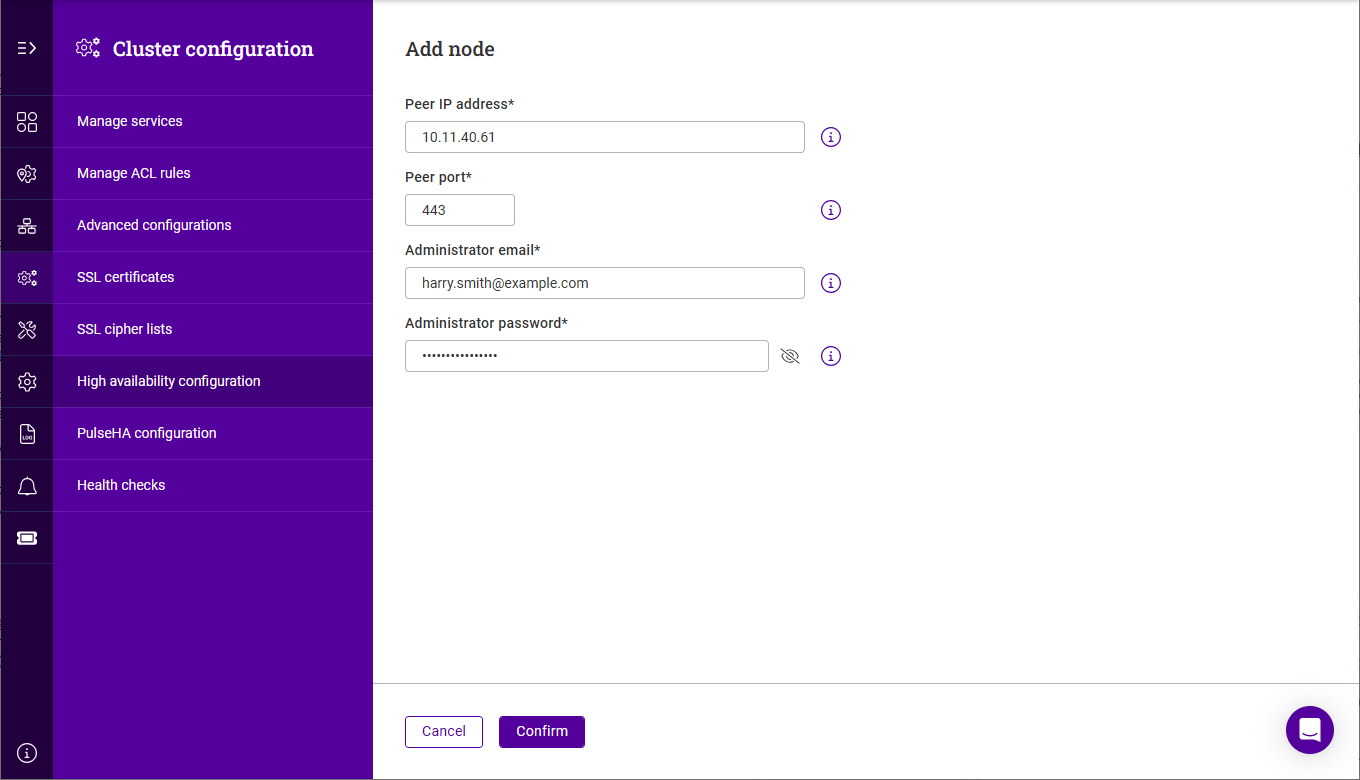
Click Add node.
-
Specify the Peer IP address, Administrator email and Administrator password for the second node.
-
Click Confirm and Confirm again in the popup to start the clustering process.