Application programming interface (API)
This chapter covers the appliance’s REST API - the port it is served on, how requests are formed and authenticated, where the full endpoint reference is published, and a worked example that builds a complete Layer 7 service using API requests alone.
Endurance has been built from the ground up with an API-first approach to meet modern infrastructure challenges. Every appliance function is accessible through a modern RESTful API, enabling headless operation, full automation and seamless integration with existing toolchains, with real-time updates available via WebSocket connections.
The appliance can be configured either using the WebUI or by sending API requests directly. In fact, when the WebUI is used, it calls the same API in the background to configure the appliance. This means that anything that can be done in the WebUI can also be achieved through the API.
API calls can be formed and sent using any RESTful-compliant application or API test client. This enables Endurance to be configured without using the WebUI.
The API Port
The API is served over HTTPS on the same IP address and port as the WebUI. By default, the API listens on port 443. The listening IP address and port are configured on the User Interface page - for details, refer to User interface.
Sending API Requests
All API endpoints share a common base URL that is formed from the appliance’s IP address and API port, followed by the API version:
https://<appliance-IP-address>:<API-port>/api/v1/
For example, the base URL for the appliance used throughout this manual would be https://10.11.40.70:443/api/v1/.
Each request uses the standard HTTP method appropriate to the action being performed:
-
GET - retrieve one or more existing objects.
-
POST - create a new object.
-
PUT - update an existing object, or apply pending configuration changes.
-
DELETE - remove an existing object.
Request and response bodies are formatted as JSON.
Every response shares the same envelope, whether the request succeeded or failed:
{
  "status": "success",
  "uid": "ef6-744-6d8-263",
  "message": "Successfully returned all services info",
  "data": []
}-
status - either
successorerror. -
uid - a unique identifier for the request. Quote it when reporting a problem to our support team.
-
message - a human-readable summary of the outcome.
-
data - whatever the request returned. For a request that reads, creates or updates an object this is the object itself (or a list of objects); where there is nothing to return it is an empty list.
When a request fails, status is error and an additional error object lists the individual
problems. Each carries its own message and, where the problem relates to a particular input, the
field it applies to:
{
  "status": "error",
  "uid": "b57-681-e6c-8c8",
  "message": "Invalid user credentials.",
  "data": [],
  "error": {
    "errors": [
      {
        "type": "invalid",
        "message": "Invalid user credentials.",
        "field": ""
      }
    ]
  }
}|
As with the WebUI, configuration changes made through the API are staged and do not take effect until they are applied. To apply pending changes and restart the affected services on every node in the cluster, send: PUT https://<appliance-IP-address>:<API-port>/api/v1/services/apply To apply the pending changes on a single appliance only, include its appliance ID (returned when authenticating) in the path: PUT https://<appliance-IP-address>:<API-port>/api/v1/<appliance-id>/services/apply |
Authentication
Endurance uses token-based (bearer token) authentication. Before sending any other request, you must authenticate to obtain an access token.
To authenticate:
-
Send a POST request to the token endpoint, passing the same email address and password used to log into the appliance in the request body:
RequestPOST https://<appliance-IP-address>:<API-port>/api/v1/token
Body{ "email": "<your-email-address>", "password": "<your-password>" } -
The response contains the access token, together with the appliance ID, in its
dataobject:{ "data": { "token": "<access-token>", "appliance_id": "<appliance-id>" } } -
Include the token as a bearer token in the Authorization header of all subsequent requests:
Authorization: Bearer <access-token>
The token obtained above is tied to your interactive login and is short-lived - it carries an expiry, after which it is rejected and a fresh token must be requested. For a script or integration that should not embed a user account’s password, create a personal access token instead - it has its own, much longer expiry and is limited to the endpoints you select when it is created. A personal access token is presented in exactly the same way, as a bearer token in the Authorization header. See Personal access tokens.
API Reference
Complete reference documentation for the API - covering every available endpoint, along with its request parameters and response fields - is provided in the Endurance API reference.
Configuring Endurance Using Bruno
Bruno is a free, open-source API client, much like Postman, and is available for Linux, Windows and macOS. The difference is that it runs entirely on your own machine: your requests, environments and credentials are stored as plain files on your disk and are never synced to a vendor’s cloud or tied to an online account. You don’t have to use Bruno to talk to the Endurance API - any REST client will do - but the ready-made example presented below is a Bruno collection.
Bruno stores its requests and environment settings in a collection. A collection must be run in order to send the requests it contains.
Downloading Bruno
Bruno can be downloaded from the Bruno downloads page.
Download & Import the Ready-made Example Collection
The ready-made example Bruno collection can be downloaded from SimpleTestEnvironment.zip.
| The example collection is the same as the test environment presented in the Getting Started chapter. |
Once downloaded, run Bruno (the screenshots below show Bruno v4.1.0).
To import the collection:
-
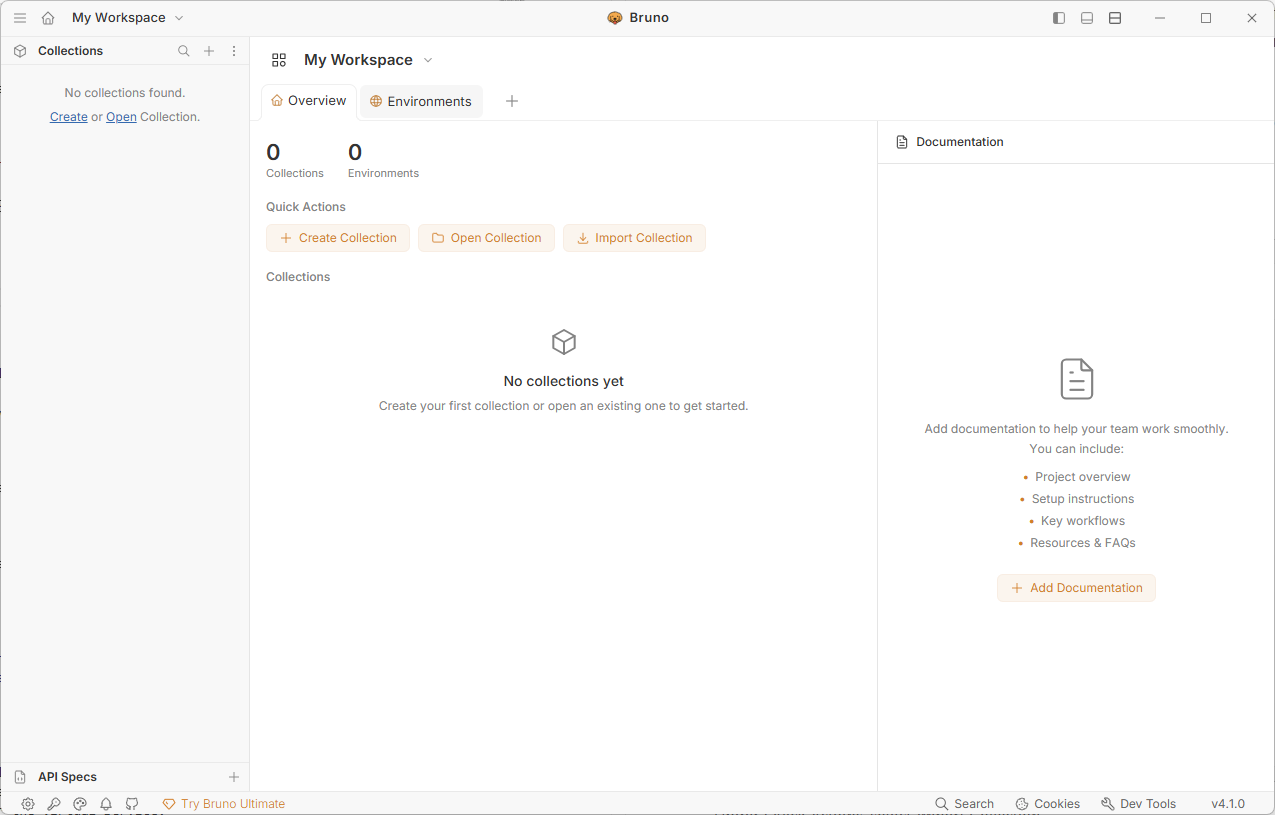
Under Quick Actions, click Import Collection.
-
In the pop-up, select choose file(s), then browse to and select the file downloaded previously and click Open.
-
Under Location, click Browse, then choose a location to store the new collection and click Select Folder.
-
Click Import to import the collection.
-
Under Collections, click Simple Test Environment to select the collection.
Environment Variables
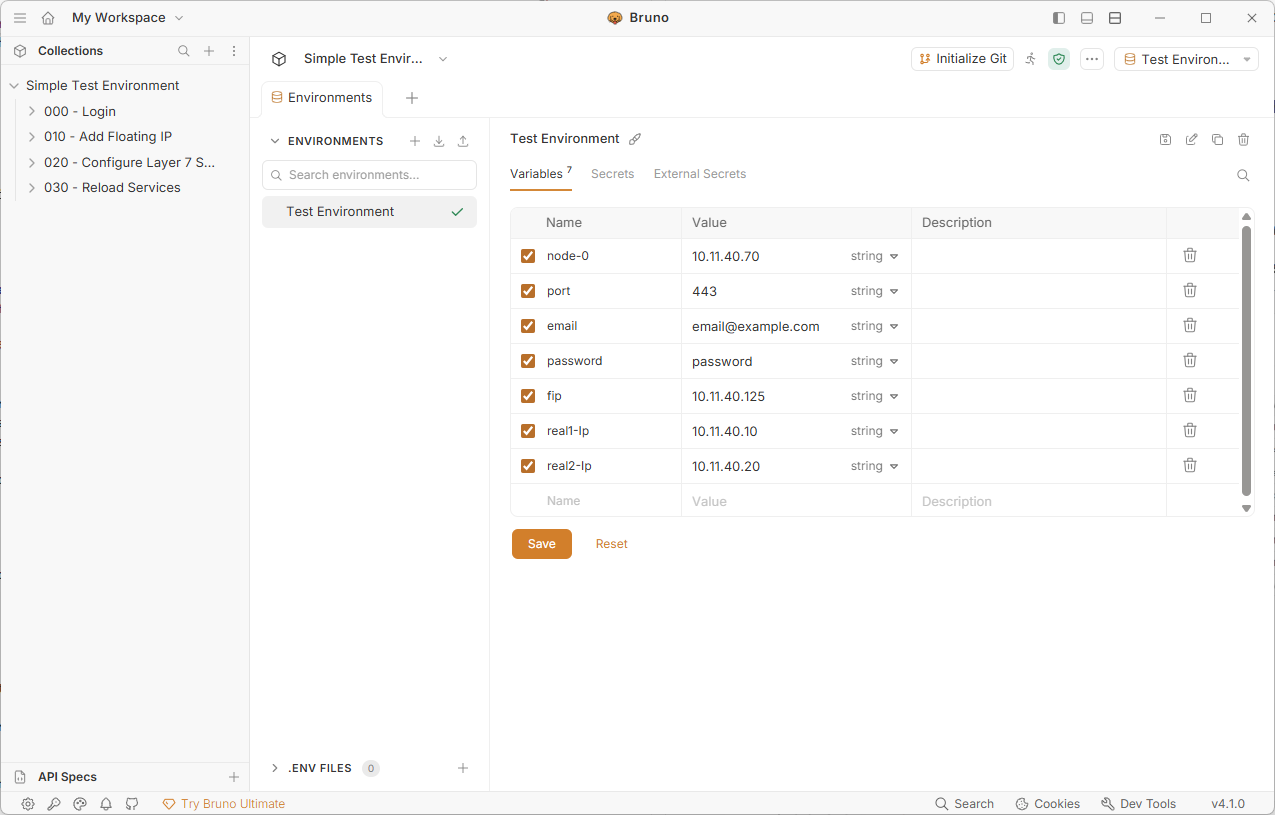
The Test Environment collection uses several environment variables in the API requests; these must be modified to suit your environment.
To edit the environment variables:
-
Click on No Environment in the top right corner, then select Test Environment.
-
Click on Test Environment in the top right corner and select Configure.
-
Change the IP address for node-0 to match your appliance.
-
Change port to the port the API is served on, if it is not the default of 443.
-
Change email to match the email address you use to log in to your appliance.
-
Change password to match the password you use to log in to your appliance.
-
Change the IP address for fip to the IP address you’d like to use for the Virtual Service.
-
Change the IP address for real1-Ip to the address of your first Real Server.
-
Change the IP address for real2-Ip to the address of your second Real Server.
-
Click Save.
-
Command Overview
The table below provides a summary of the API requests that are used to configure the simple test environment:
| Command Group | Request | Purpose |
|---|---|---|
Login |
Login |
Login and obtain access token |
Add Floating IP |
Get Management Group |
Determine the groupId for the management subnet |
Add Floating IP |
Add the floating IP to the management subnet |
|
Configure Layer 7 Service |
Add Real Server 1 |
Add first real server |
Add Real Server 2 |
Add second real server |
|
Add Backend |
Add the backend for the Layer 7 service |
|
Add Default ACL |
Add the default ACL to link frontend and backend |
|
Add Frontend |
Add the frontend for the Layer 7 service |
|
Reload Services |
Reload Required Services |
Restart services to apply new settings (HAProxy and NF Tables) |
Command Details
The following sections provide full details of all API requests.
Login
POST https://{{node-0}}:{{port}}/api/v1/token
{
  "email": "{{email}}",
  "password": "{{password}}"
}bru.setEnvVar("token", res.body.data.token);
bru.setEnvVar("localnodeid", res.body.data.appliance_id);Get Management Group
GET https://{{node-0}}:{{port}}/api/v1/ipgroups/
Bearer token : {{token}}
var groupId = ""
for (let i = 0; i < res.body.data.length; i++) {
    if (res.body.data[i].name == "Management") {
        groupId = res.body.data[i].id
    }
}
bru.setEnvVar("groupId", groupId);
Add Floating IP
POST https://{{node-0}}:{{port}}/api/v1/fips
{
  "groupId": "{{groupId}}",
  "ip": "{{fip}}",
  "enabled": "true"
}Bearer token : {{token}}
bru.setEnvVar("fipId", res.body.data.id);Add Real Server 1
POST https://{{node-0}}:{{port}}/api/v1/haproxy/rips
{
  "name": "RS-01",
  "ipDomain": "{{real1-Ip}}",
  "port": 80,
  "weight": 100,
  "minconns": 0,
  "maxconns": 0,
  "enabledCount": false
}Bearer token : {{token}}
bru.setEnvVar("real1-Id", res.body.data.id);Add Real Server 2
POST https://{{node-0}}:{{port}}/api/v1/haproxy/rips
{
  "name": "RS-02",
  "ipDomain": "{{real2-Ip}}",
  "port": 80,
  "weight": 100,
  "minconns": 0,
  "maxconns": 0,
  "enabledCount": false
}Bearer token : {{token}}
bru.setEnvVar("real2-Id", res.body.data.id);Add Backend
POST https://{{node-0}}:{{port}}/api/v1/haproxy/backends
{
  "name": "Web-Cluster-Backend",
  "mode": "tcp",
  "ripIds": ["{{real1-Id}}","{{real2-Id}}"],
  "balanceMode": "leastconn",
  "persistenceMode": "none",
  "healthCheck": "connectToPort",
  "healthCheckPort": 80,
  "healthCheckRequestToSend": "/",
  "healthCheckResponseExpected": "",
  "encryptToBackend": false,
  "enableGzipCompression": false,
  "headers": "",
  "httpPipeline": "httpKeepAlive",
  "httpPretendKeepalive": false,
  "httpAcceptInvalidResponse": false,
  "httpRequestTimeout": true,
  "tunnelTimeout": "1h",
  "TCPKeepalive": false,
  "connectionRedispatch": true,
  "abortOnClose": false,
  "slowStartTime": "3s",
  "backendSourceAddress": "",
  "enableServerConnTimeout": true,
  "serverTimeout": "43s",
  "enableFeedbackAgent": false,
  "feedbackAgentPort": 3333,
  "feedbackAgentInterval": "2s",
  "fallbackPersistence": false,
  "enableTProxy": false,
  "sendProxyProtocol": "off"
}Bearer token : {{token}}
bru.setEnvVar("backend-id", res.body.data.id);Add Default ACL
POST https://{{node-0}}:{{port}}/api/v1/haproxy/acls
{
  "redirectLocation": "{{backend-id}}",
  "redirectType": "backend",
  "name": "Web-Cluster default",
  "conditionSet": {
    "terms": [
      {
        "conditionGroups": [
          {
            "conditions": [
              {
                "conditionType": "default",
                "conditionValues": []
              }
            ]
          }
        ]
      }
    ]
  }
}Bearer token : {{token}}
bru.setEnvVar("acl-default-id", res.body.data.id);Add Frontend
POST https://{{node-0}}:{{port}}/api/v1/haproxy/frontends
{
  "name": "Web-Cluster",
  "ports": [80],
  "mode": "tcp",
  "fipID": "{{fipId}}",
  "aclIds": ["{{acl-default-id}}"],
  "SSLEnable": false,
  "SSLTLSv130rttEnable": false,
  "tcpKeepalive": false,
  "acceptProxyProtocol": false,
  "SSLMinVer": "TLSv1.2",
  "SSLMaxVer": "TLSv1.3",
  "httpsForceToRedirect": false,
  "httpsRedirectCode": 301,
  "hstsEnable": false,
  "hstsTimeout": 6,
  "sslCerts": [],
  "maximumConnections": 40000,
  "enableClientConnTimeout": false,
  "clientTimeout": "42s",
  "httpPipeLine": "httpKeepAlive",
  "httpAcceptInvalidRequest": false,
  "httpRequestTimeout": true,
  "httpPretendKeepalive": false,
  "setXForwardedforHeader": false
}Bearer token : {{token}}
bru.setEnvVar("frontend-id", res.body.data.id);Run the Collection
Under Collections, right-click Simple Test Environment, select Run then click Run 9 Requests.
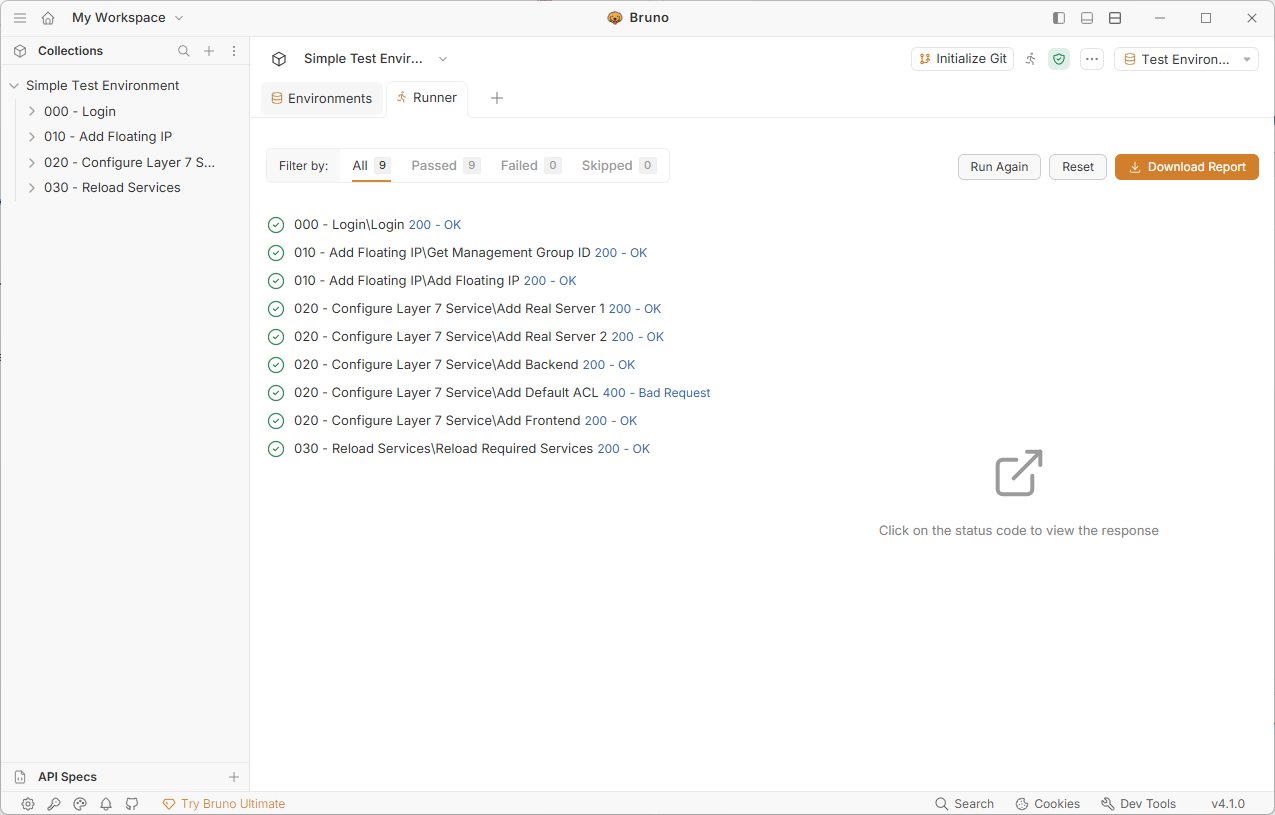
The above image shows that all requests have completed successfully. This confirms that the simple test environment has been created.
For details on viewing/modifying and testing the configuration, please refer to the Getting Started chapter.
|
Every endpoint, its parameters and its responses are listed in the API Reference. |