High availability
High availability
Loadbalancer.org recommends deploying multiple nodes in a cluster to provide a highly available, resilient load balancing solution and avoid a single point of failure. This section explains the clustering concepts and describes how to create and manage an HA cluster.
| A single appliance can be deployed, but this introduces a single point of failure. We always recommend deploying at least two appliances in a cluster. |
Clustering Concepts
A cluster operates in an Active-Passive manner and can contain up to four nodes — one active node and up to three passive nodes:
-
Under normal conditions the active node handles all traffic.
-
Each node runs PulseHA, which continually health checks the other nodes in the cluster. If the active node fails, one of the passive nodes automatically becomes active and takes over the floating IP addresses and traffic. This is known as fail-over.
Once the cluster has been formed, load balanced services and most other settings can be configured or modified on any node — the other nodes are automatically kept in sync. Configuration is replicated between the nodes over the network using SSH/SCP.
Clustering can be configured at any time. Clustering is always initiated from the appliance that is to become the active node. When a passive node is added to the cluster, the active node’s configuration is replicated to it, which erases any existing configuration on the passive node.
Non-Replicated Settings & Actions
Most configuration is automatically replicated between the nodes. The settings and actions listed below are not replicated and must therefore be configured or performed on each node individually:
| Option | Description |
|---|---|
Network > Interfaces > Overview |
Network interface settings |
Network > Interfaces > Subnets |
IP Group (subnet) settings |
Network > IPs > Static IPs |
Static IP settings |
Network > IPs > Service IPs |
Service IP settings |
Network > Routing |
Route settings |
Settings > System settings |
Date/time, user interface and physical advanced settings |
Settings > License & Billing |
License keys |
Settings > Software updates |
Appliance software updates |
Settings > Backup & Restore |
Appliance backups |
Settings > Support download |
Create Technical support download |
| Make sure that the settings and actions listed above are configured / performed on each node. |
HA Node Communication
The nodes in a cluster communicate using PulseHA. For PulseHA to function correctly, all nodes must be able to reach each other as follows:
| Protocol / Port | Purpose |
|---|---|
ICMP (echo request / ping) |
Node reachability checks |
TCP 443 |
Inter-node API communication |
TCP 9083 |
PulseHA health check / heartbeat traffic |
| If a firewall is deployed between any of the nodes, ensure that the traffic listed above is permitted in both directions. |
Configuring HA
HA clustering is configured from the appliance that will become the active node. Adding a passive node replicates the active node’s configuration to it and erases the passive node’s existing configuration.
-
Deploy a second appliance and configure its network settings as described in Network. The second appliance must be reachable from the first over the network (see HA Node Communication).
-
On both appliances, apply any outstanding service changes. Add node is disabled while a service is still waiting to be updated or restarted; hovering over the disabled button explains why: "Some services need restarting before you can add a node. Make sure the other node is up to date and the required services are running."
-
Using the WebUI on the appliance that is to be the active node, navigate to High availability.
-
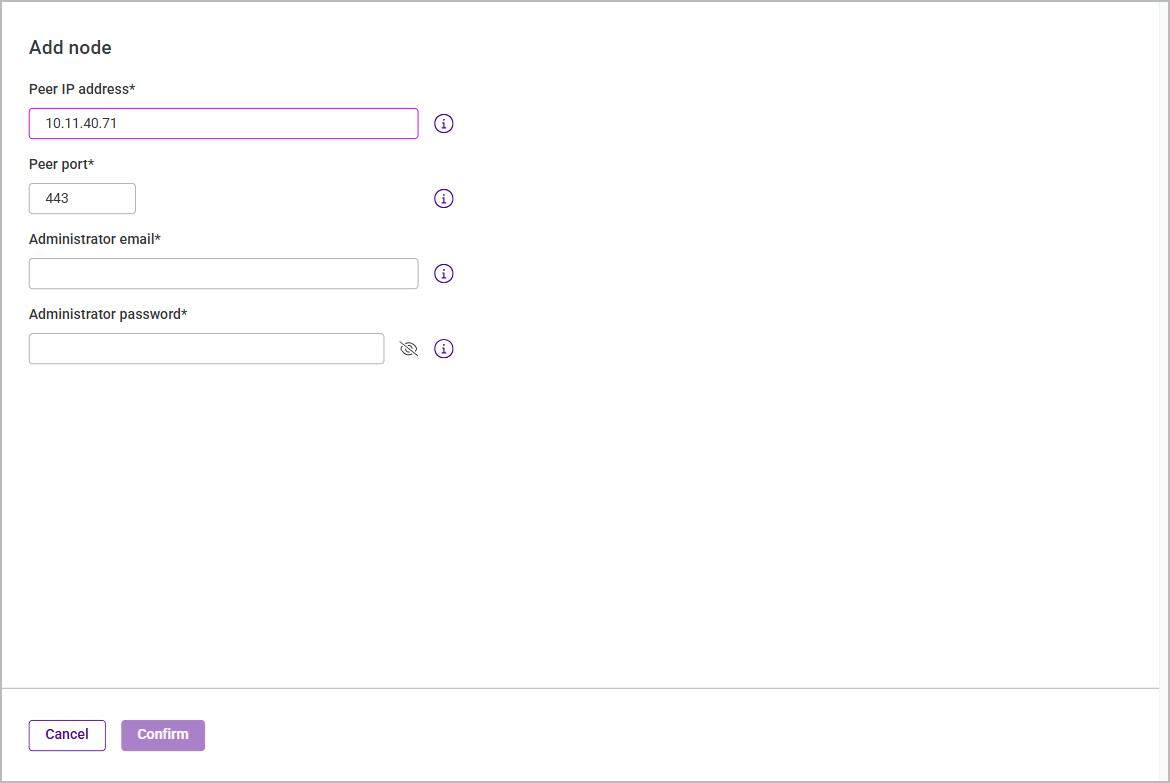
Click Add node.
-
Complete the Add Node form with the details of the peer — the appliance being added as a passive node:
Field Description Peer IP address
The IP address of the node being added to the cluster.
Peer port
The port that the peer’s WebUI/API is listening on (default 443).
Administrator email
The administrator username / email address of the peer.
Administrator password
The administrator password of the peer.
-
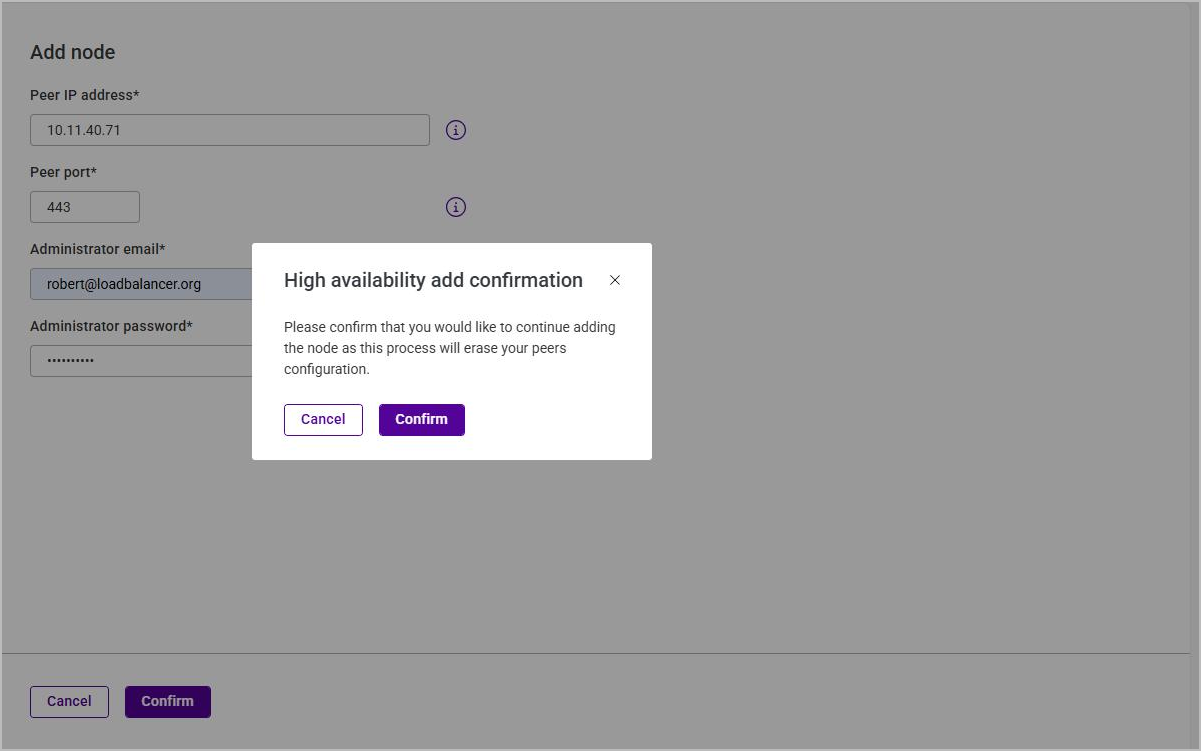
Click Confirm. A confirmation dialog is displayed, warning that the process will erase the peer’s configuration:
-
Click Confirm to start the clustering process.
The clustering process restarts services on both appliances and can take a short time to complete. During this time the WebUI may briefly become unavailable.
A cluster can contain up to three passive nodes in addition to the active node. To add further passive nodes, repeat the steps above on the active node for each additional appliance.
Viewing the HA Configuration and Status
Once clustering is complete, all nodes are listed on the High availability page, along with the current status of each node:
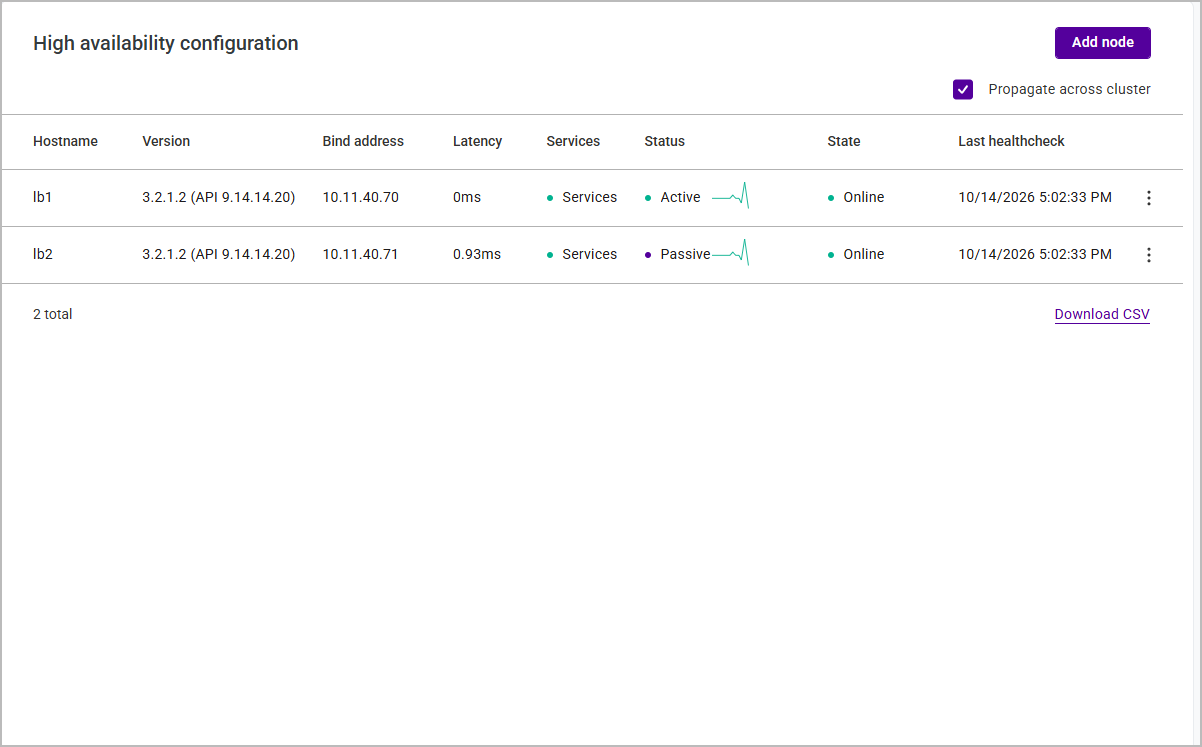
The table shows the following information for each node:
| Column | Description |
|---|---|
Hostname |
The hostname of the node. |
Version |
The software release the node is running, together with its API build, e.g. |
Bind address |
The IP address that PulseHA is bound to on the node. |
Latency |
The measured network latency to the peer node. The node you are logged in to reports |
Services |
The status of the load balanced services on the node, shown as a coloured indicator beside the word Services. It is an indicator only - it is not a link. |
Status |
The clustering role of the node — Active or Passive. A node may also report Standby while the cluster is degraded. A heartbeat trace is drawn to the right of the role within the same column, giving an at-a-glance view of the node’s recent health check activity. |
State |
The health state of the node — for example |
Last healthcheck |
The time of the last successful health check. |
The page also provides a Propagate across cluster checkbox, which applies an action taken from a node’s three-dots menu to every node in the cluster rather than just the selected one, and Download CSV to export the table.
When any node in the cluster has configuration changes waiting to be applied, a Reload/restart services button appears beside Add node. Clicking it applies the outstanding changes on every node at once and reports "Pending changes applied on every node". The button is hidden again once nothing is pending.
In the example above, lb1 is the active node and lb2 is the passive node. Each node also provides a three-dots menu, and the options it offers depend on the role of that node.
On the active node:
-
Re-sync config — replicates the active node’s configuration to the other nodes again. The action runs immediately, without a confirmation dialog, and reports "Cluster re-sync successful!" when it completes.
-
Take out of service — temporarily removes the node from the cluster’s rotation.
On a passive node:
-
Promote — make the selected node the active node. Selecting Promote on the passive node fails the cluster over so that it becomes active and the current active node becomes passive.
-
Remove — remove the selected node from the cluster, returning it to a standalone configuration. A confirmation dialog names the node that will be removed and warns that a removed node is reset to DHCP. On a network without DHCP, tick Set a static IP so this node stays reachable and complete the form that appears, so that the node can still be reached once it has left the cluster:
Field Description Interface
The interface the address is applied to. Only physical Ethernet interfaces are listed, because the reset removes bonds and VLANs.
Address
The address to give the node. Separate IPv4 and IPv6 sections are provided.
Prefix length
The prefix length of that address, e.g.
24.Gateway (optional)
The default gateway for the node.
DNS server (optional)
The DNS server for the node.
If the static IP cannot be applied, the interface stays on DHCP. -
Take out of service — temporarily removes the node from the cluster’s rotation.
| These menu options only appear once the appliance has a peer. On a standalone appliance the menu is present but empty. |
| The cluster role of the appliance you are logged in to is also shown among the icons at the right of the top bar on every page - Active, Passive, or Not in a cluster on a standalone appliance. Clicking it returns you to this page. |